
The stencil sat on the skin at the edge of the jaw, the client steadying their breath while the artist checked symmetry under the studio light. For side neck tattoos the small shifts in placement change how the piece reads when you turn your head, and how it weathers with sun and shirts. Below are tried-and-true traditional designs that work on that thin skin, with what to ask for in consults and how they age so you pick something you still like in five years.
1. Classic Traditional Rose on the Side Neck

There is a reason the rose shows up in old-school flash for the side neck. Bold linework and heavy saturation resist early fading better than very fine detail on this spot. Expect the session to be short, usually under an hour, but fair warning, the neck is sensitive and will sting more than an arm placement. Tell your artist you want open negative space around the petals so the piece can breathe as it settles. A common mistake is cramming tiny filler around the bloom which merges by year three. For showing it off, a thin chain pendant necklace sits just above the design without competing.
2. Swallow Silhouette Along the Jawline

This lean traditional swallow reads clearly with bold outlines and minimal shading. I recommend asking for a slightly thicker outline than you think you need so the shape stays crisp as the skin moves. Pain is moderate. Session time runs 30 to 60 minutes. The main error is tiny wings and delicate tails that soften into a blur. Over the first two years expect some softening but the silhouette will keep its identity. For session day wear, pull on a loose button-down shirt so your collar can be moved without rubbing the fresh ink.
3. Nautical Anchor with Dot Shading
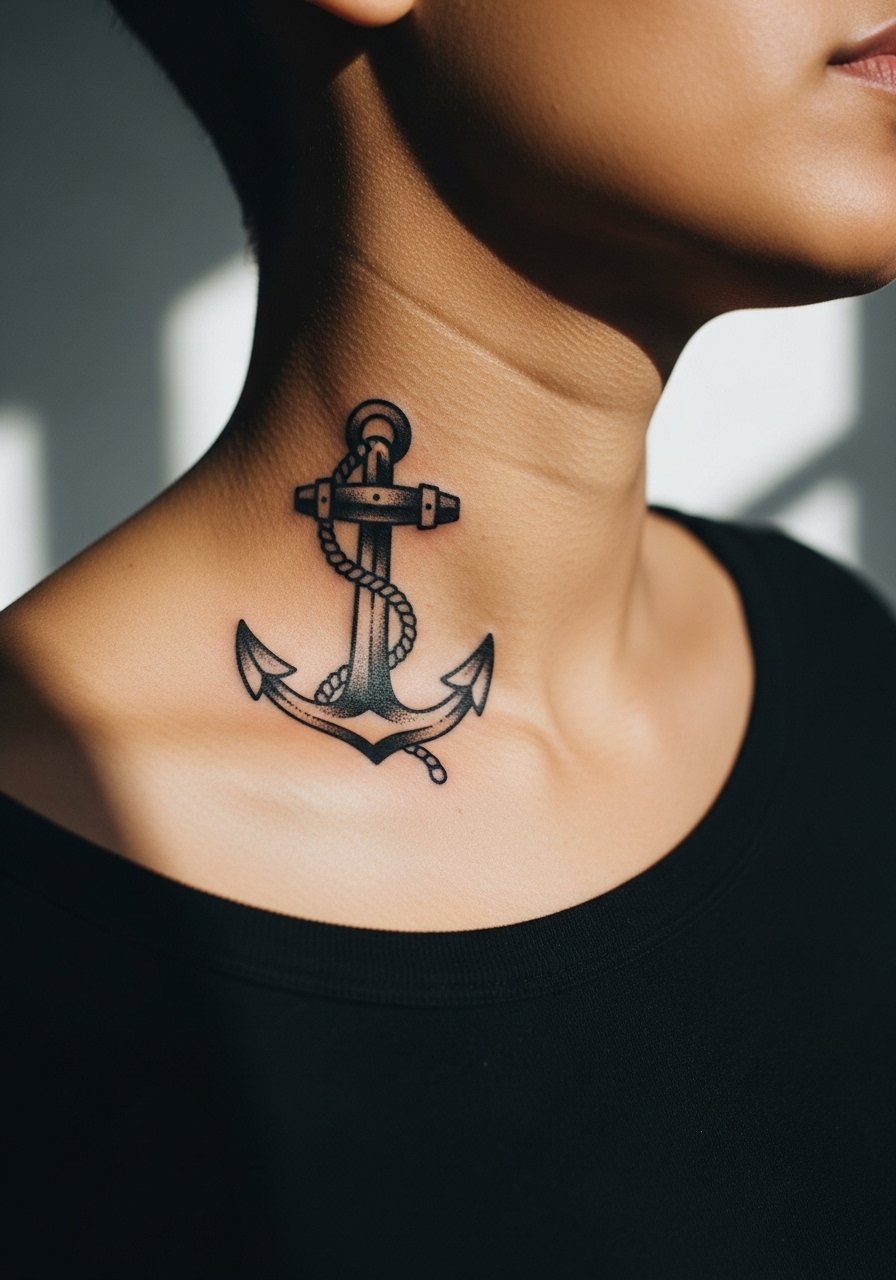
The anchor is a classic that benefits from stipple shading rather than heavy gradation on the neck. Ask for dot work in the fill rather than solid gray to avoid a flat block that can look muddy later. This placement hurts more than the forearm because the needle sits over thin tissue. A typical session is 45 minutes. The mistake is over-saturating the fill so it puckers during healing. Expect touch-up potential at year three if you want the dots dark again. Pair this with an open-collar shirt and a thin chain pendant necklace for a balanced look.
4. Small Traditional Dagger with Banner
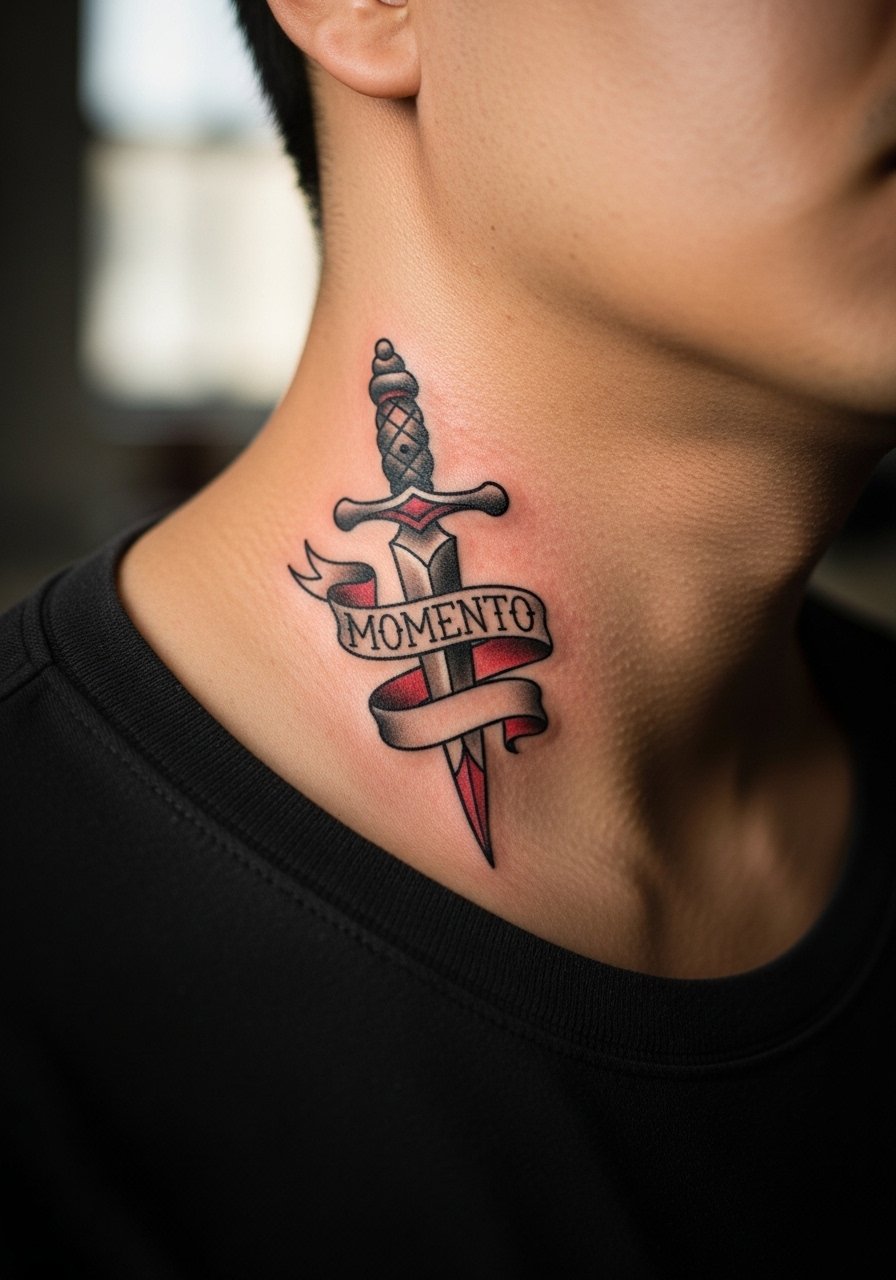
A dagger with a banner reads bold and graphic on the side neck when the banner is kept short and the type is simple. In consultation, bring the exact short word or date you want because lettering needs space to avoid blurring. Expect 45 to 75 minutes depending on banner detail. The most common mistake is asking for script too thin, which merges by year two. For show-off outfits, a wide-neck blouse frames the neck without covering the design.
5. Classic Star Cluster with Saturated Black
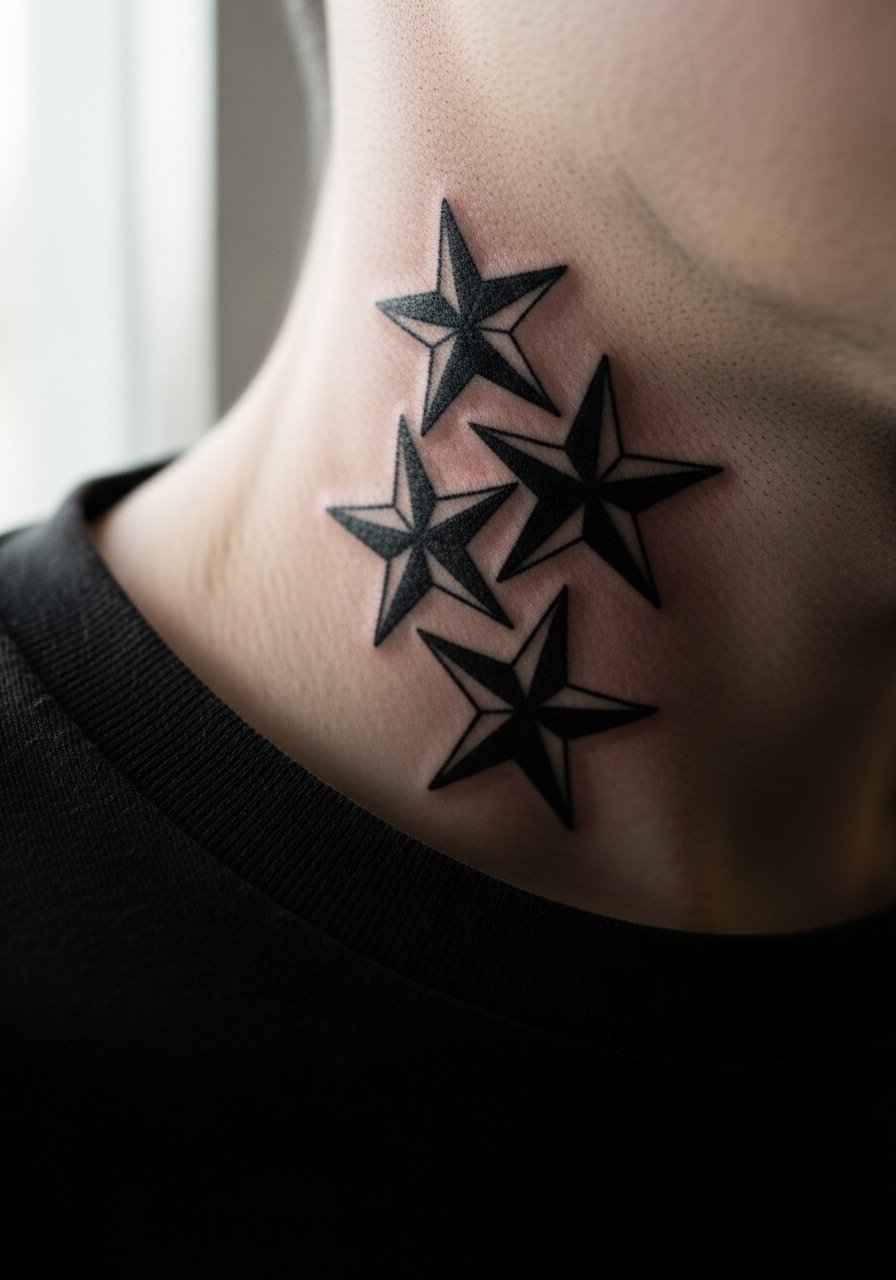
Small stars work well because the bold black holds. Tell your artist you want confident outlines and a touch of saturation rather than tiny decorative flourishes. Pain is moderate and sessions are short. The common error is lots of micro-dots around each star which can blur into a patch. Over time the stars will soften but remain visible because of their dark outlines. For the appointment wear a loose crew-neck tee so the collar does not press on the area immediately after.
6. Traditional Snake Coiling Under the Ear

A snake that follows the curve under the ear looks dynamic and uses the neck's vertical canvas well. Pain spikes near the jaw and behind the ear, so expect sharp moments even in a short session. Ask for thicker outlines around the head and thinner internal lines so the form reads at a distance. One controversy here is fine line versus bold work on the neck. Some artists insist fine line will blur quickly on this spot. Others say proper depth and spacing can let it settle. Ask your artist where they land before booking. For showing it off, a wide-neck shirt pulled slightly aside keeps the area visible without exposing too much.
Studio Day Picks
Those side-neck pieces above can be sensitive to friction and washing during the first week, so a few studio-day items make sessions easier and the first days cleaner.
-
Stencil transfer paper kit. Lets you preview placement on the neck so small shifts are visible before the needle touches skin.
-
Topical numbing cream. Applied about 45 minutes before can ease the sharp spots near the jaw without dulling linework.
-
Thin protective film roll. Keeps the neck tattoo clean from clothing friction during the first day when movement can be annoying.
-
Fragrance-free gentle body wash. Cleanses the area without stripping saturation in the first two weeks of healing.
-
Aquaphor healing ointment. A thin layer in the first days keeps the neck from drying out while still allowing the skin to breathe.
7. Traditional Anchor and Rope Looping Behind the Ear
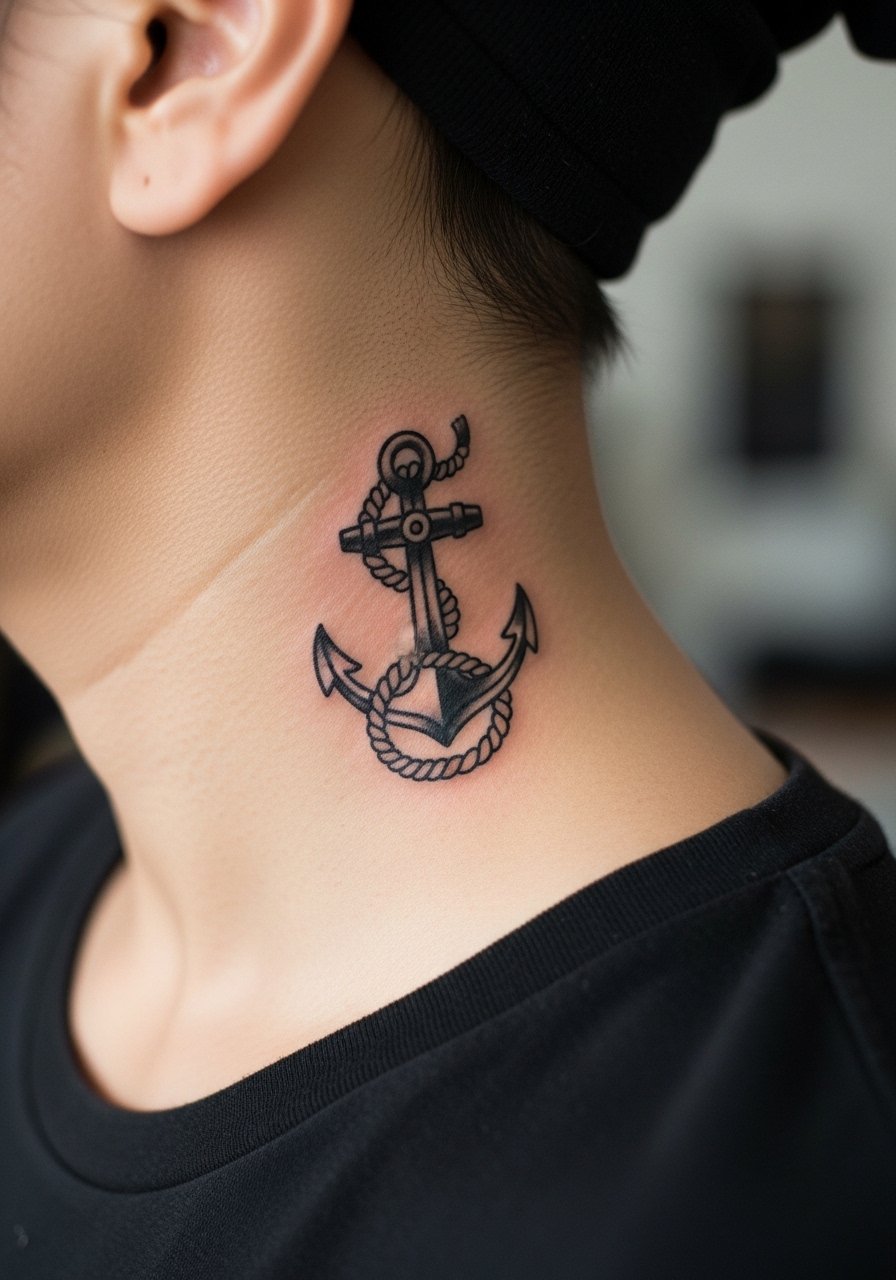
This compressed anchor composition uses rope lines to follow the neck curve. For consults, explain you want the rope to read separate from the anchor with small gaps between turns. The area behind the ear has thin skin so the session feels sharper. A session usually takes 40 to 60 minutes. A common mistake is putting too much tiny shading inside the anchor which can fill in as it heals. For showing it off, pin your hair up and wear a racerback tank so the neck line is open and visible.
8. Bold Traditional Script Name Along the Neck

Lettering on the neck needs space and confident strokes. Tell your artist the exact word and the font weight you want because thin script blurs here. Sessions vary from 30 minutes to an hour. The frequent mistake is decorative flourishes that merge when the skin moves. Over time you may want a touch-up at year two or three to keep edges crisp. For an outfit that frames the piece, a wide-neck blouse exposes the top of the neck without overexposing.
9. Traditional Anchor Rose Hybrid

Combining two traditional elements can fill the neck vertically while staying legible. Ask for a clear hierarchy in the design so the rose and anchor do not compete. Expect a moderate pain level and a session around an hour. The error I see most is packing too much small detail into the junction between elements. That area needs space or the forms will merge. For showing it off, a thin chain pendant necklace or a small collar that sits above the piece complements without crowding.
10. Traditional Heart with Flame
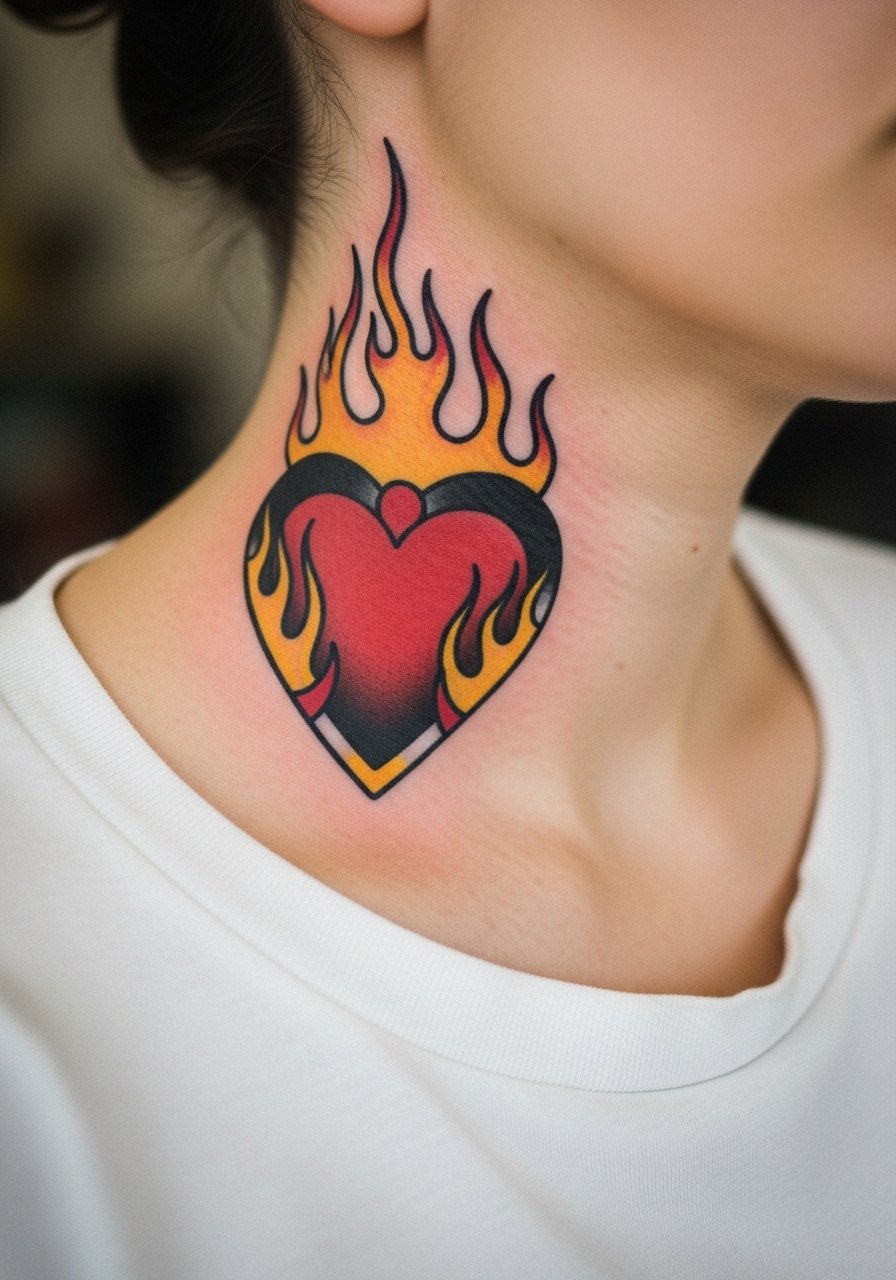
A flaming heart is compact and looks strong with solid saturation. Request thicker outlines around the flame and a slightly open interior so colors separate as they fade. Pain is moderate and the session is usually under an hour. Common mistakes include tiny rays around the flame which can blur into the skin texture. Over the first five years expect the reds to soften, but the black outline will keep the shape. Pair this with an open-collar shirt to let the top of the design show.
11. Traditional Nautical Star with Rays
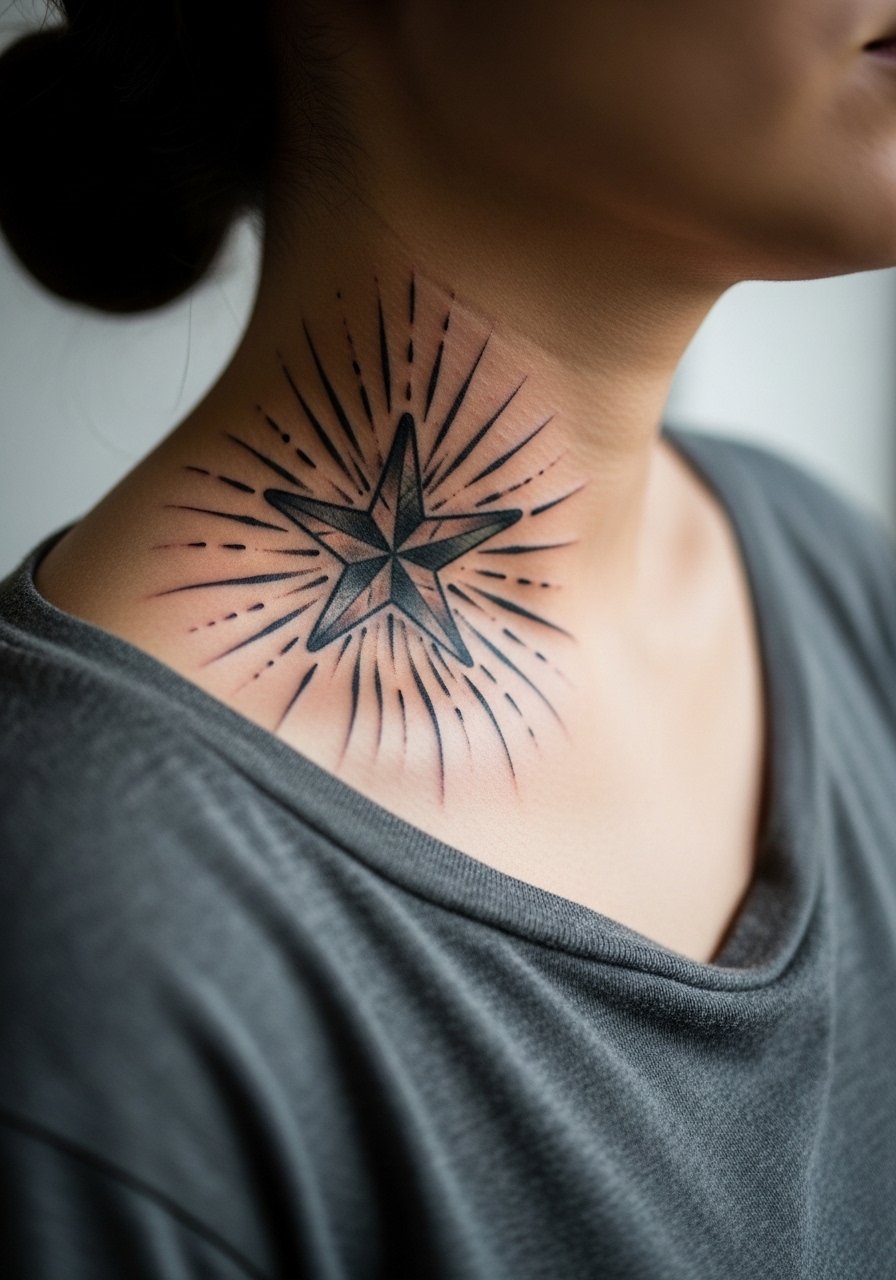
Nautical stars translate well because they are geometric and bold. Ask for crisp points and a touch of negative space as a buffer around each tip. Pain is similar to other side neck pieces. The usual mistake is tiny dot shading that fills inward. Over time the star will soften but remain readable. For a simple daytime show-off, a loose button-down shirt pulled open at the collar works well.
12. Traditional Compass Rose Near the Ear

Compass roses use radiating lines that need clear spacing to age well on the neck. I suggest keeping the inner points bold and skipping tiny inner decorations. The spot stings more because of proximity to bone. Sessions can be 60 minutes. A common mistake is too many thin points which bleed together within a couple of years. For showing it off, pin your hair back and wear a wide-neck shirt.
13. Traditional Ship Wheel with Rope
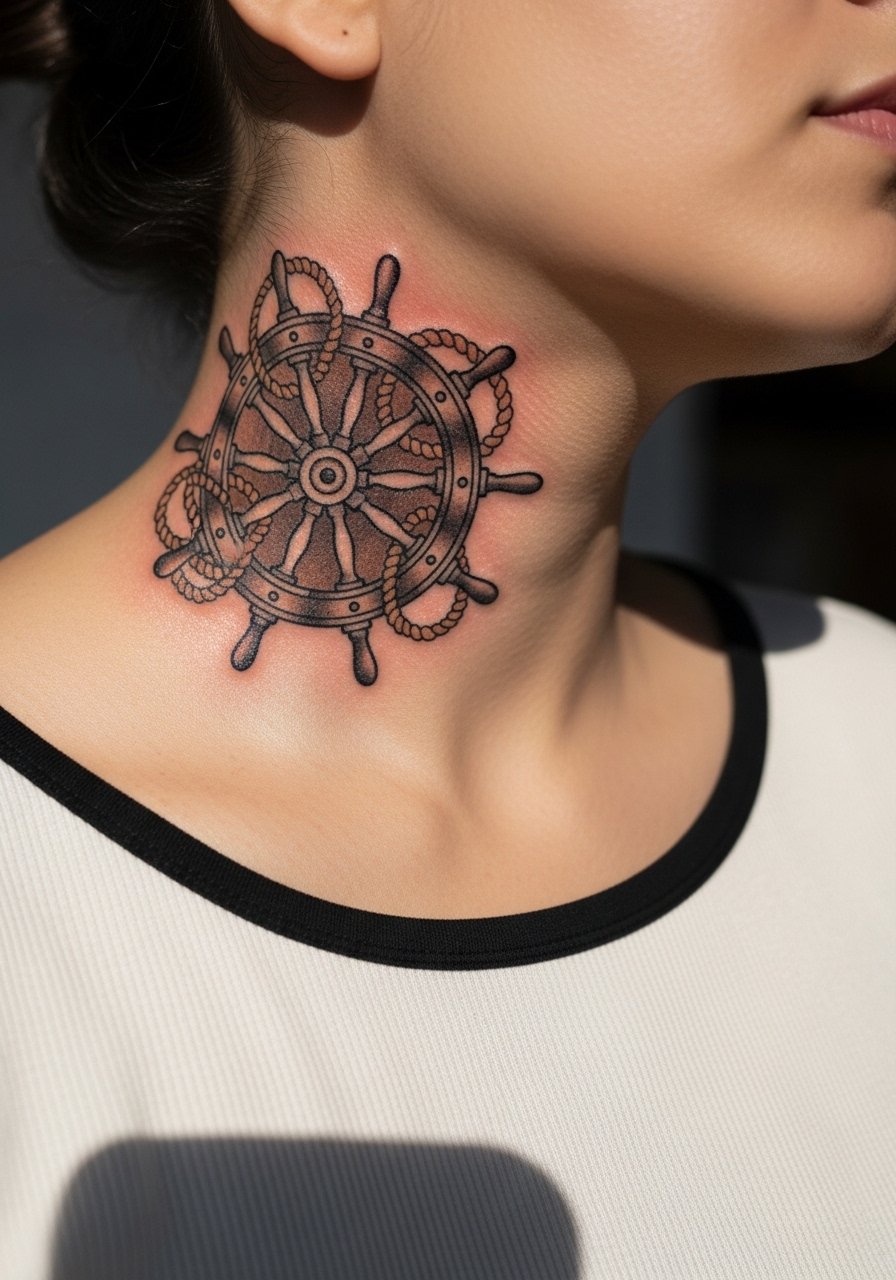
A ship wheel translates into a compact round composition that sits nicely on the side neck. Tell your artist to simplify spokes and use negative space to prevent a busy interior. Expect 45 to 75 minutes and a medium pain level. The error is overfilling the central hub with tiny shading which blurs. Aftercare and sun protection matter here because the circular silhouette can soften if exposed often. For an outfit that accents the shape, a thin chain pendant necklace or collared top left open works.
14. Traditional Bannered Heart with Initials

Initials inside a banner are classic and bold. Hand your artist the exact lettering and the size you prefer because small letters on neck skin do not hold like on the forearm. Session time is usually 45 minutes. The common mistake is thin lettering which fills in. Consider leaving letters slightly wider to avoid a touch-up later. For showing it off a wide-neck blouse keeps attention on the upper neck without overexposing.
15. Traditional Dagger Piercing a Rose Motif
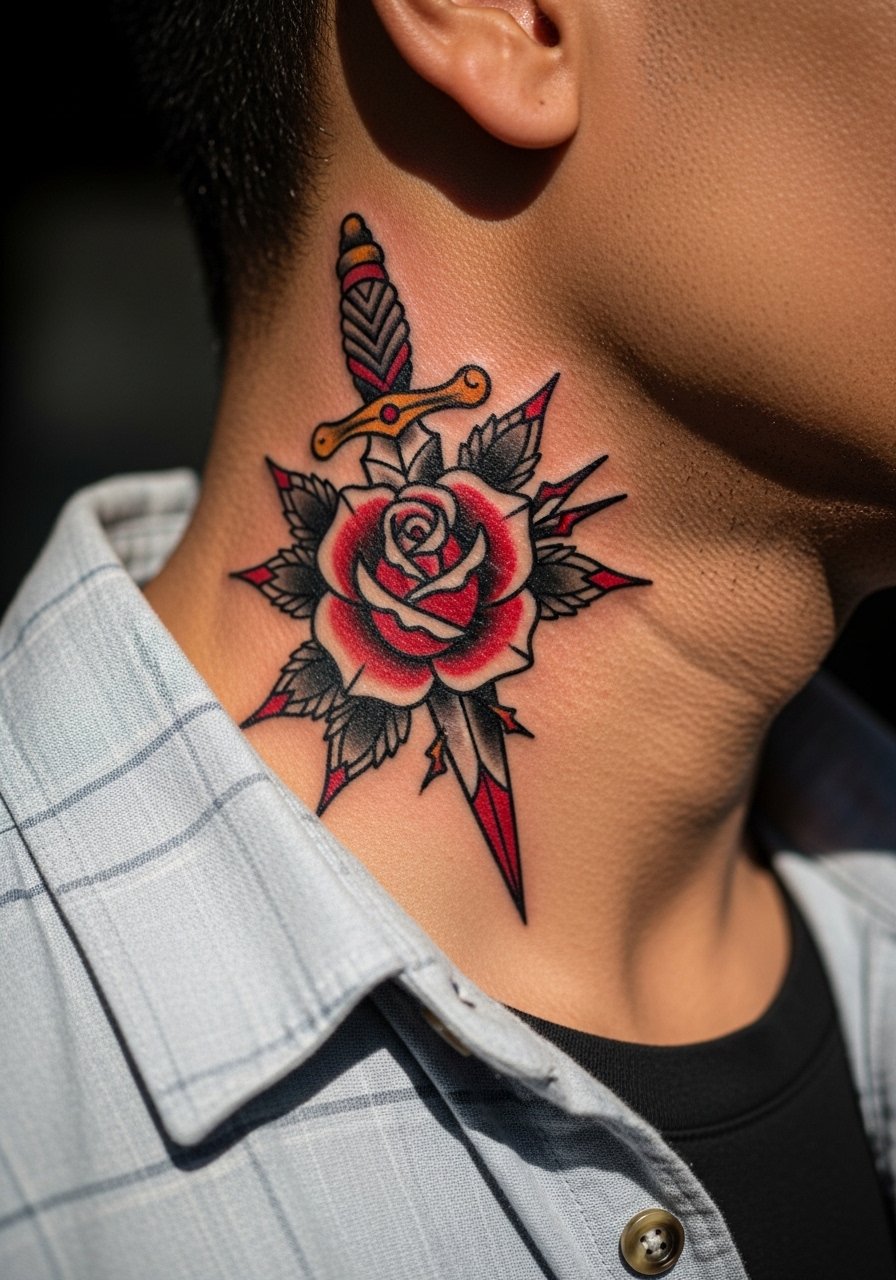
This composition uses vertical flow to suit the neck. Ask for clear separations between the dagger and the petals in the sketch. The session can be 60 to 90 minutes if you add color. A mistake I see is too many tiny highlights which dissipate during healing. Over time the black will remain dominant and color will need a touch-up sooner. Wear a loose button-down shirt to your appointment so the collar can be shifted without rubbing.
16. Traditional Rose and Lightning Bolt Mix

A lightning bolt adds energy and a modern twist while keeping the traditional palette. In consults ask for bold bolt edges and space where it crosses the rose. Neck sensitivity makes the bolt area feel sharp. Sessions are quick but may sting. The mistake is tiny serrations on the bolt that lose definition. Expect the bolt to remain readable because of hard edges. For outfits, a thin chain pendant necklace keeps the focus above the design.
17. Traditional Lion Head Portrait

A lion head uses bold linework and heavy saturation to hold up well on thin skin. Request simplified mane shapes and avoid tiny whisker detail. Expect a longer session, 60 to 120 minutes, and a higher pain level near the jaw. The common mistake is overworking small facial details which blur. After two to five years you may want a touch-up on the saturation. For showing it off, wear a wide-neck shirt that leaves the jawline visible.
18. Traditional Pin-Up Eye with Stars

A single eye motif is striking when kept bold and simple. Ask for open whites and strong lashes rather than tiny eyelid details. Expect moderate pain and a session under an hour. The main mistake is trying to include realistic iris detail which loses clarity. Over time the eye will soften but the silhouette will hold. For an outfit that highlights it, a racerback tank with hair up works well.
19. Traditional Swallow and Chain Link

Pairing a bird with a simple chain uses vertical composition to good effect. Tell your artist you want clean chain links and avoid tiny internal textures. Sessions are short and pain is moderate. The mistake is placing chain links too close together which can blur into a band. After healing the bird silhouette will read from a distance. For showing it off, pair with an open-back midi dress for evening events.
20. Traditional Anchor with Floral Filigree

Adding small filigree around an anchor frames the shape but needs restraint. Ask your artist to keep filigree airy and not dense. Pain is moderate and sessions range from 45 to 75 minutes. Common mistakes include packing the filigree too tightly which merges. As the piece ages, the anchor will stay clear and the filigree will fade first. For day-to-day outfits, an open collar shirt or a low necklace highlights the area.
21. Traditional Rose with Dagger Overlap

Overlapping elements must be designed so each form reads on its own. Ask for clear separation lines and avoid tiny internal textures. Expect moderate to higher pain near the jaw and a session around an hour. The mistake is cramming extra leaves into the overlap which fills in. After two to five years you may opt for a small touch-up on the color. For showing the piece, a thin chain pendant necklace keeps the neckline clean and complementary.
22. Traditional Ship Silhouette with Wave Accent
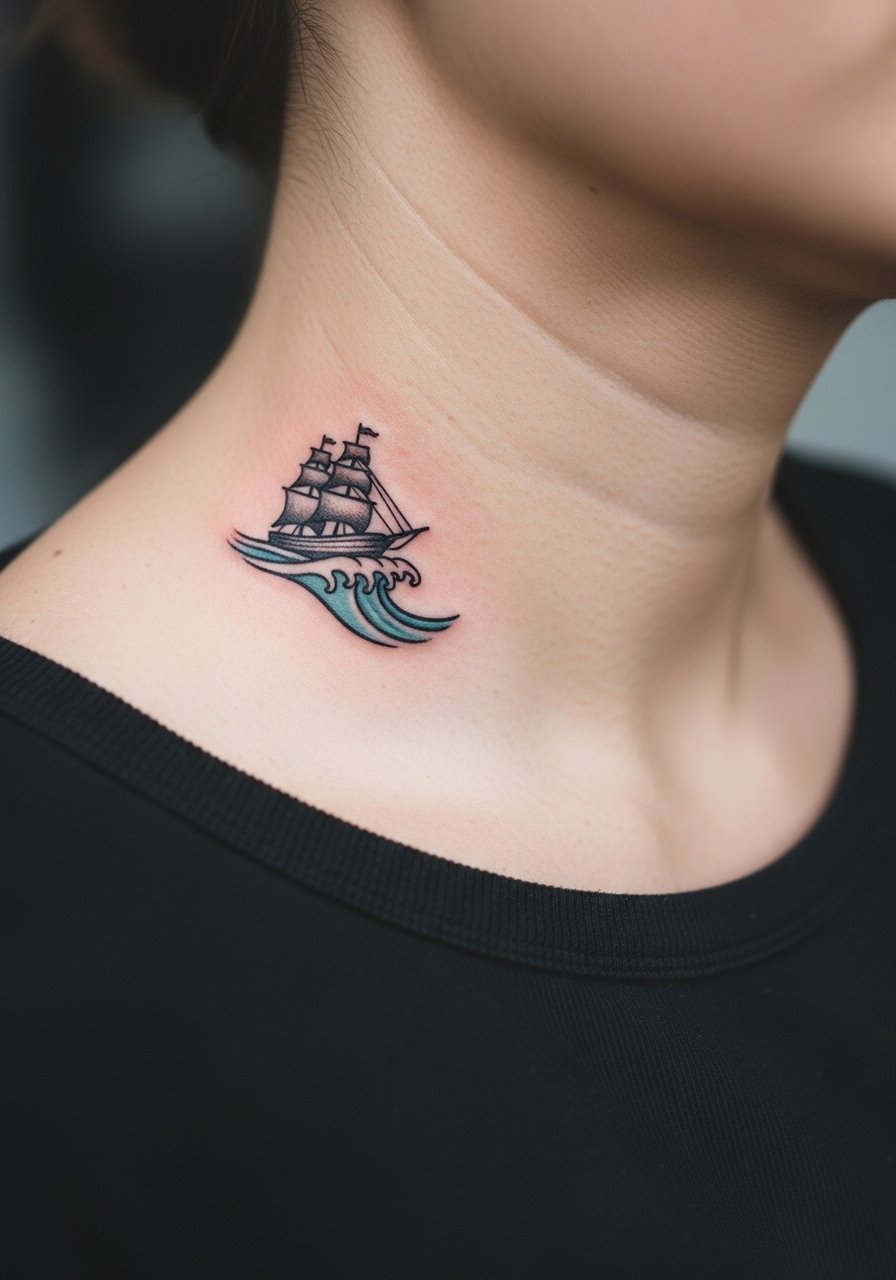
A small ship silhouette benefits from strong outer lines and minimal internal shading. Ask for simplified sails and a short wave line to avoid busy detail. Pain is moderate and sessions are short. The usual mistake is adding tiny crosshatching which softens. Expect the silhouette to hold because of the heavy outline. For an outfit that frames it, wear a loose crew-neck tee.
23. Traditional Swallow with Floral Trail
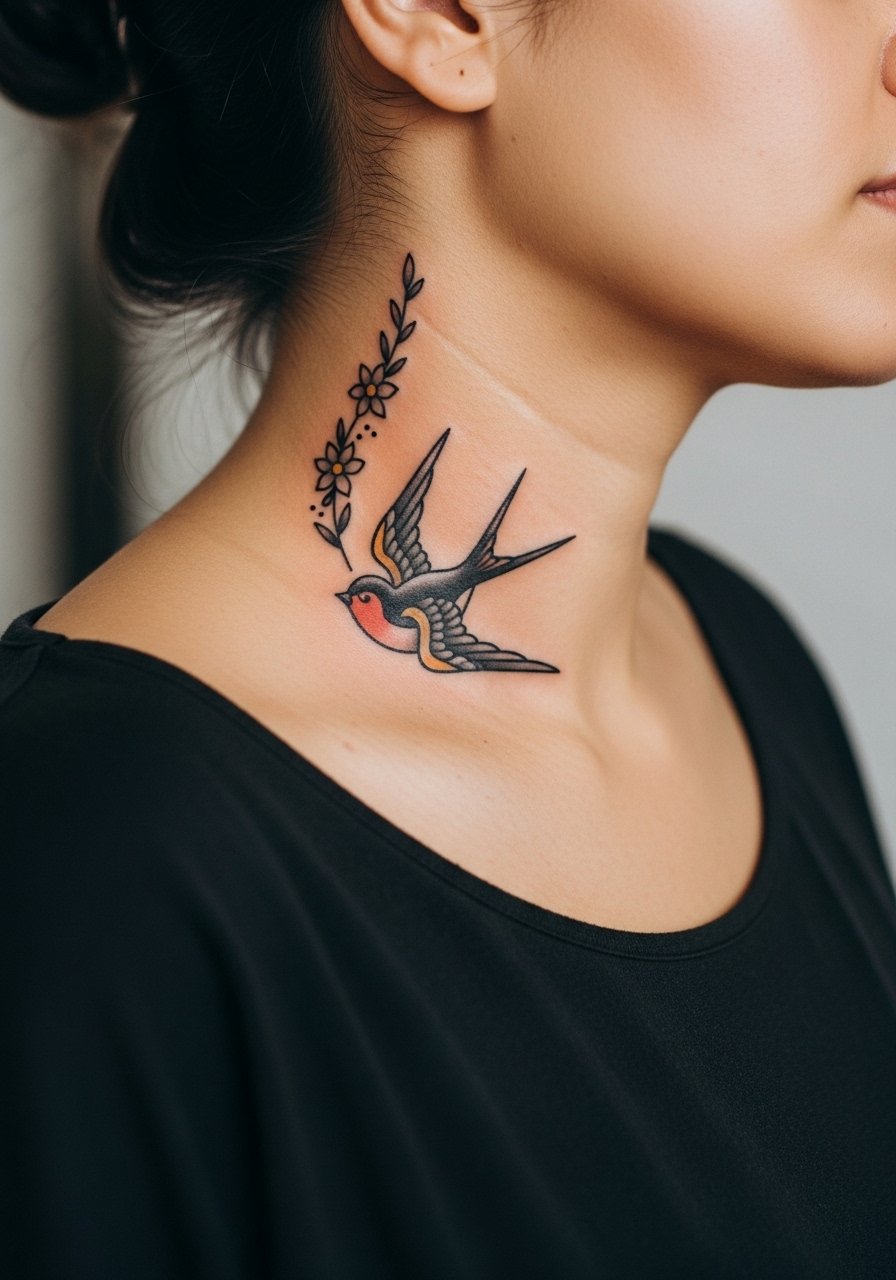
A floral trail leading from a swallow takes advantage of vertical movement. Tell your artist you want spacing between flowers so the trail breathes. Sessions are moderate in length and hurt more near the jaw. A mistake is filling the trail with too many tiny petals. Over time the flowers will soften faster than the bird silhouette. For show-off wear, a open-back midi dress or a shirt with a low back keeps the neck line visible.
24. Traditional Script Quote Band

Text on the neck needs decisive stroke width. Give the exact phrase and test a stencil for size because small scripts on neck skin can blur. Pain is moderate. The biggest mistake is choosing ornate type that cannot hold up. Plan for a touch-up at around year three if you want sharp edges long term. For styling, an open-collar shirt shows the wording without competing.
25. Traditional Rose with Banner and Date

Dates inside a banner need clear numerals. Provide the exact format because cramped numerals can blur. Sessions run 45 minutes. The usual error is thin numerals that fill in. Expect to check the digits at six months and again at a year for a minor touch-up. For an outfit that complements it, a thin chain pendant necklace sits above the banner without crowding.
26. Traditional Starburst with Dotted Accents

Starbursts with dots use negative space effectively on the neck. Ask for dots spaced deliberately so they do not merge. The placement feels sharp but sessions are usually short. The mistake is placing dots too densely which turns them into a gray patch. Over time dots fade faster than the outline. For showing it off, a loose button-down shirt left open frames the jawline.
27. Traditional Lion Paw with Small Stars

A lion paw is compact and symbols read strong with bold outlines. Request clear separation between paw pads and surrounding stars so each element has breathing room. The session is moderate and pain is similar to other neck pieces. A common mistake is adding tiny fur texture which softens. Expect to check saturation after a year and plan a touch-up if you want the pads dark. For outfits, a thin chain pendant necklace complements the area without competing.
Frequently Asked Questions
Q: Will traditional linework on the side neck blur faster than on my arm?
A: The neck is thinner and moves more than an arm, so fine linework is at higher risk of softening. Bold traditional outlines and deliberate spacing tend to age better. Ask for slightly heavier linework in consults and budget for a touch-up in a few years.
Q: Are visible side neck tattoos still an issue for jobs and interviews?
A: Some workplaces remain conservative while others are relaxed. From what I've seen, customer-facing roles can be stricter. If this matters, place your design slightly lower or choose a small piece you can cover with a collar during interviews.
Q: How much does sun exposure affect side neck traditional pieces?
A: UV exposure fades saturation and softens edges faster than almost anything else. The neck is often exposed, so hats and high-SPF sunscreen when healed make a big difference in longevity.
Q: Do touch-ups on neck tattoos take longer or cost more?
A: Touch-ups usually run shorter than initial sessions because the stencil exists and the artist is refreshing lines. Cost varies by studio. Expect a simple outline refresh to be quicker than recoloring.
Q: What should I wear to the session for a side neck tattoo?
A: Wear a wide-neck shirt or a button-down you can shift so the artist has clean access. Loose collars let the area breathe after the session and reduce rubbing while healing.
