
Fine line watercolor tiger tattoos have surged on feeds, but what looks arresting on screen can blur into a soft smudge if placement and saturation are treated like an afterthought. Longevity here depends more on where you put the piece and how the color is balanced than on how detailed the reference photo is. These 27 takes mix showy color with practical tips so you get an image that still reads well years from now.
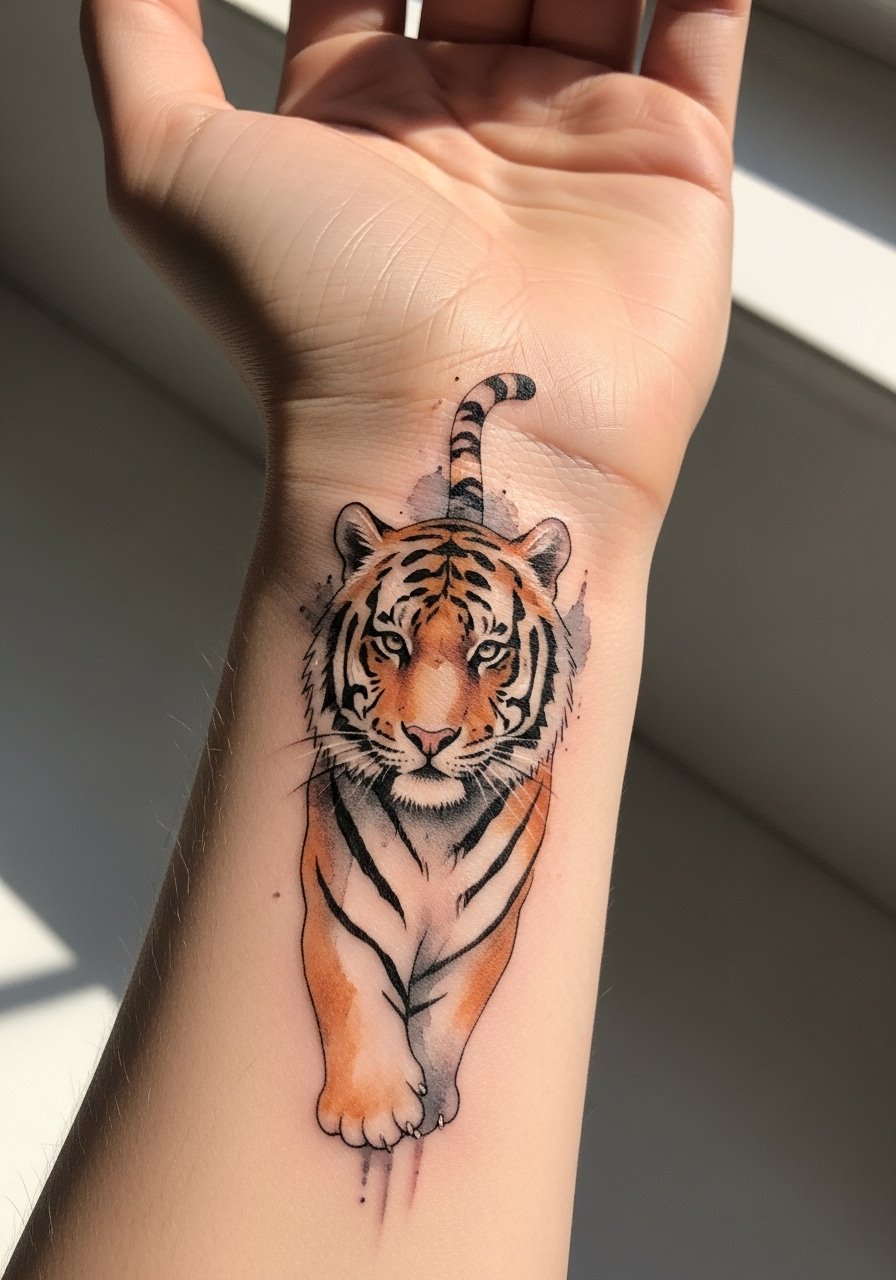
1. Small Watercolor Tiger on Inner Forearm

This compact inner forearm piece reads like a living charm. I recommend slightly bolder outlines than a true fine-line piece so the stripes keep their shape as the color fades. Tell your artist you want saturated base color under the watercolor washes and ask them to leave breathing room between stripes and splashes. Pain is mild to moderate and a single session usually covers this size. Expect crispness at six months, softer edges at two years, and a possible touch-up by year three if you want the color vivid. For showing it off, roll up the sleeve of a loose linen button-down so the arm reads like an intentional detail.
2. Tiny Watercolor Tiger on the Ankle
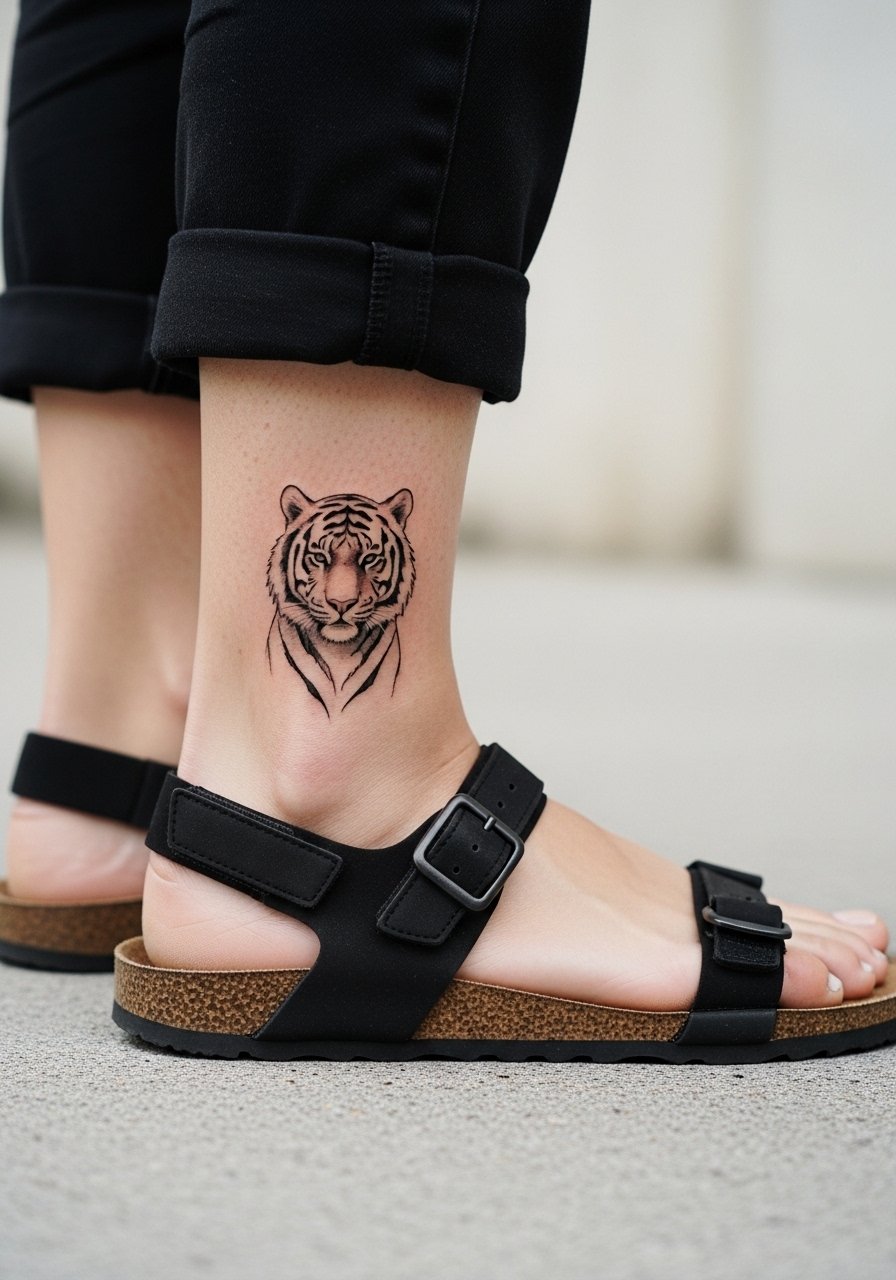
Ankle tattoos suffer friction from shoes and socks, so this tiny tiger benefits from simplified color fields and no micro-detail in the stripes. Pain sits around a five out of ten. Session time is short, often under an hour. A common mistake is requesting ultra-fine detail that the ankle will not hold. For the appointment, wear slip-on shoes and rolled linen pants so the artist can access the area without tugging. Expect the first-year color loss where the ankle rubs against footwear. Plan for a touch-up if you want the colors restored later.
3. Roaring Ribcage Watercolor Tiger
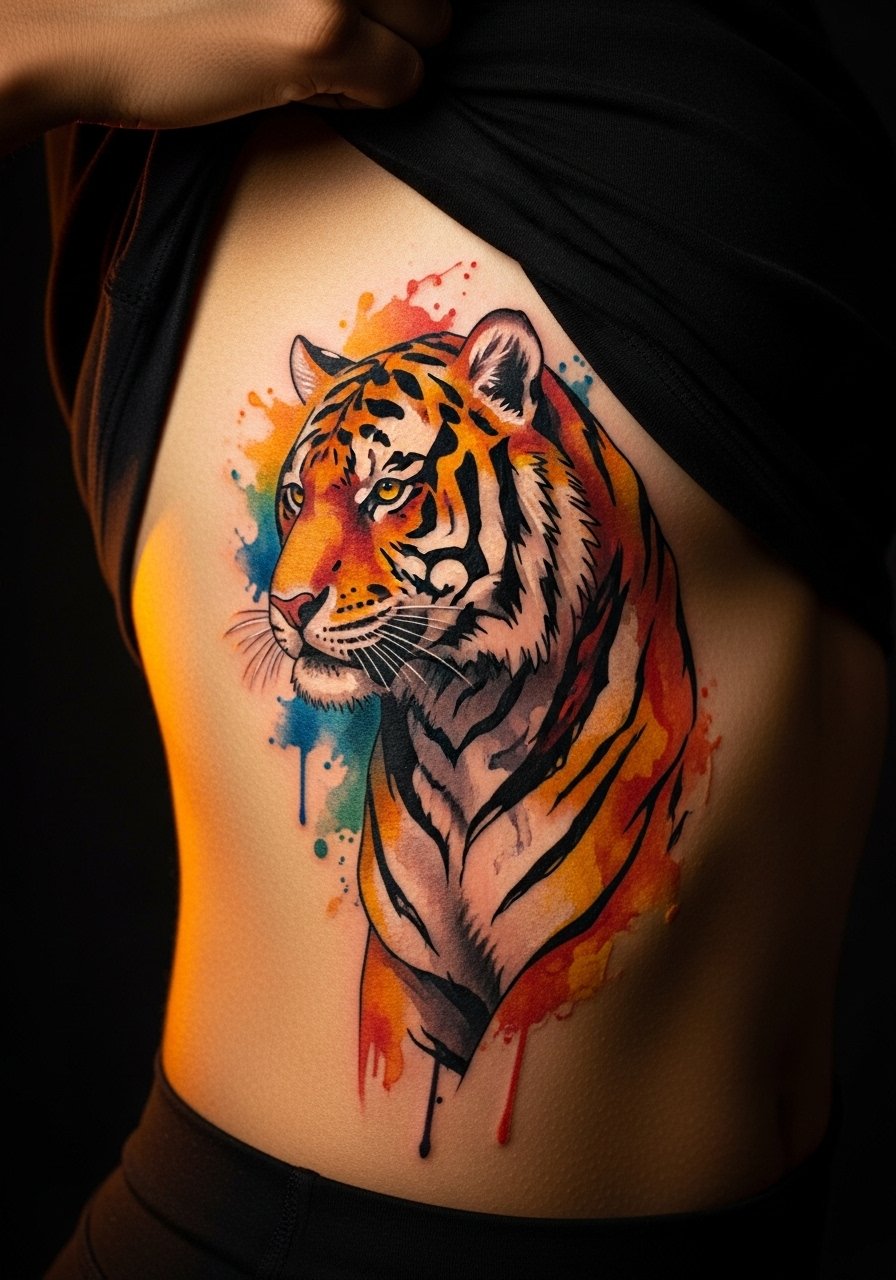
Fair warning: the ribcage is a high-pain zone. That does not mean avoid it, but plan for breaks and staggered sessions. Artists are split on fine line here. One camp says the constant skin stretch blurs lines within two years. The other camp insists that proper spacing and depth keep details readable. I tell clients to favor slightly stronger linework and less micro detail for ribs. Sessions can run long depending on size. The visual payoff is dramatic because the torso gives room for color gradients that flow with breath. For the studio, wear a cropped athletic top you can lift, and bring layers for after the session.
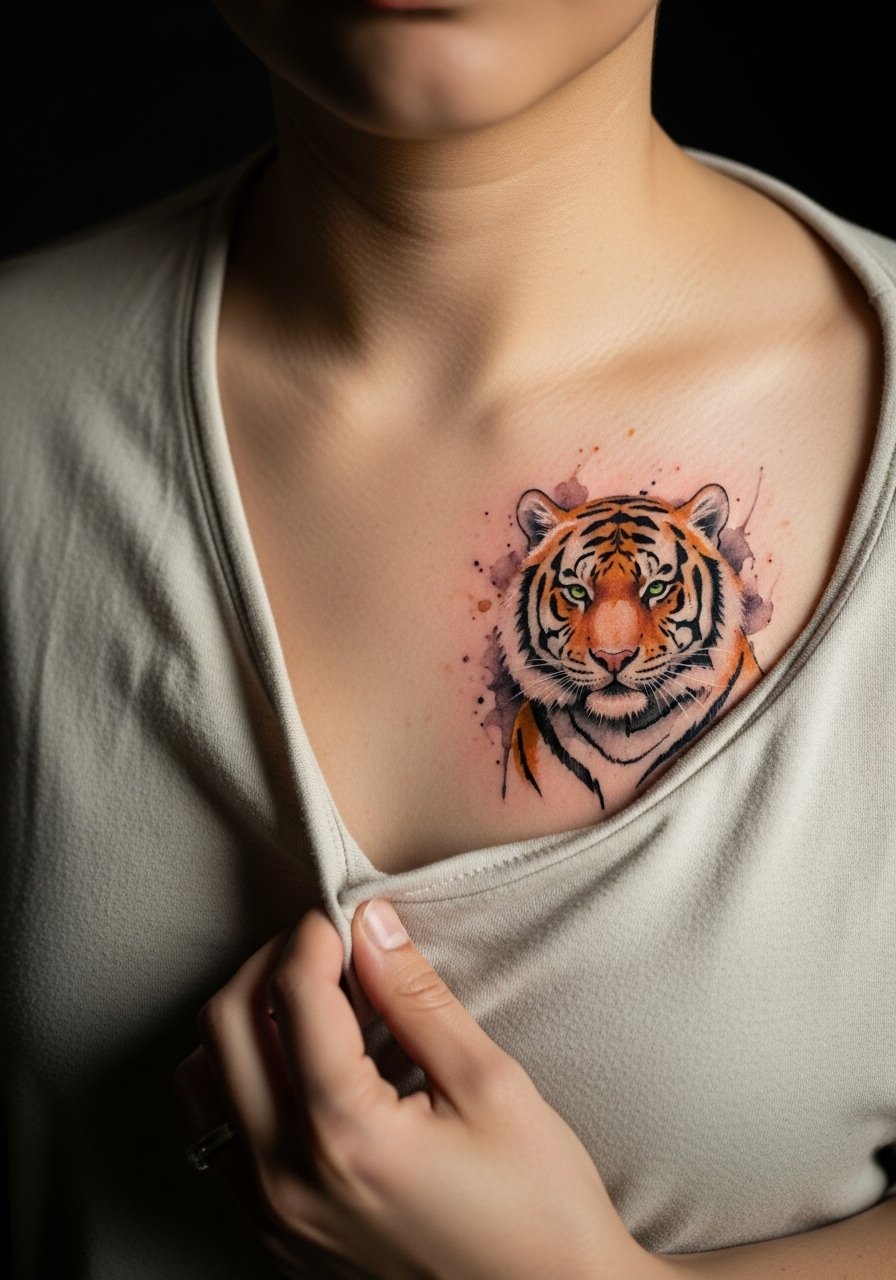
4. Sternum Watercolor Tiger with Subtle Linework
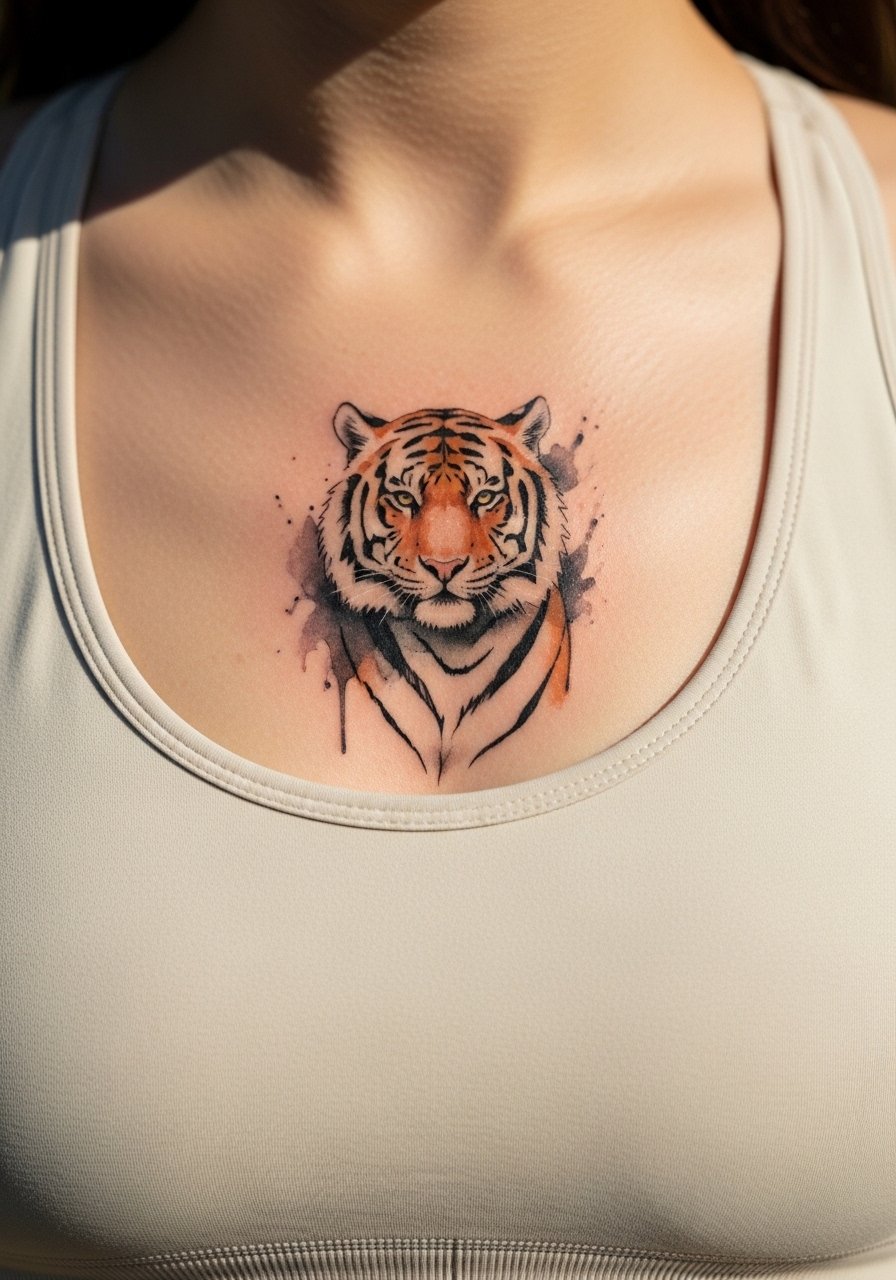
Sternum pieces show beautifully under low-cut tops that remain modest. The skin here can be thin and reactive, so the right move is moderate saturation rather than heavy packing. That keeps the watercolor washes soft without looking patchy as they heal. Expect a medium to high pain level because the area sits over bone. A typical session is one to two hours. The most common error is overworking the white space, which ages into uneven patches. For showing it off, pair with an open-back dress or a bandeau for photos.
5. Collarbone Tiger Splash
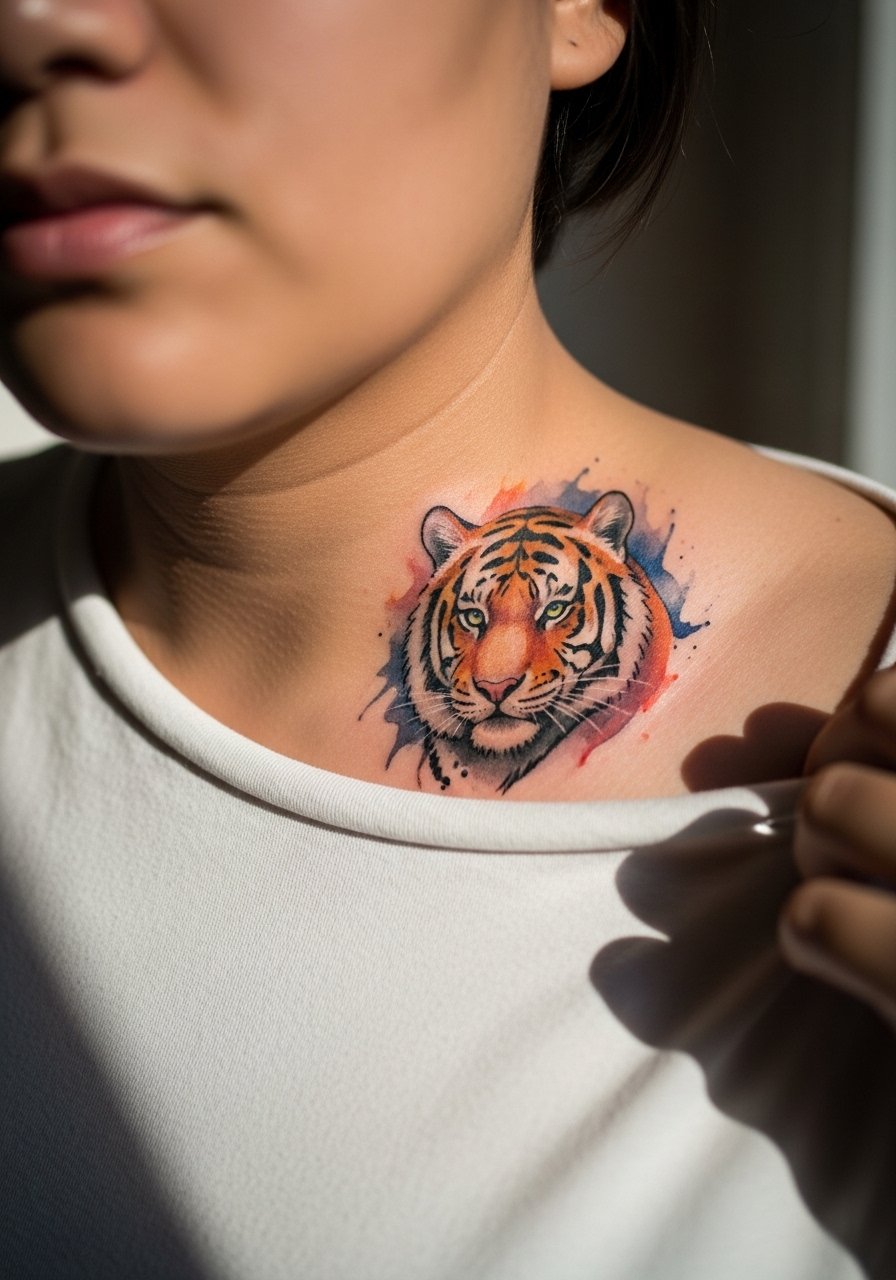
Collarbone tattoos read as jewelry when placed carefully. The biggest mistake is placing too much dense color against the bone. I advise soft washes that follow the collarbone curve and modest linework to define the tiger's eye and whisker area. Pain is variable and usually a six for most people. This placement is great for a single session. For outfits, a wide-neck sweater or a boat-neck tee shows the design without revealing too much skin. Expect color softening around two years and plan a touch-up if you want to keep contrast strong.
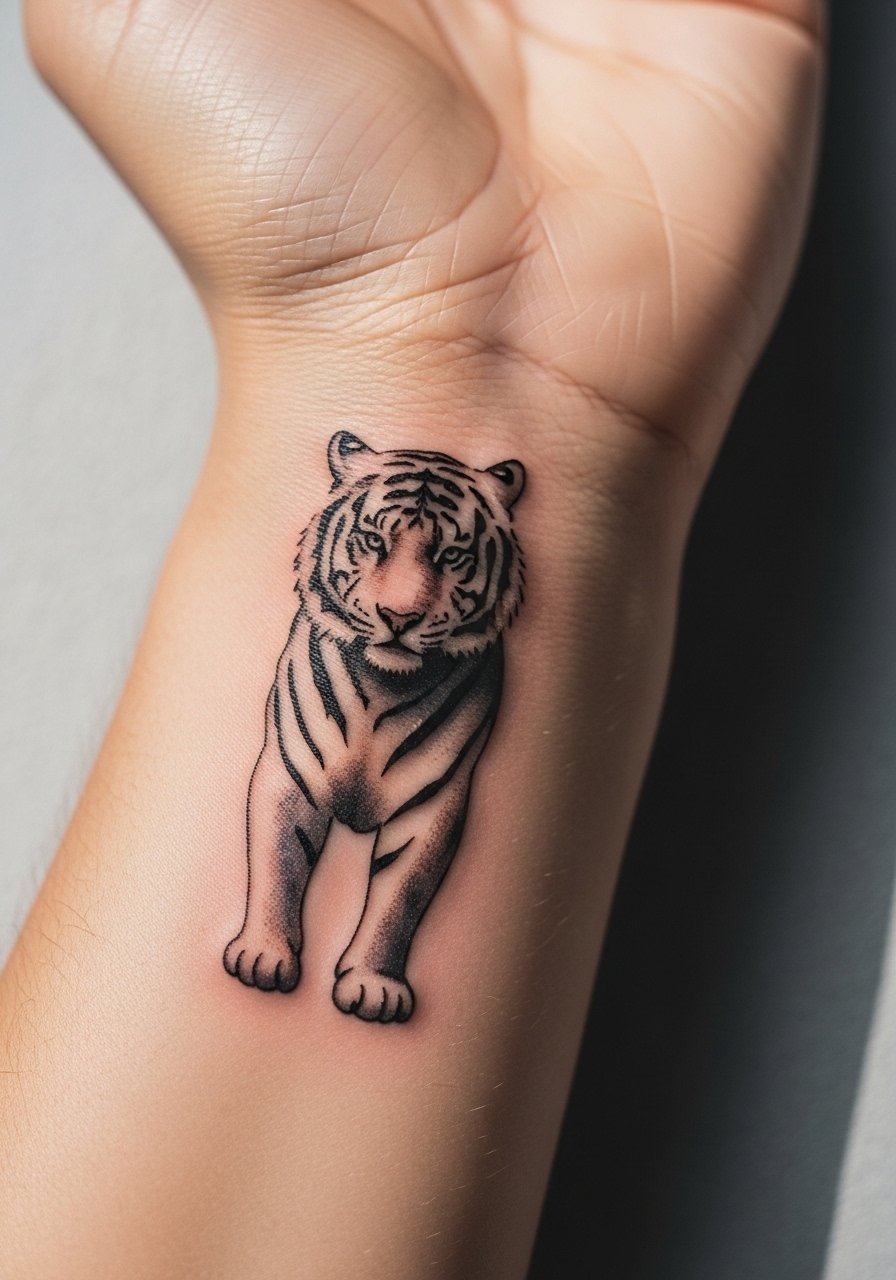
6. Watercolor Tiger Wrist Band
Wrist pieces age fast because of constant washing and sun exposure. For a wrap-style tiger, ask the artist for waterproof-friendly saturation and a small margin of negative space between stripes and color wash. Pain is low to moderate but the skin is thin so sessions are precise. The common mistake is demanding ultra-fine brush strokes that dissolve after a year. For the session and to show it off, wear a minimalist watch band or stack with thin bracelets, but avoid constant rubbing during healing. Expect touch-ups sooner than for larger pieces.
Studio Day Picks
The first six pieces above include exposed arm, wrist, chest, and rib placements. A few targeted items make those session days and the first week of healing much smoother.
- Stencil transfer paper kit. Lets you preview placement and lineweight on skin before the needle starts, which matters for small forearm and wrist pieces.
- Topical numbing cream. Applied per instructions it eases rib and sternum sensitivity so you can sit for longer without tensing up.
- Thin protective film roll. Ideal for wrist and ankle work that faces constant friction from clothing and shoes during the first days.
- Fragrance-free gentle body wash. Cleanses healing areas without stripping the watercolor pigments and helps avoid irritation on exposed arm work.
- Aquaphor healing ointment. Thin layers protect small fine-line and watercolor areas in the first 48 to 72 hours.
7. Thigh Panel Watercolor Tiger
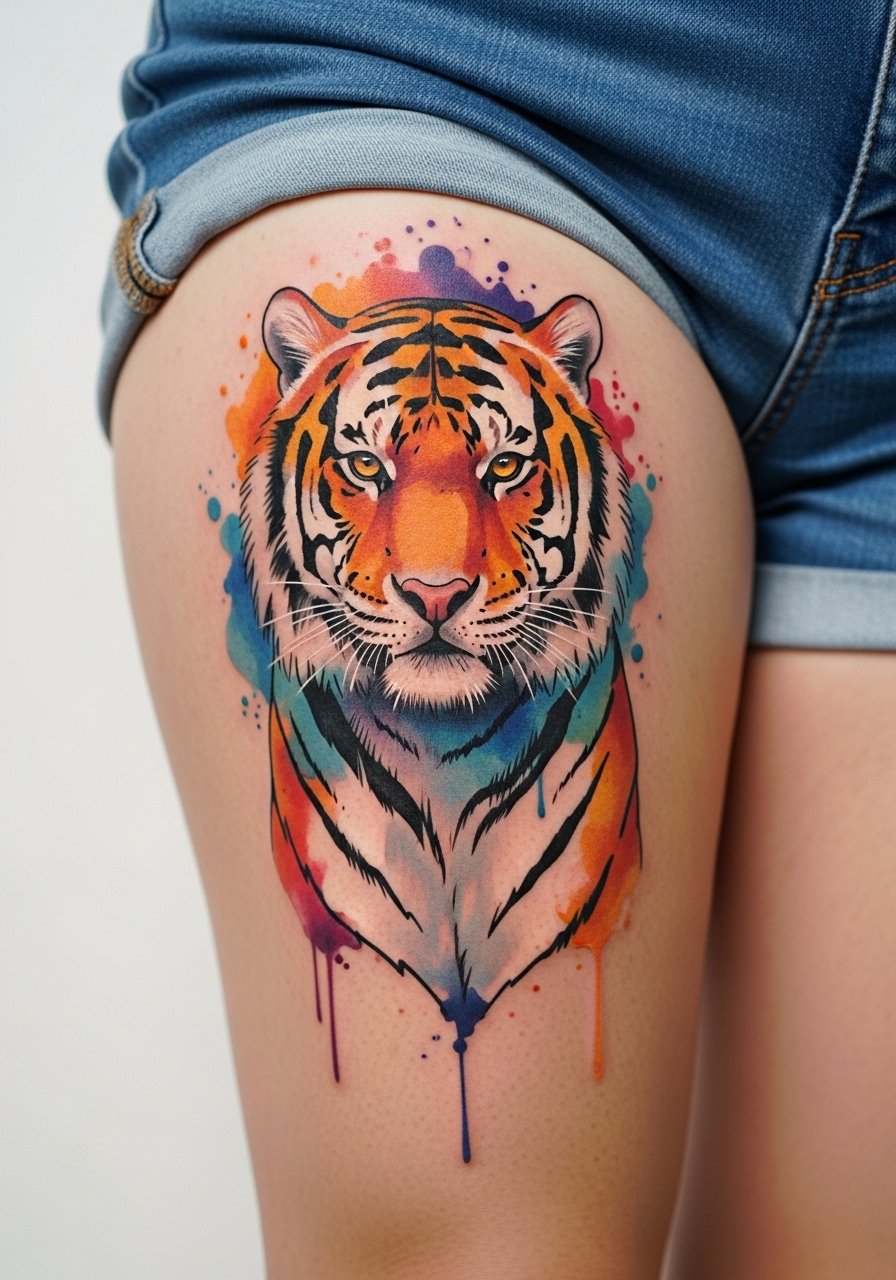
Thigh pieces are forgiving and hold color well because the skin there is thicker. This is a great spot for a painterly tiger with bold washes and layered saturation. Session time can be two to four hours depending on size. The main mistake is cramming too many small details into a large field. I recommend specifying where you want focus, such as the eyes or whisker detail, and letting washes handle the rest. For showing the piece, a wrap skirt or high-cut swim bottom highlights the placement. Expect color to remain legible longer than on the wrist or ankle.
8. Shoulder Cap Watercolor Tiger with Floral

The shoulder cap is a low-pain, high-visibility spot that flatters shoulder-slung clothing. For watercolor tigers mixed with flowers, ask for clear separations between botanical elements and the tiger's stripes so the two do not merge as they age. Session time is typically one to three hours. A common error is over-saturating the flowers next to fine tiger linework. For the session, wear a loose tank top so the artist has unobstructed access. This hybrid reads well at six months and keeps its painterly charm at two years with minor touch-ups.
9. Full Side-Body Watercolor Tiger Sleeve
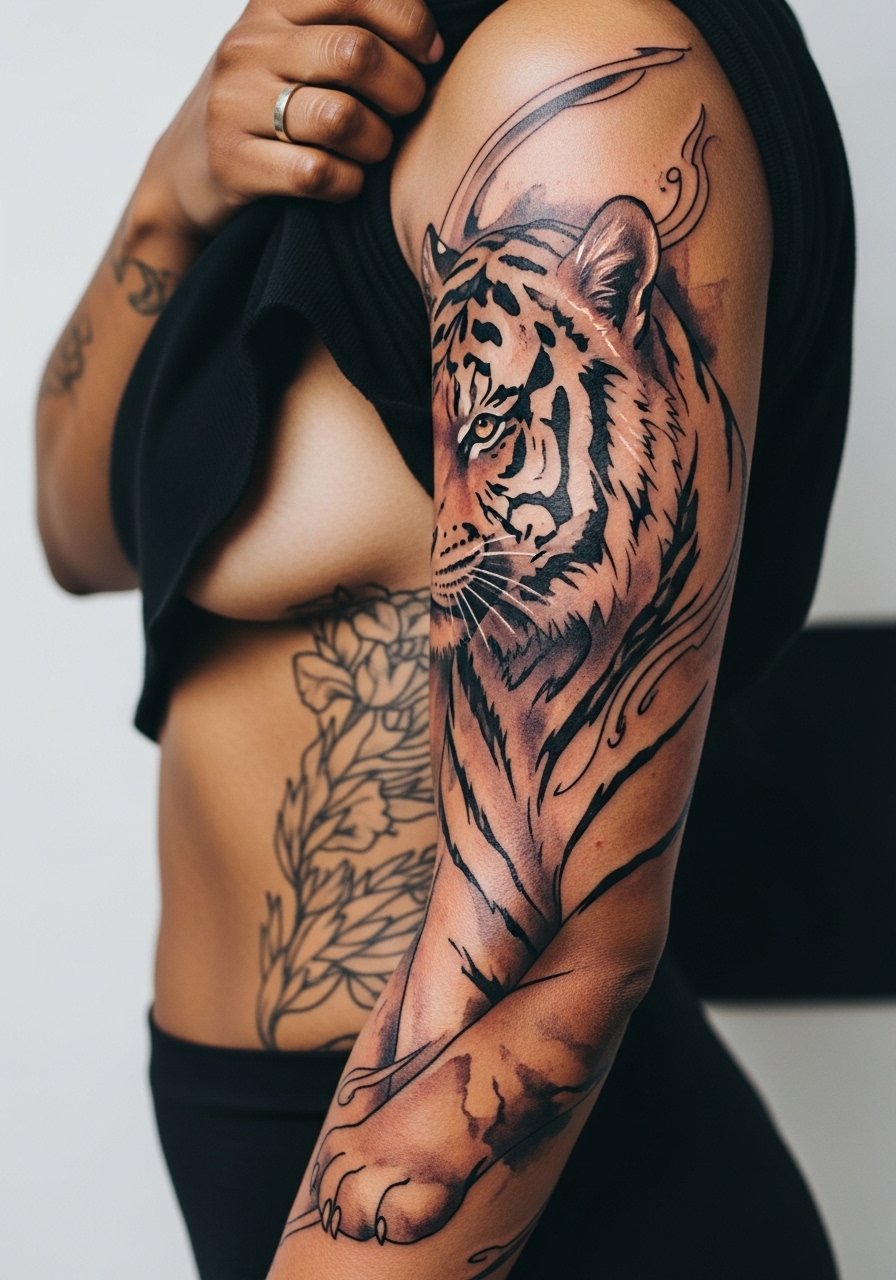
A side-body sleeve offers dramatic canvas but demands careful planning around natural movement. I tell clients to space the design so key facial features of the tiger sit on less mobile areas. The controversy over fine line on ribs applies here too. Two camps exist. One asserts that dense detail in mobile skin blurs quickly. The other claims that with strategic placement and deeper saturation, details can last. My practical advice is to prioritize bold focal points and let watercolor elements flow into looser washes. Sessions are multiple and can be spread over several visits. Wear comfortable, adjustable tops to the studio.
10. Calf Watercolor Tiger in Motion

Calf pieces age predictably and show well in mid-length pants or shorts. I suggest using directional brush strokes with the watercolor so the image reads as movement rather than a static patch. Pain is moderate and sessions are usually single visits for medium sizes. A common mistake is overworking the inner calf near muscle movement, which can distort linework. For the session, wear pants you can roll up so the artist has full access without tight waistbands. Color and saturation generally hold up well here.
11. Collar Tattoo: Subtle Watercolor Tiger Near Clavicle

This small collarbone placement works as an accent piece. Because the clavicle area sits near thin skin and bone, I recommend lighter washes and leaner outlines. Pain is moderate. A frequent error is pushing heavy color against bone, which leads to patchy healing. For showing it off, a delicate chain necklace sits above the motif without competing. Expect subtle fading at two years and a possible touch-up to restore contrast if desired.
12. Watercolor Tiger and Koi Fusion on Upper Arm
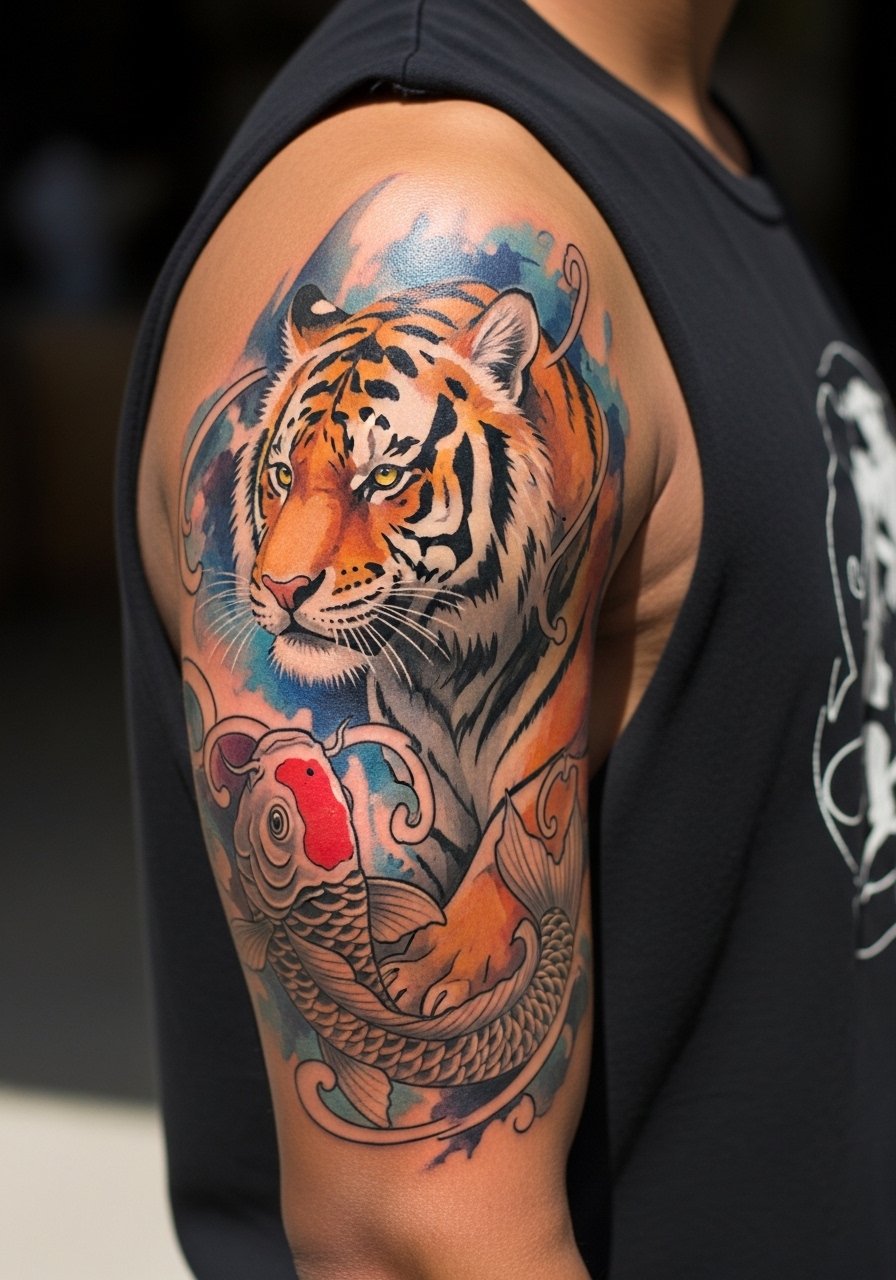
Combining a tiger with koi brings dynamic color and narrative. On the upper arm, the thicker skin holds pigment well, which is ideal for vibrant watercolor blends. Tell your artist whether the tiger or the koi is the focal point so they can prioritize detail around that element. Sessions may range from one to three hours. A typical misstep is equalizing detail across both creatures, which flattens the composition. For outfits, a sleeveless linen shirt shows off the upper arm without forcing a full sleeve reveal.
13. Mini Watercolor Tiger Behind the Ear
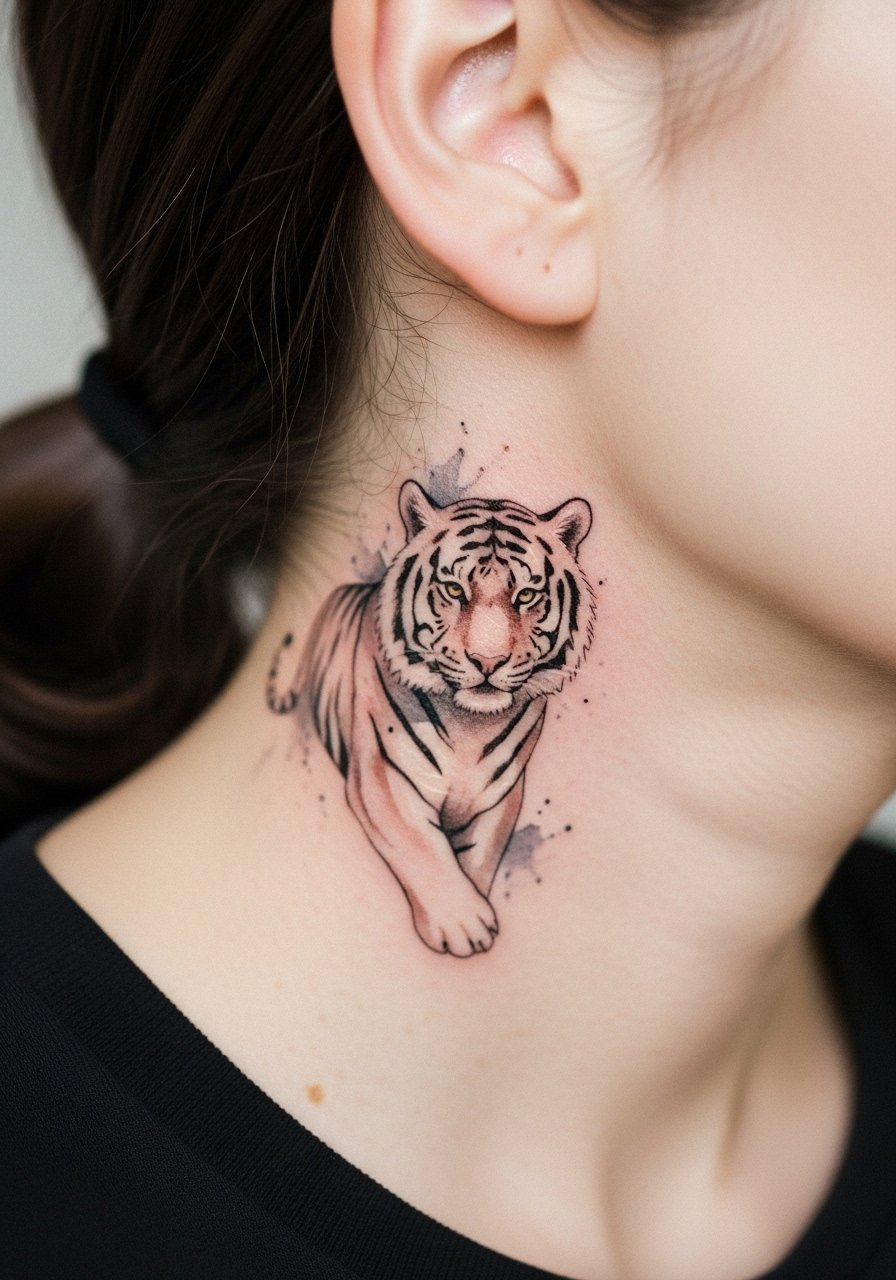
Behind-the-ear placements must be framed carefully. The correct phrasing is "on the skin behind the ear, below the hairline on the neck" so the artist places the tattoo on that small patch. Pain is low but the area is sensitive. A common mistake is asking for dense color there. Keep the design tiny with soft washes. For the session, wear hair up and bring a soft hair tie so the area stays accessible. These pieces are intimate and subtle, and they fade more quickly than arm work.
14. Watercolor Tiger Chest Panel
Chest panels offer a broad canvas that flatters dramatic watercolor blends. The sternum and upper chest vary in sensitivity, so plan for moderate pain. The right approach balances saturation with open negative space so the washes do not muddy. A common error is packing too many hues close together without transitional tones. For sessions, wear a wide-neck shirt you can pull aside. The piece pairs well with open-neck tops for photos and stays readable for several years if you protect it from heavy sun exposure.
15. Watercolor Tiger Paw on the Hand

Hand tattoos remain controversial in workplaces because they are visible. If you opt for a hand paw, accept that it will likely need touch-ups more often because of constant washing and sunlight. Pain is moderate. The most common mistake is asking for tiny detail that the skin on the hand cannot hold. For the session, minimal jewelry and a bare hand help the artist work cleanly. Consider the career implications before committing.
16. Watercolor Tiger Half-Sleeve with Geometric Accents
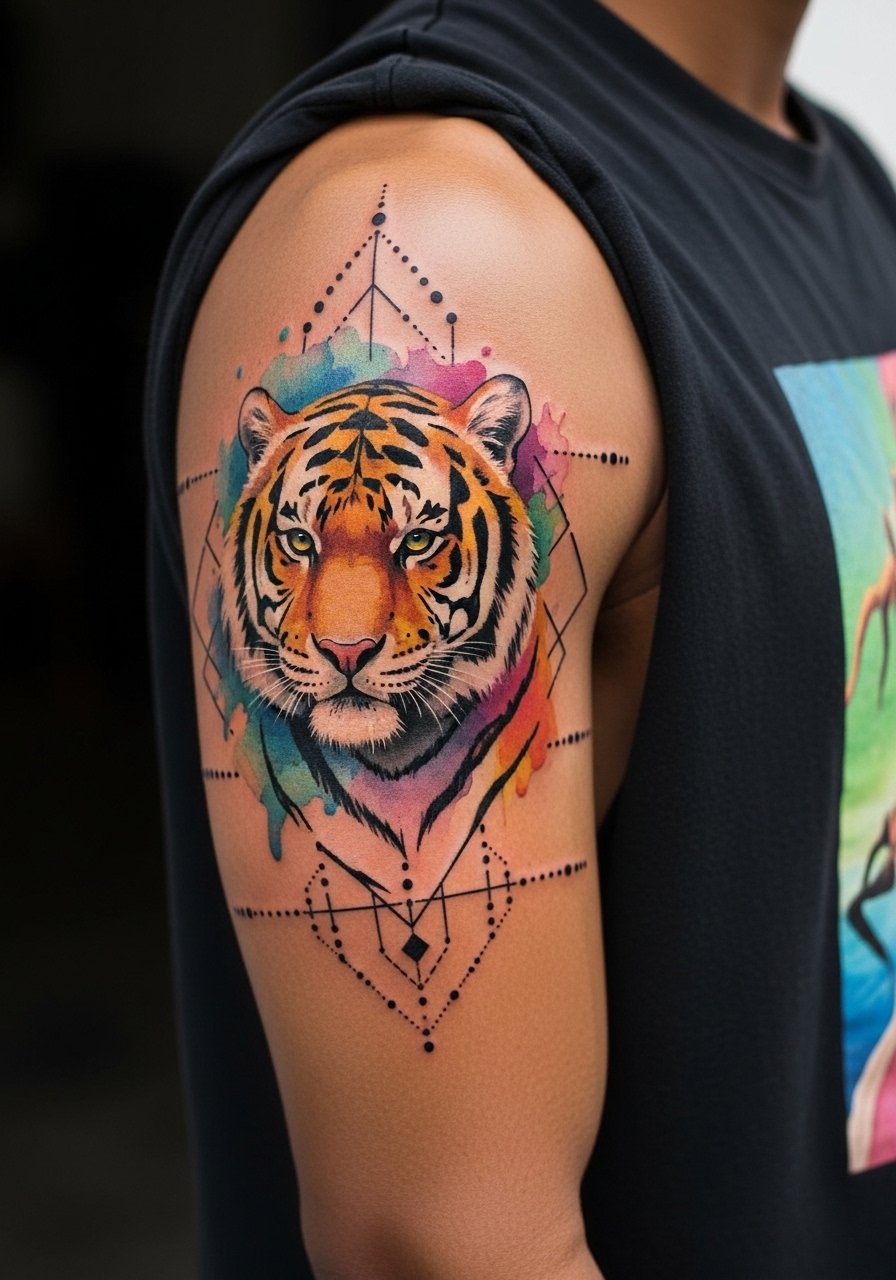
Half-sleeves mix narrative and cohesion. Combining watercolor tigers with geometric dot work can give structure to loose washes. Tell the artist you want the geometric elements to anchor color transitions so the sleeve does not read like floating blobs. Sessions are multi-visit. A common error is random placement of geometric lines that intersect key tiger features. For the studio, bring a sleeveless tee for easy access. This format ages well since the geometric work provides long-term contrast.
17. Watercolor Tiger Crest on the Lower Back
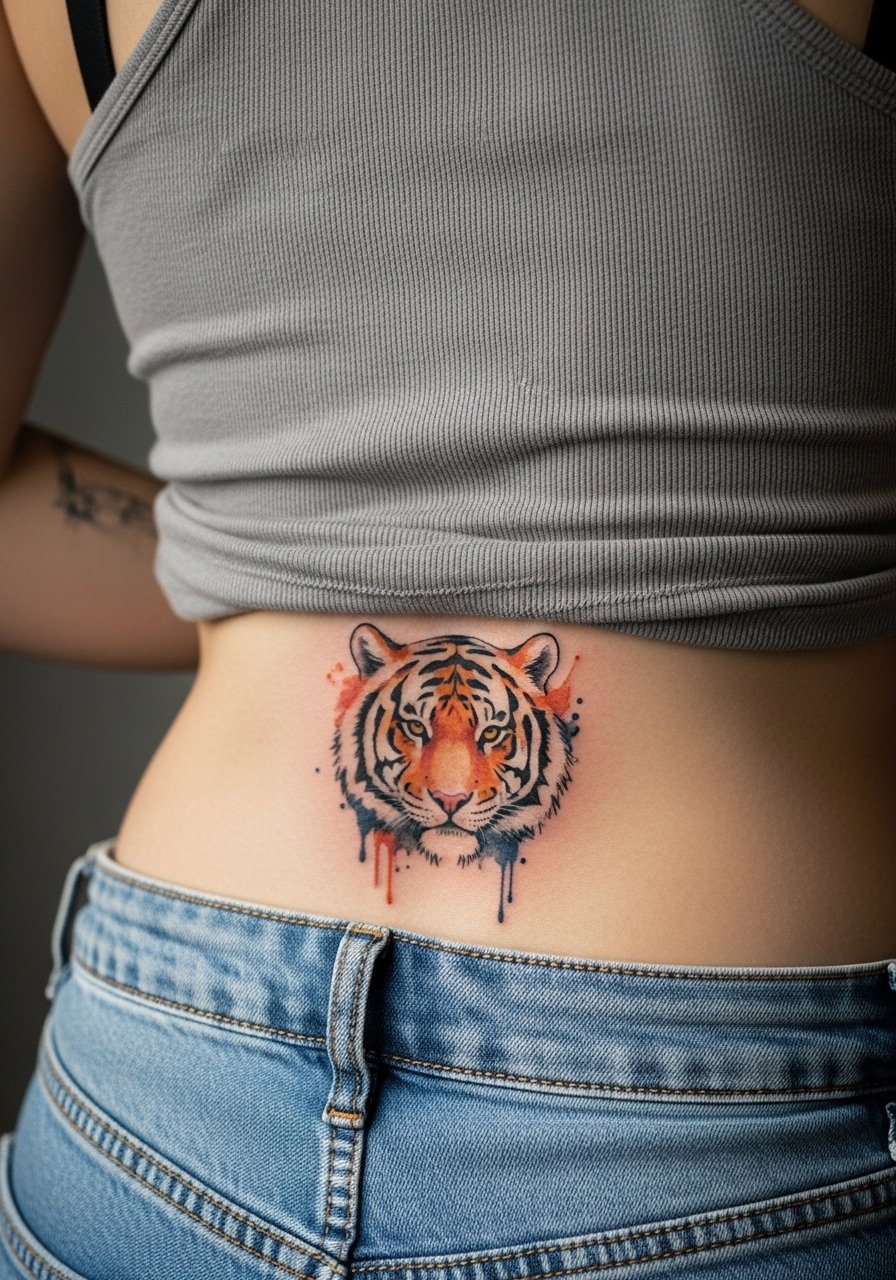
Lower back tattoos can be very private and hold color well if kept out of constant sun. The skin is stable and receptive to broad washes. Pain is low to moderate. A common mistake is extending detail into areas prone to friction from waistbands. For the session, wear a tank top with high-waisted bottoms you can slide down slightly. The piece pairs well with low-rise jeans or swimwear for occasional showing.
18. Watercolor Tiger Hip Accent

Hip tattoos move with clothing and body contours, so plan the composition around the pelvis curve. Pain ranges from moderate to high depending on proximity to bone. I advise softer washes near the hip bone and stronger saturation toward the outer curve. Wear high-cut or adjustable bottoms to the appointment. For showing subtle highlights, a high-waisted bikini bottom frames the area without exposing more than intended. Expect the color to remain fairly stable away from heavy friction zones.
19. Watercolor Tiger Finger Accent

Finger tattoos are notorious for early fading. The skin is thin and exfoliates often. For this reason, keep the design minimal and accept a higher touch-up likelihood. Pain is moderate and sessions are quick. The mistake is requesting complex shading that the finger cannot retain. For sitting, leave fingers bare and wear gloves only after the first bandage removal. These should be treated as semi-permanent pieces that may need refreshes every year or two.
20. Watercolor Tiger Over Rib and Hip Flow

Crossing two zones increases healing complexity. The rib portion will be more reactive while the hip holds pigment. Space details so the tiger's face sits over the hip and long washes sweep over the ribs. Expect multiple sessions. A common error is equalizing detail across both zones which creates inconsistent aging. For the studio, wear a cropped tee or a zip-front hoodie you can lift. Plan touch-ups targeted to the rib area in the second or third year.
21. Watercolor Tiger and Moon Collar Design
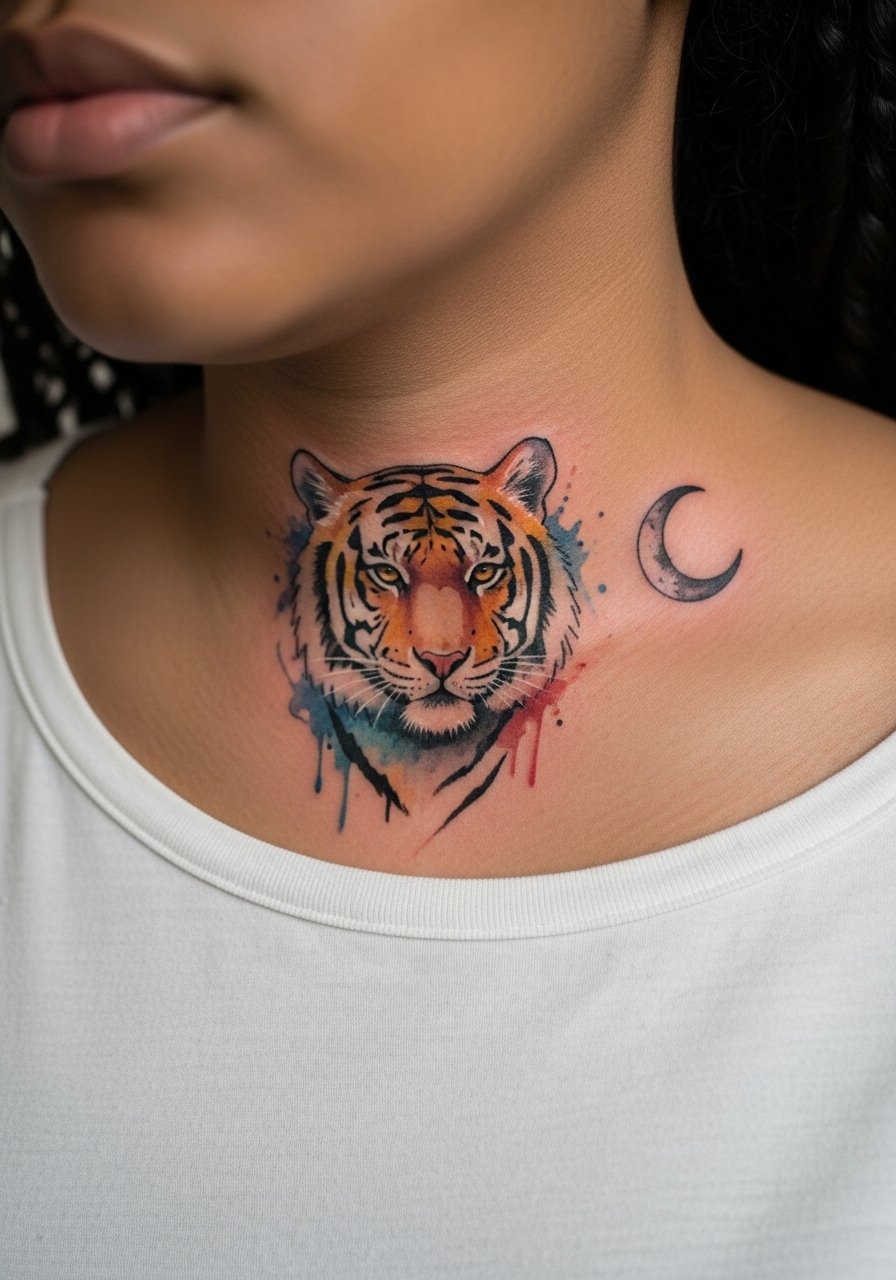
Pairing celestial elements with the tiger adds mood. Keep the moon as a simple silhouette or a light wash to avoid competing with the tiger's features. Pain is moderate. The usual mistake is over-detailing the moon so it reads like a patch next to the animal. For photos, a thin chain pendant necklace sits above the design without interfering.
22. Watercolor Tiger Mask on Upper Back
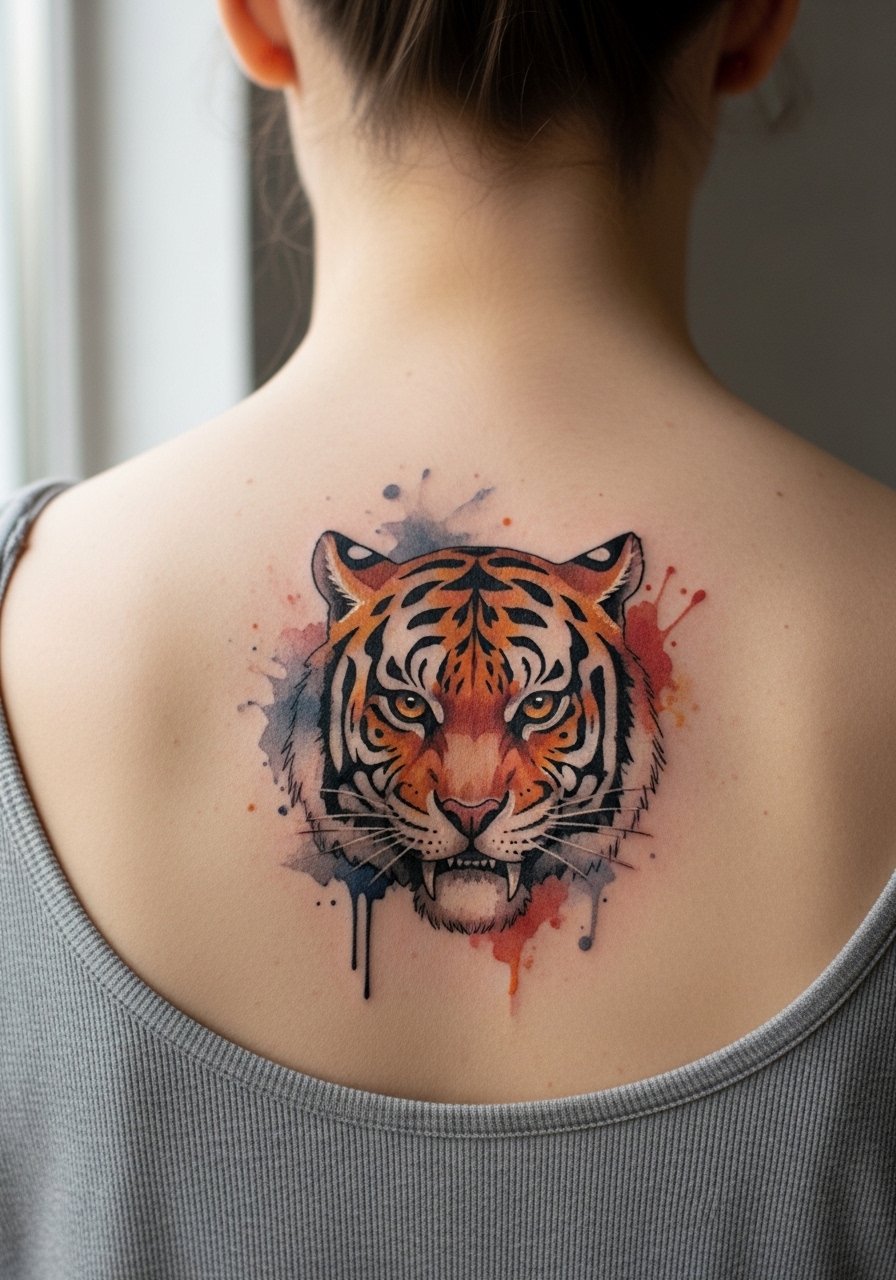
Upper back pieces are ideal for symmetrical motifs. Ask the artist to center the tiger mask between the shoulder blades so it aligns with the spine without touching it. Pain is moderate and sessions can be long. A typical error is placing focal detail too close to areas that move with shoulder motion. For the studio, wear a tank you can pull down slightly. This placement allows a lot of breathing room for watercolor strokes to age gracefully.
23. Watercolor Tiger Eye on the Sternum Edge

Focusing on a single eye lets you capture intensity without overtaxing reactive skin. This is sensitive and often painful, so shorter sessions are better. The mistake is packing tiny lashes or textures that heal into a fuzzy area. For the session, wear a fitted sports bra to expose the area cleanly. The small focal piece holds character and can be a memorable anchor for future expansions.
24. Watercolor Tiger with Peony Japanese-Inspired Panel

This design borrows visual language from Japanese floral work. Out of respect, avoid direct cultural symbols and opt for stylistic inspiration rather than exact traditional motifs. Say you want "Japanese-inspired peony and tiger" rather than a direct replication. The thigh is forgiving for color layering and allows large, flowing petals. Sessions are multi-hour. For showing it off, a wrap dress or high-cut shorts work well.
25. Watercolor Tiger Portrait on Upper Arm

Portrait-style tigers require careful planning to maintain facial clarity as color fades. I recommend prioritizing clean anchor lines around the eyes and nose while letting color fields form the fur. Sessions are longer and may span multiple visits. A common mistake is over-detailing whisker textures that soften into blur. For outfits, a sleeveless top shows the portrait without needing a full reveal.
26. Watercolor Negative Space Tiger on the Side Wrist
Negative space tigers rely on surrounding color to define form. On the side wrist, aim for moderate saturation around the negative areas and ask the artist to leave crisp boundaries where the skin creates the tiger's stripes. Pain is low to moderate and sessions are brief. A frequent mistake is using too little contrast, which makes the negative shape vanish after healing. Wear a minimalist bracelet to style it, but avoid tight bands while healing.
27. Watercolor Tiger Tail Wrapping the Ankle

Wrapping designs on the ankle must account for joint movement and shoe friction. Keep the scale appropriate and the color fields simple to prevent frequent touch-ups. Pain on the ankle can be sharp in places. The most common mistake is wrapping too tightly so details collapse with motion. For the appointment, wear slip-on sandals and rolled jeans so the artist can assess the wrap without obstruction. Expect more fading on the inner ankle where rubbing occurs.
Frequently Asked Questions
Q: Do watercolor-style tiger tattoos need different aftercare than traditional ones?
A: Not really different in steps, but they benefit from gentler handling. I tell people to avoid heavy scrubbing and to use a fragrance-free cleanser for the first two weeks so the pigments can settle. Aftercare products can help, but the timing of cleaning and moisturizing matters more than the specific brand.
Q: Will fine watercolor stripes blur faster on ribs than on arms?
A: Yes, the ribs move and stretch more, so fine stripes there are at higher risk of softening. Artists split into two camps. One camp recommends avoiding fine stripes on ribs because of skin movement. The other camp says strategic spacing and slightly stronger linework can keep stripes readable. Ask your artist how they handle rib placements before booking.
Q: How visible will a thigh watercolor tiger be when wearing everyday clothes?
A: Thigh pieces are easy to hide under jeans and show off with shorts or skirts. For occasional reveals, high-waisted shorts or swim bottoms frame the design without forcing you to expose the whole area. If you plan frequent display, think about clothing that complements the color palette.
Q: Are hand and finger watercolor tigers worth it if I want longevity?
A: They can look great but expect more maintenance. Hands and fingers face constant washing and sun, which fades watercolor pigments faster than on the thigh or upper arm. If longevity matters, consider moving a similar motif to the outer wrist or base of the thumb.
Q: How should I find an artist for watercolor tiger work without naming specific shops?
A: Look through local shop directories, check portfolios at conventions, and search community hashtags that show healed tattoos. Reddit threads and regional tattoo groups can point you to artists who document healed work. Focus on portfolios that display healed photos rather than only fresh images.
