
Fine line tattoos dominate saved boards right now, and what looks delicate on a screen often settles differently on real skin. The forearm is forgiving, but spacing, line weight, and placement still determine whether a geometric piece reads clean at year one or needs a touch-up at year three. Read through these forearm-specific ideas to see what works for visibility, how to brief your artist, and what to wear on chair day.
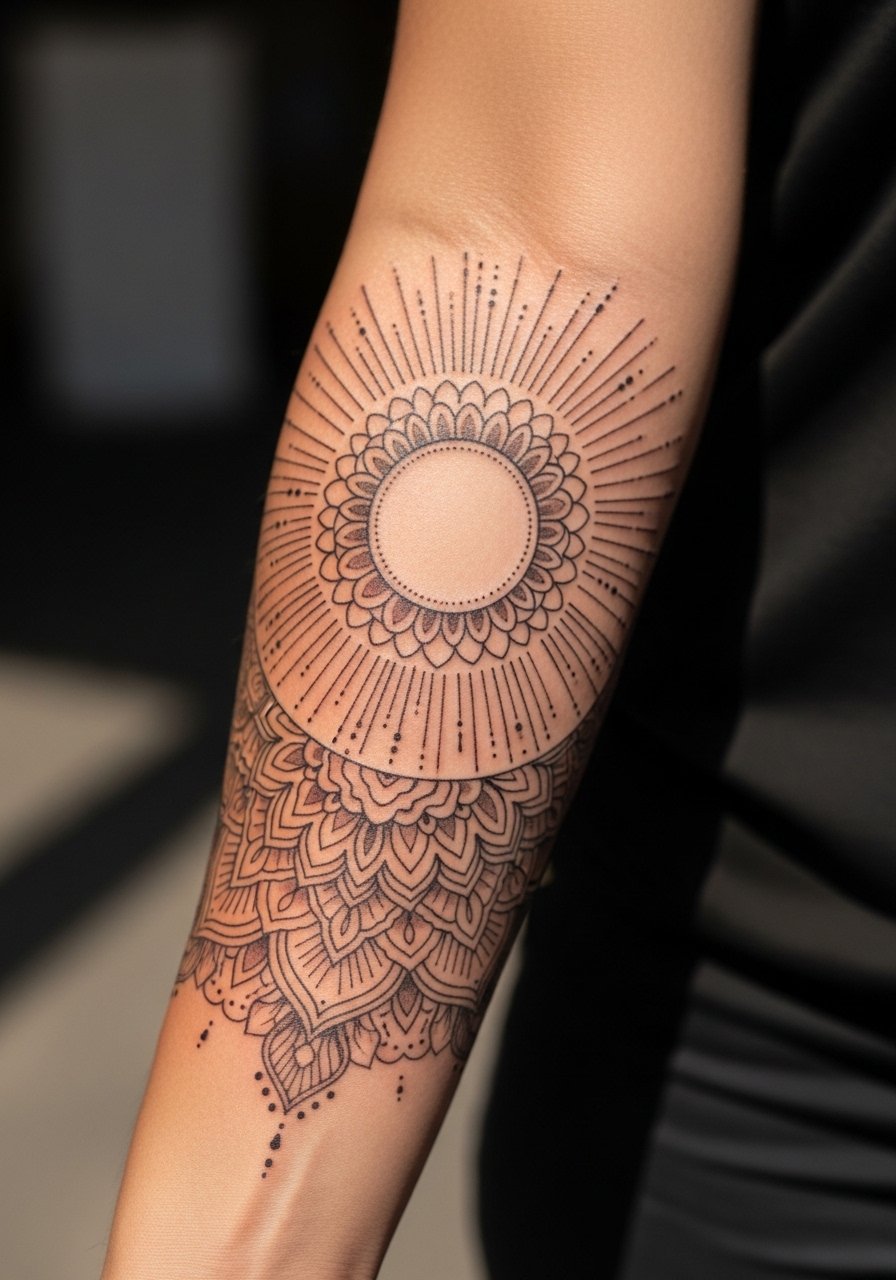
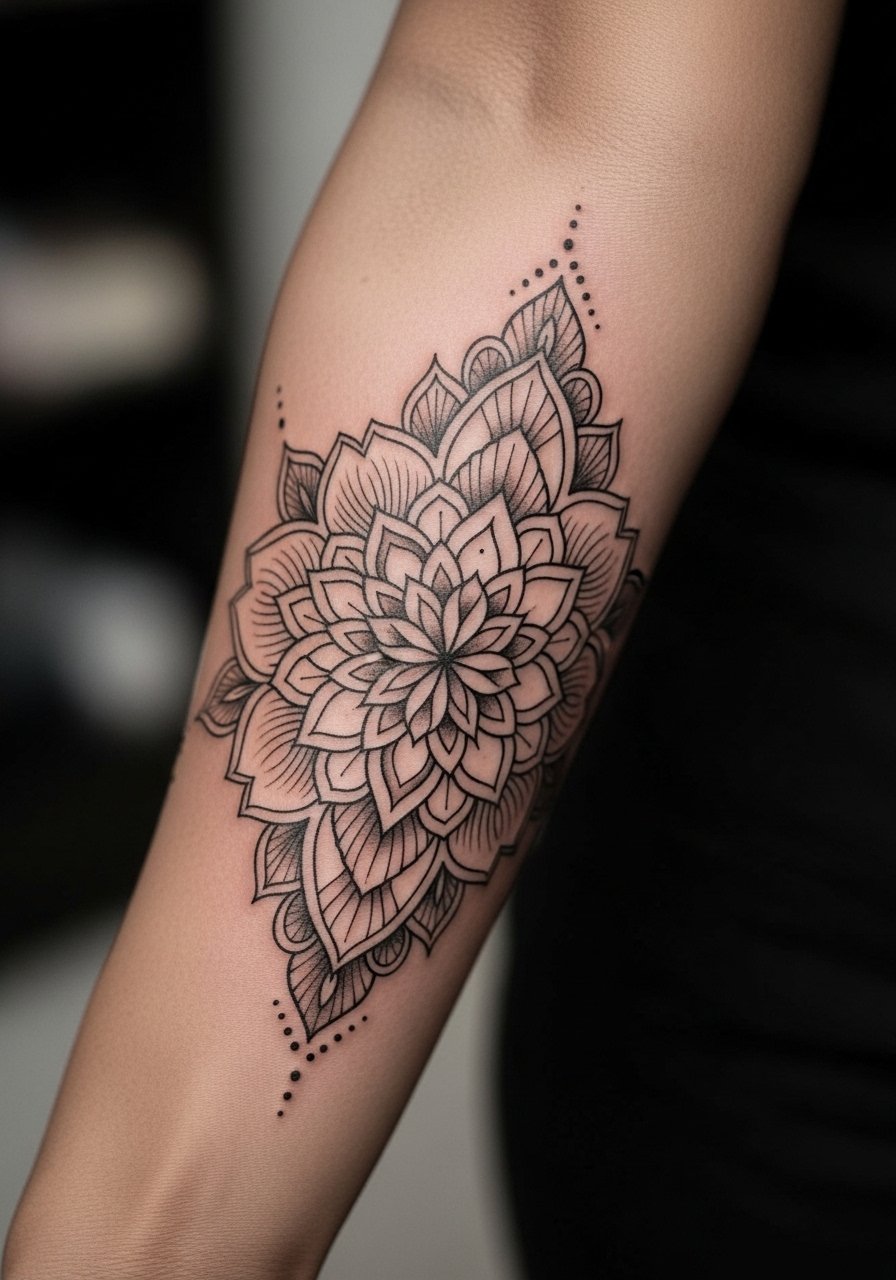
1. Dotwork Mandala on Inner Forearm

I've seen inner-forearm mandalas last longer when artists space the dots and leave breathing room in dense centers. Pain lands low to moderate on most scales, and a two-hour session usually gets you a 2-to-4-inch piece. Tell your artist you want stipple shading with gradual density so the mandala keeps definition at six months, two years, and beyond. A common mistake is packing too many tiny dots into a small circle, which merges as the ink settles. For showing it off, roll up a rolled cuff long sleeve top and add a thin silver chain bracelet on the opposite wrist during outings.
2. Flower of Life Cluster Along Outer Forearm
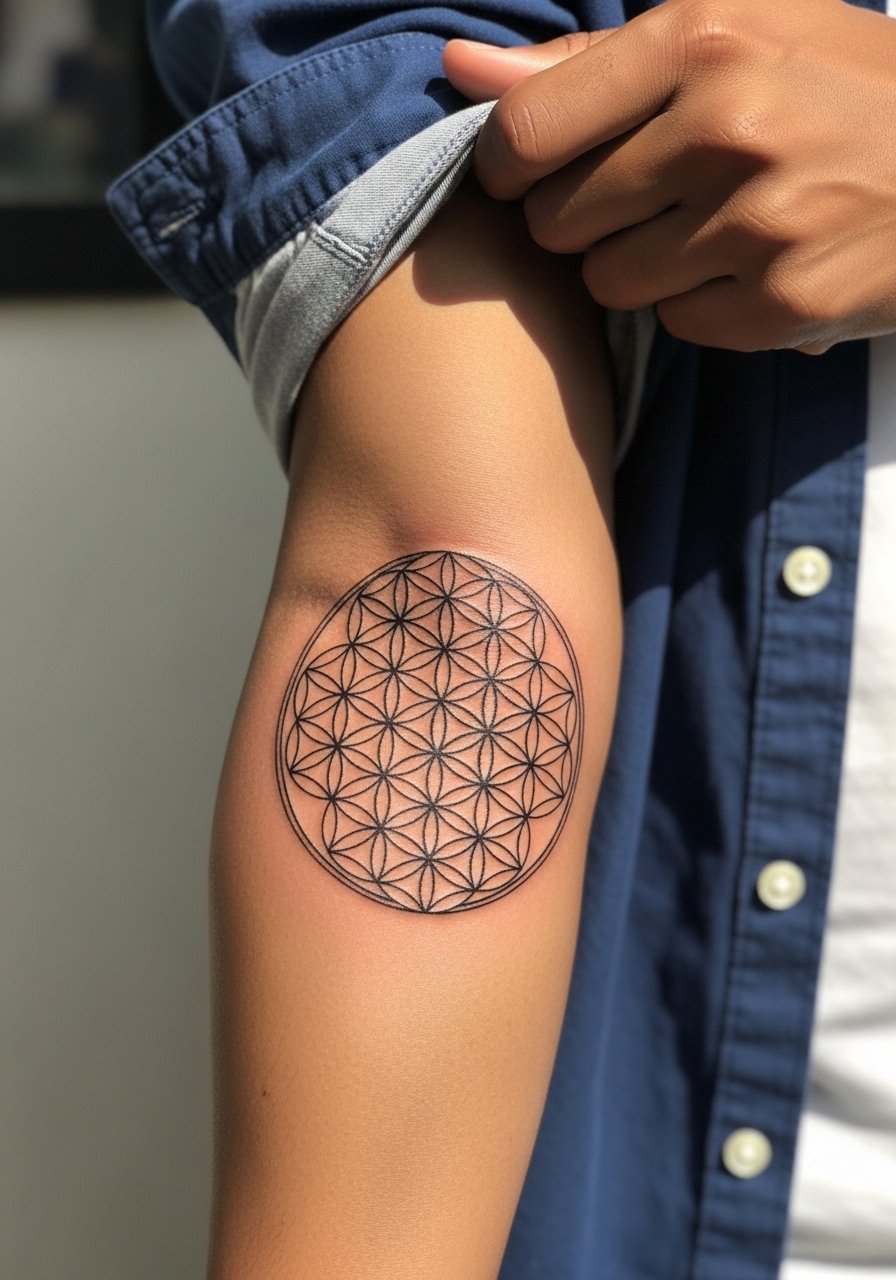
The Flower of Life reads best when scaled to follow the forearm length. Expect moderate pain and a multi-session layout for a 5-6 inch repeat pattern. Ask for consistent line weight and slightly larger spacing between intersecting circles so the intersect points do not blur over time. Many people mistakenly request ultra-fine lines that look delicate fresh but lose crisp intersections by year two. For a clean reveal, pair this with a loose button-down shirt rolled to the elbow when you want to show symmetry.
3. Minimalist Triangle Linework Forearm Band
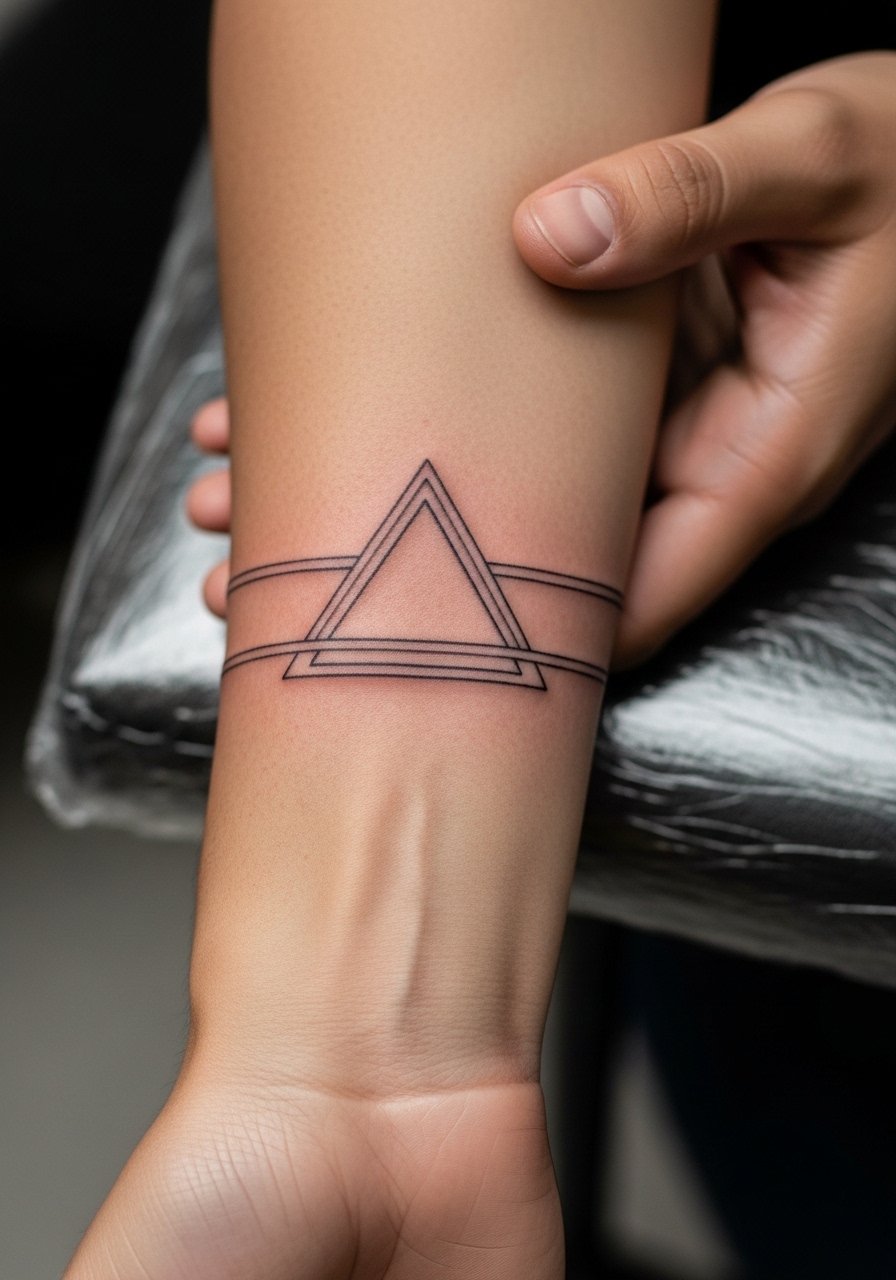
Fine line bands look sleek but they need room to breathe. Pain is low to moderate and one session under an hour often suffices for a 1-to-3-inch wrap. During consultation, specify exact line weight and ask for the stencil to be placed and checked under natural light so the band sits straight. The biggest mistake is going too thin around the whole arm, which invites early softening and touch-ups by year three. For casual wear, push up a cropped thumb hole sweater to frame the band without distraction.
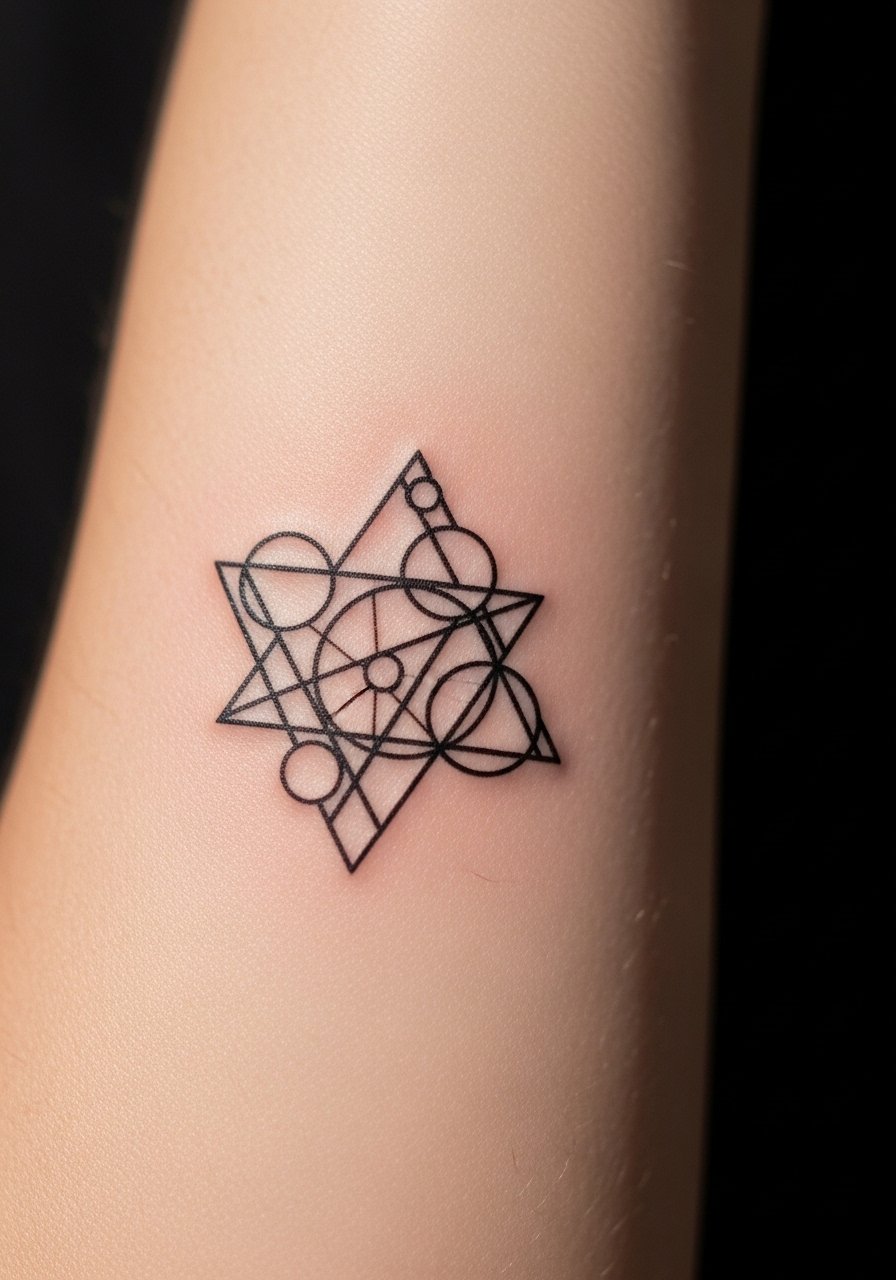
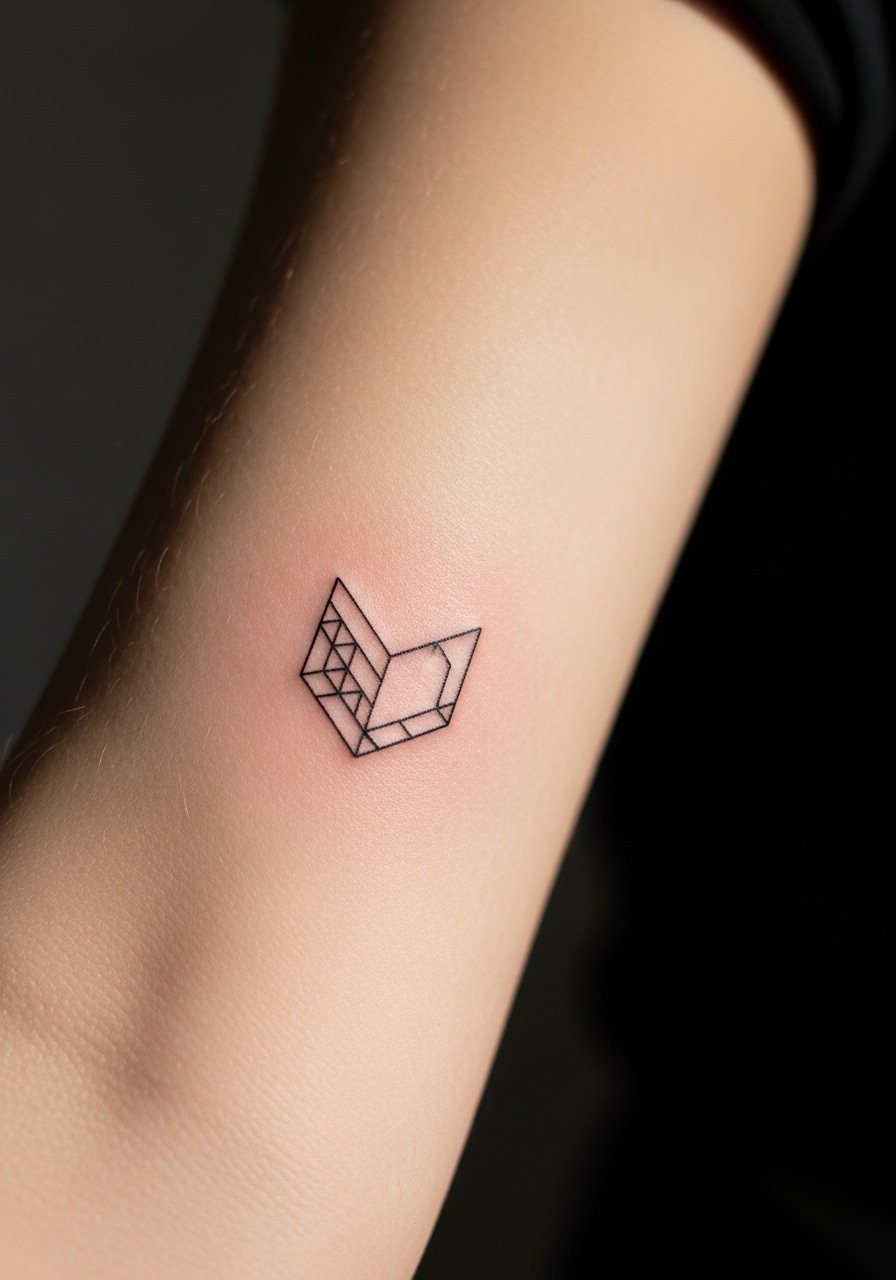
4. Metatron's Cube Forearm Panel
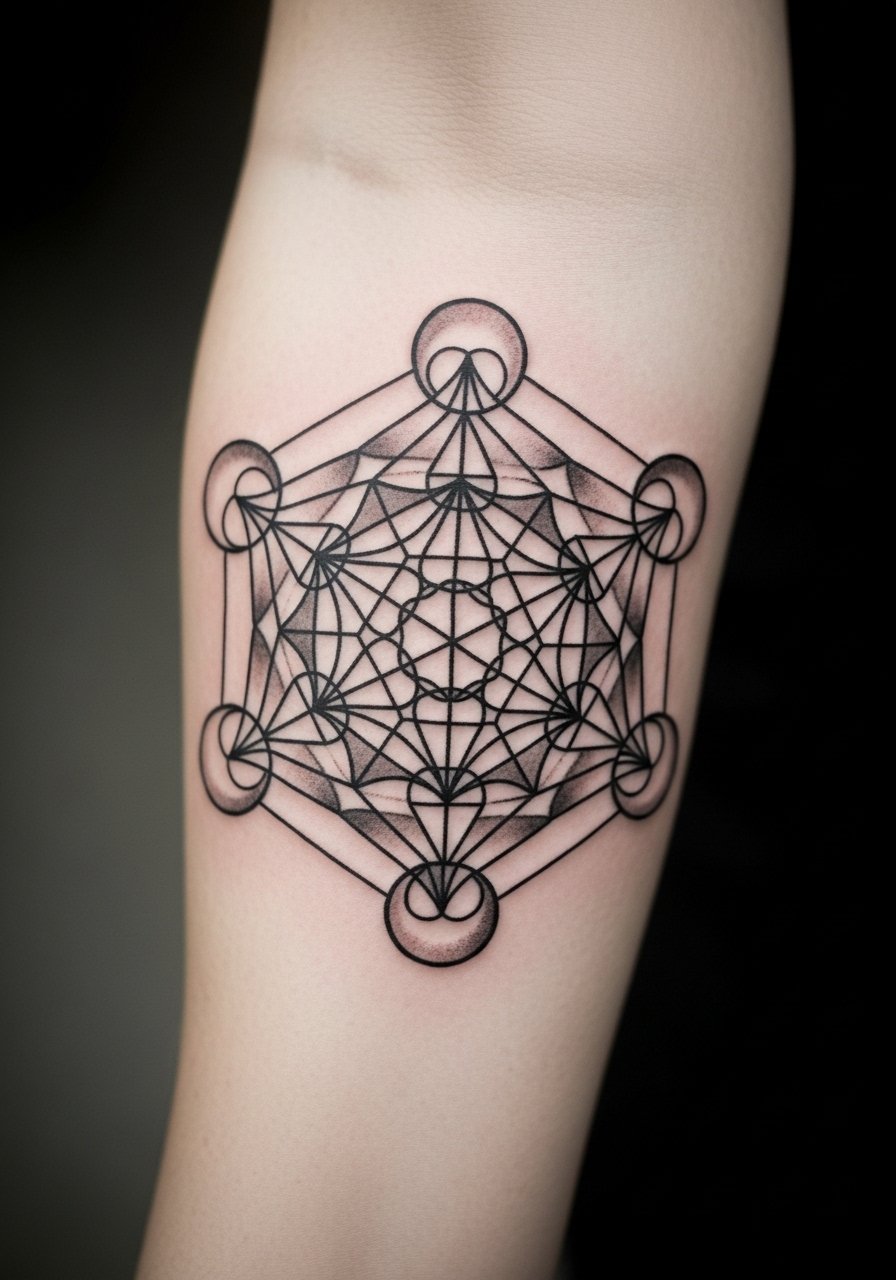
This geometric panel reads architectural when kept mid-to-large size on the forearm. Pain ranges from moderate to high depending on coverage and shading, and plan for two to three sessions. Tell your artist you want heavier outlines on the outer frame and lighter inner connections, so the piece reads from a distance. A common error is shrinking the cube into a small patch where interlocking lines crowd and blur. Expect touch-ups at year two for dense interlocking points. For appointments, wear a tank top with arm cutouts or a loose button-down so the artist can access the full forearm.
5. Hexagon Pattern Patch on Inner Forearm
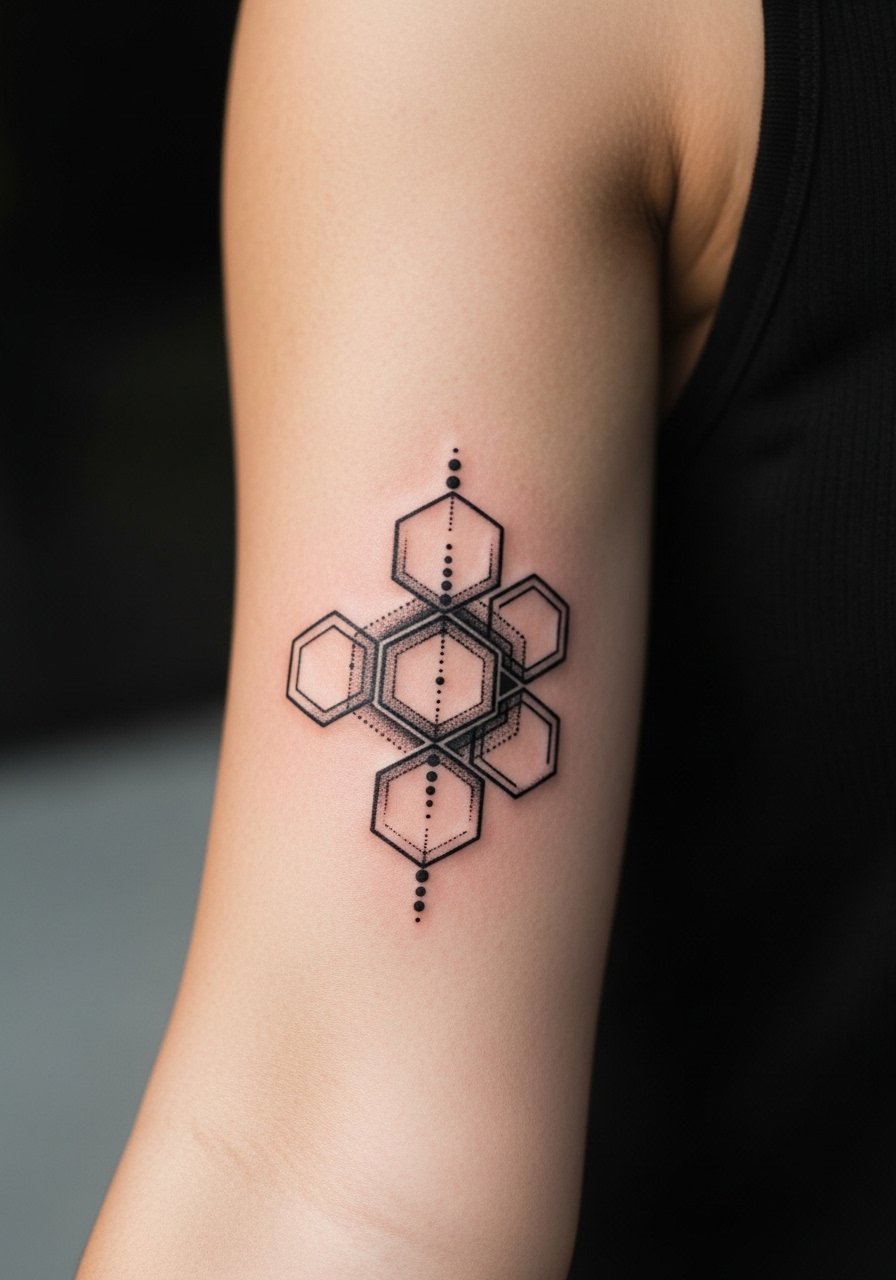
Hexagon grids feel balanced on the inner forearm if centered and kept to a 3-inch diameter. Sessions are short to moderate and pain is usually mild. During the consult, request slightly thicker outer hex outlines so each cell keeps shape as the skin ages. Newcomers often ask for tiny adjacent hexes that blur together; spacing fixes that. This is a smart first geometric piece for someone who wants symmetry without a sleeve commitment. During wear, a sleeveless tank or loose short-sleeve tee works for the session and photos.
6. Seed of Life Linear Cluster Along Forearm
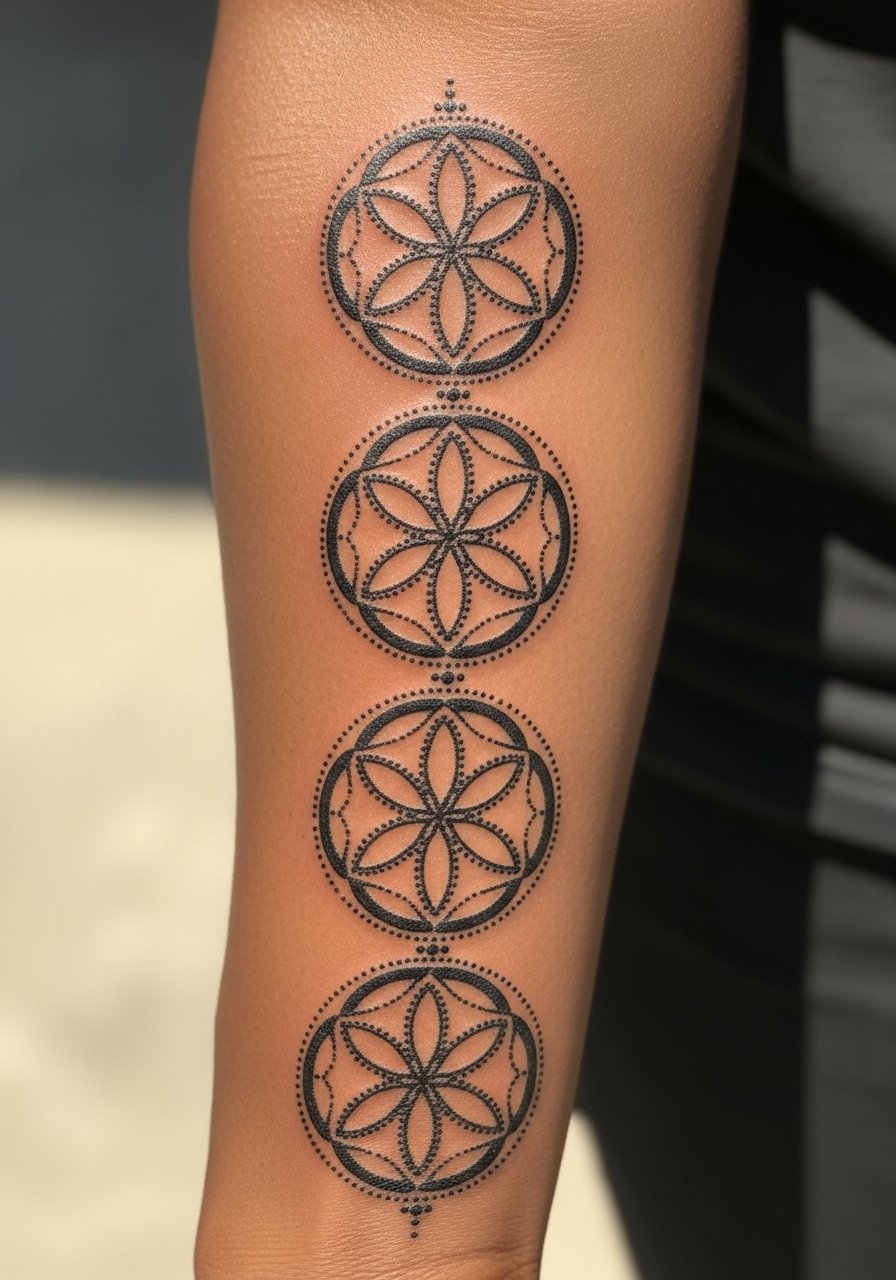
A vertical Seed of Life cluster uses repetition to create rhythm on the forearm. Expect moderate session time depending on spacing and dotwork density. Tell the artist you want each circle slightly larger than the last so the pattern breathes toward the elbow. People often stack identical small circles tight together and the intersections lose clarity over a few years. The touch-up timeline is usually at year two for dense dot fills. For a polished look, roll sleeves to the elbow of a linen button down and add minimal stud earrings to echo the geometry.
Studio Day Picks
The inner and outer forearm pieces above have different session needs, and these items help smooth quick appointments and the first healing week.
-
Stencil transfer paper kit. Lets you preview the exact placement on skin before the needle starts, which is critical for symmetrical forearm panels.
-
Topical numbing cream. Applied as directed before arrival it softens wrist and outer forearm sensitivity for shorter sessions.
-
Thin protective film roll. Keeps linework clean from clothing friction during the first 48 hours when fine lines need protection.
-
Fragrance-free gentle body wash. Cleans the area without irritating the healing ink that fine geometric work depends on.
-
Aquaphor healing ointment. A thin layer in the first days helps keep small needle channels from drying and scabbing too thick.
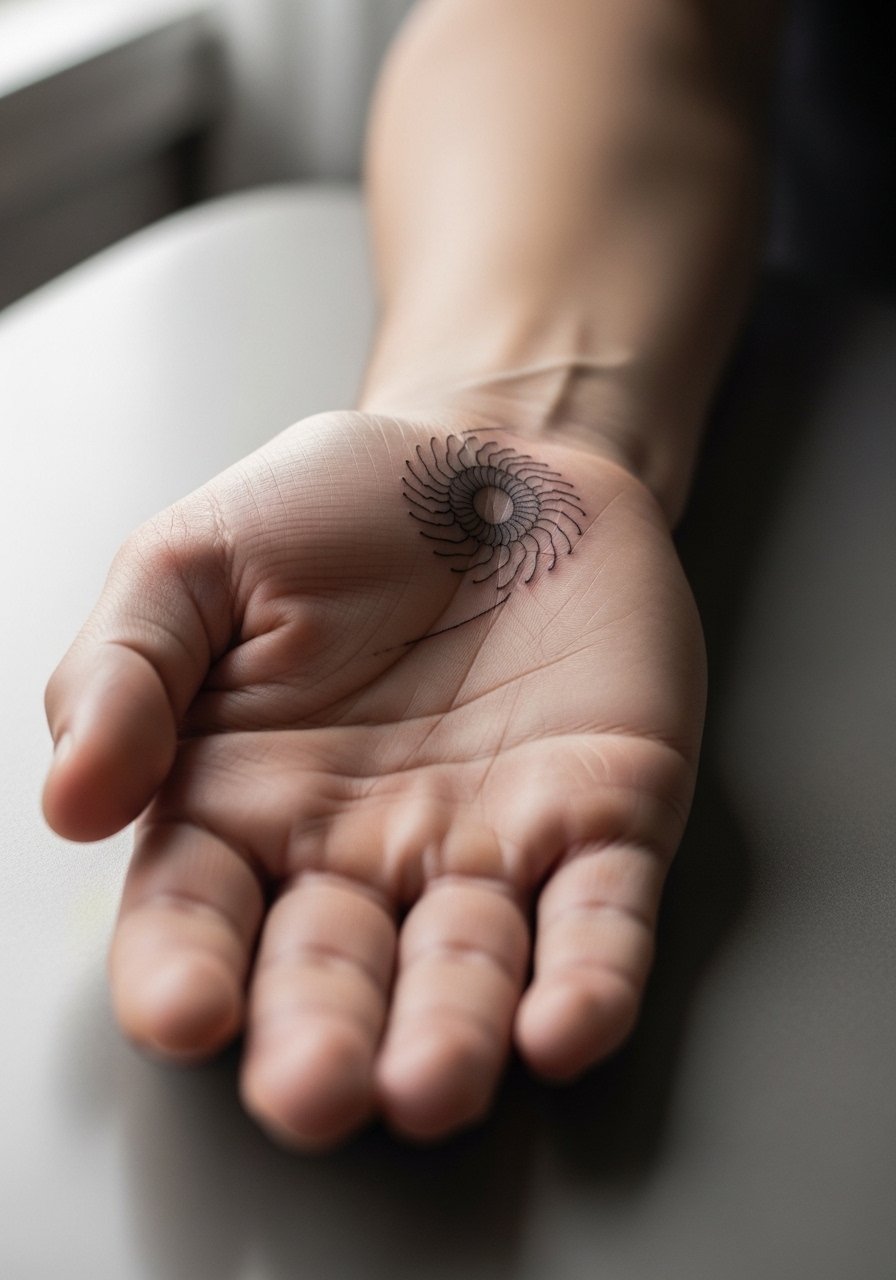
7. Fine Line Spiral Wrist-to-Elbow Accent
Spiral accents read dynamic when line weight stays consistent along the curve. Expect one session and mild to moderate pain. During consultation ask for slightly stronger anchor points where lines overlap so the spiral keeps shape after healing. There is a split among artists about ultra-fine spirals on curved areas. One camp argues the curves and movement cause early softening. The other camp says careful spacing and needle depth make them stable. Ask your artist which approach they use before booking. For photos and outings, bell-sleeved blouses pushed up frame the spiral, so try a bell sleeve blouse to show it off.
8. Mandala Half-Sleeve That Follows the Arm Curve
Half-sleeve mandalas on the forearm need careful contouring to follow muscle and bone so petals do not warp. Expect multiple sessions and moderate to high pain for full coverage. Tell your artist you want the design to elongate with the arm, not wrap in a circular, flat plate. A common mistake is forcing a circular mandala into a sleeve shape without adjusting petal proportions, which makes the piece look squeezed on the curve. Healed looks at two years depend on spacing and shading saturation. For session days wear an oversized blazer with sleeves rolled to let the artist access the whole area.
9. Square Frame Panel Mid-Forearm
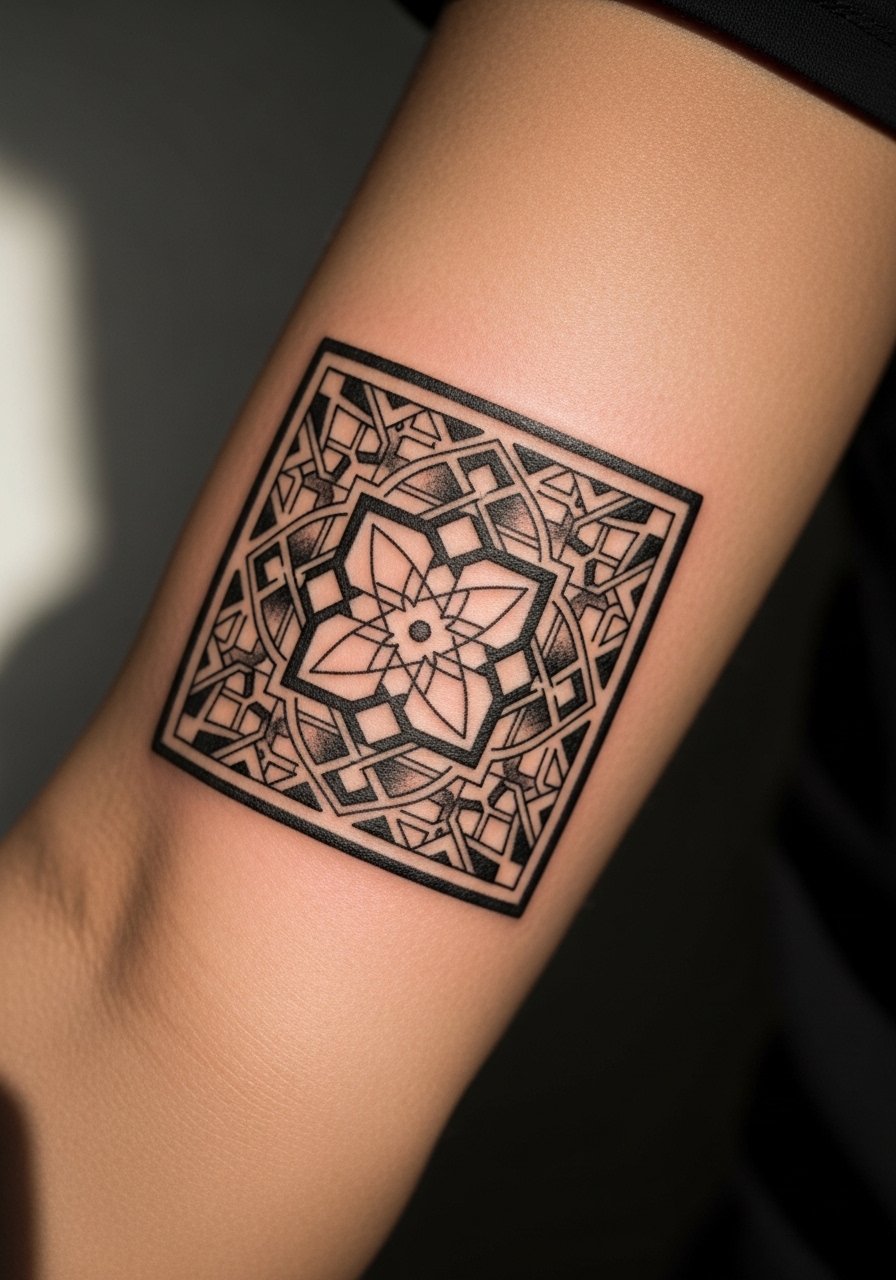
A square frame reads architectural when placed mid-forearm and kept large enough for the interior to breathe. Pain is moderate and sessions depend on interior shading. During the consult, ask for heavier outer borders and lighter inner connectors so the frame remains readable as lines soften. The mistake is shrinking the square to fit into a small space which collapses interior detail. A touch-up at year two is common for areas with dense intersections. For a smart reveal, push up a monochrome blazer sleeve so the square sits against clean fabric lines.
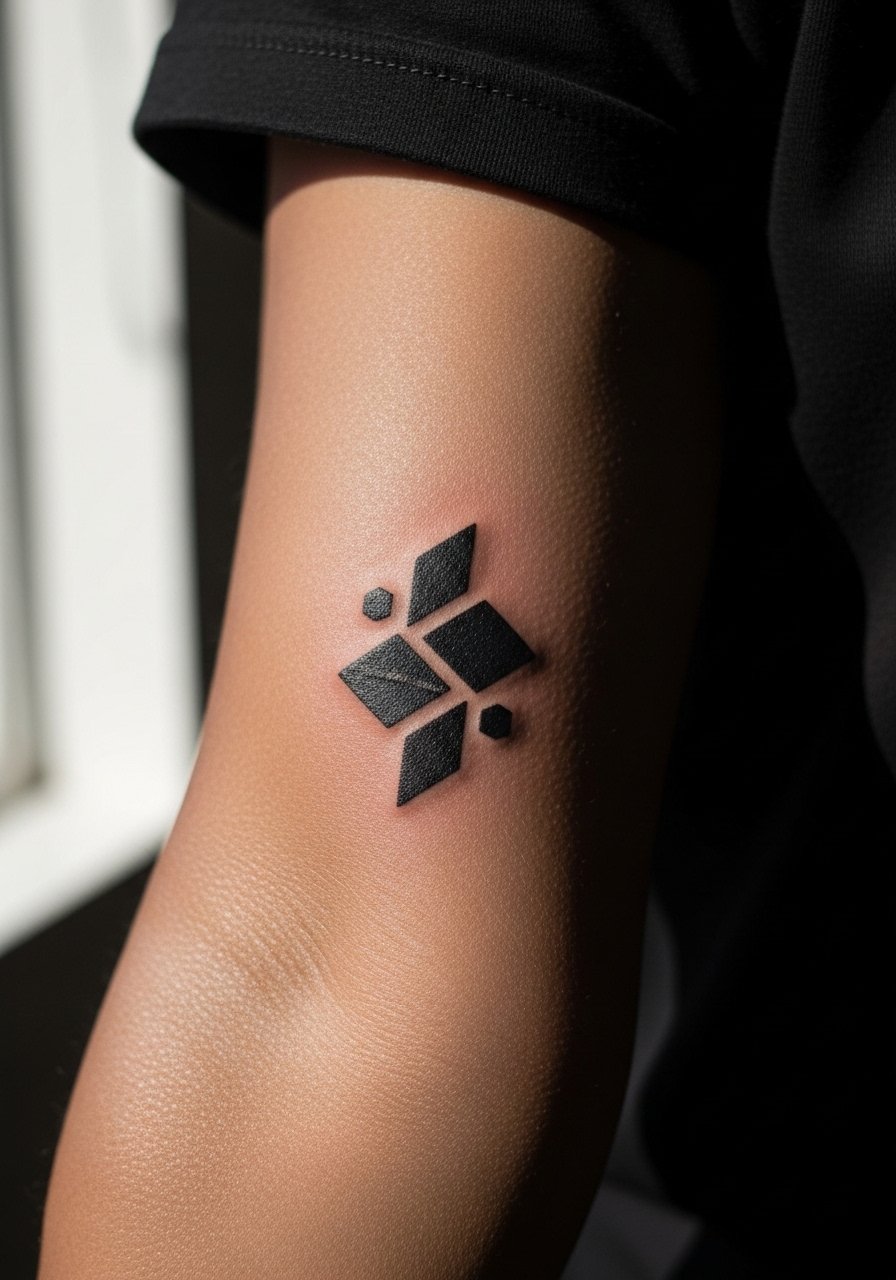
10. Overlapping Shape Patch on Mid-Forearm
Small overlapping shapes solve visibility challenges on toned forearms by creating depth with negative space. One session usually does it and pain levels are low. Tell your artist you want deliberate overlaps with negative space carved out so each shape keeps identity as the ink heals. People often ask for indistinct overlaps that become a muddle when the skin settles. This patch is best for someone building toward a sleeve or preferring a small, graphic focal point. For the appointment wear a short-sleeve athletic tee so the area is taut and easy to tattoo.
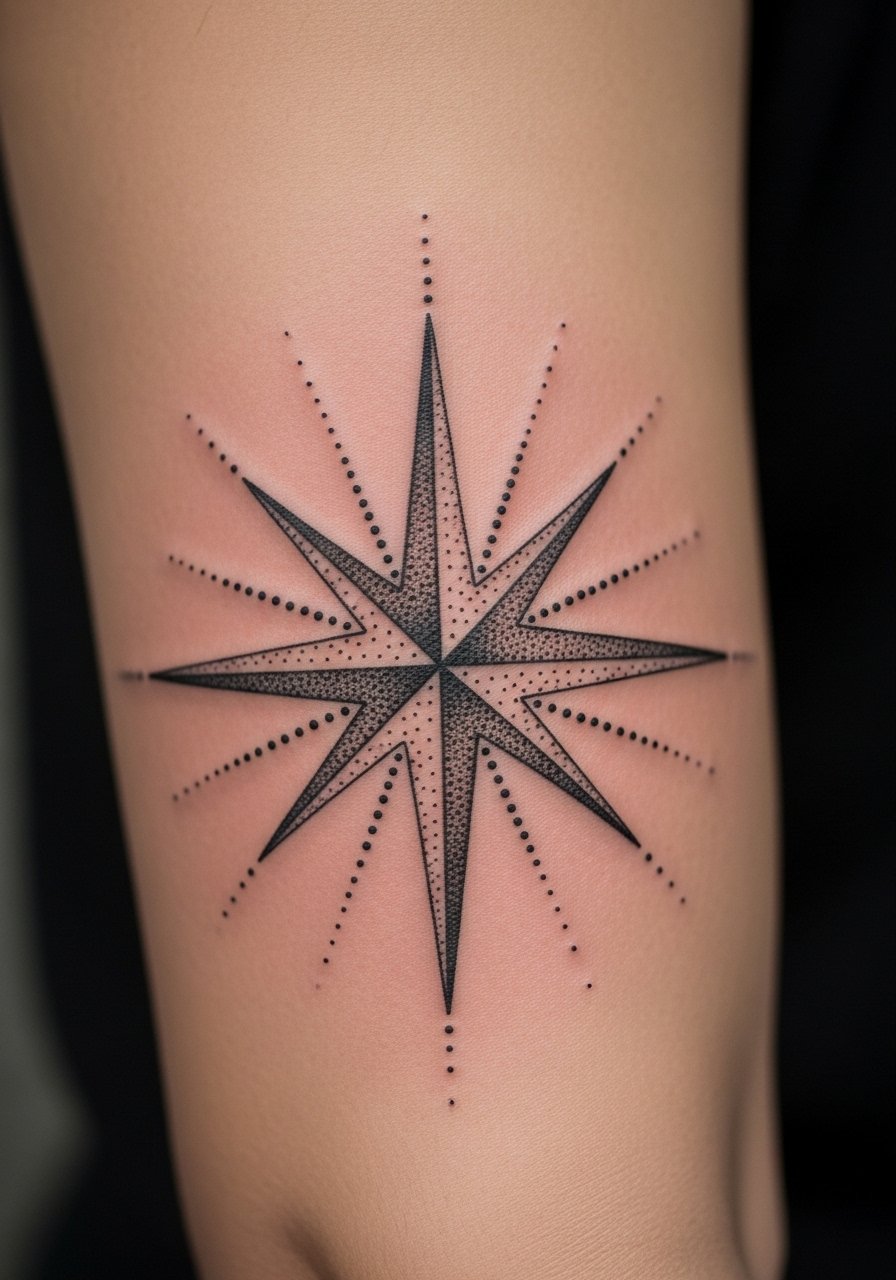
11. Pentagon Starburst Centered on Outer Forearm
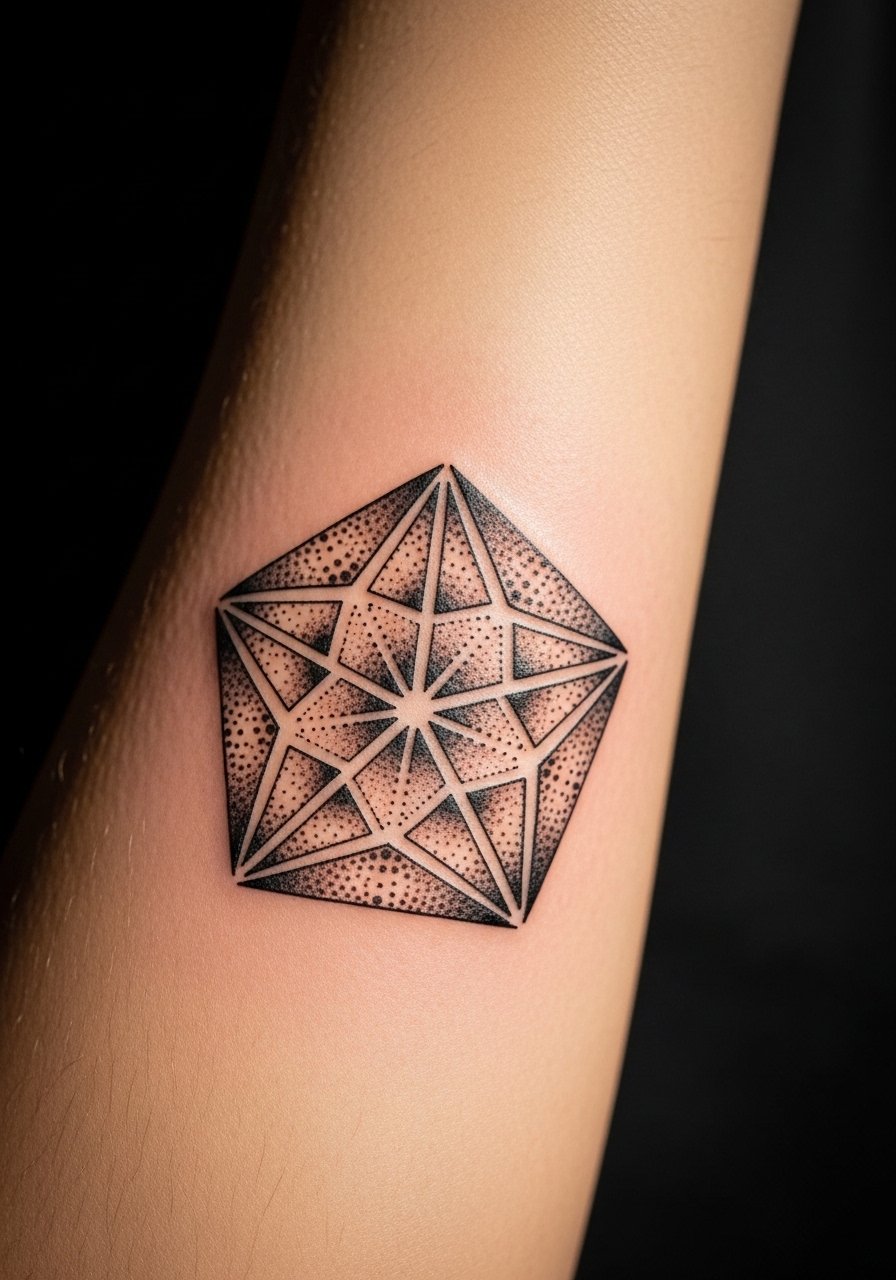
A pentagon starburst works as a focal mark if you balance dotwork with clear negative space. Sessions are moderate and pain typically ranges from mild to moderate. Ask for radiating dots that decrease in density as they move outward to preserve a crisp center for years. The early error is packing uniform dots too close to the center which blends into a shaded blob over time. This design suits someone who wants symbolic geometry without a sleeve commitment. For photos try a rolled cuff long sleeve top pushed to the elbow.
12. Abstract Geometric Lines Flowing Along Inner Forearm
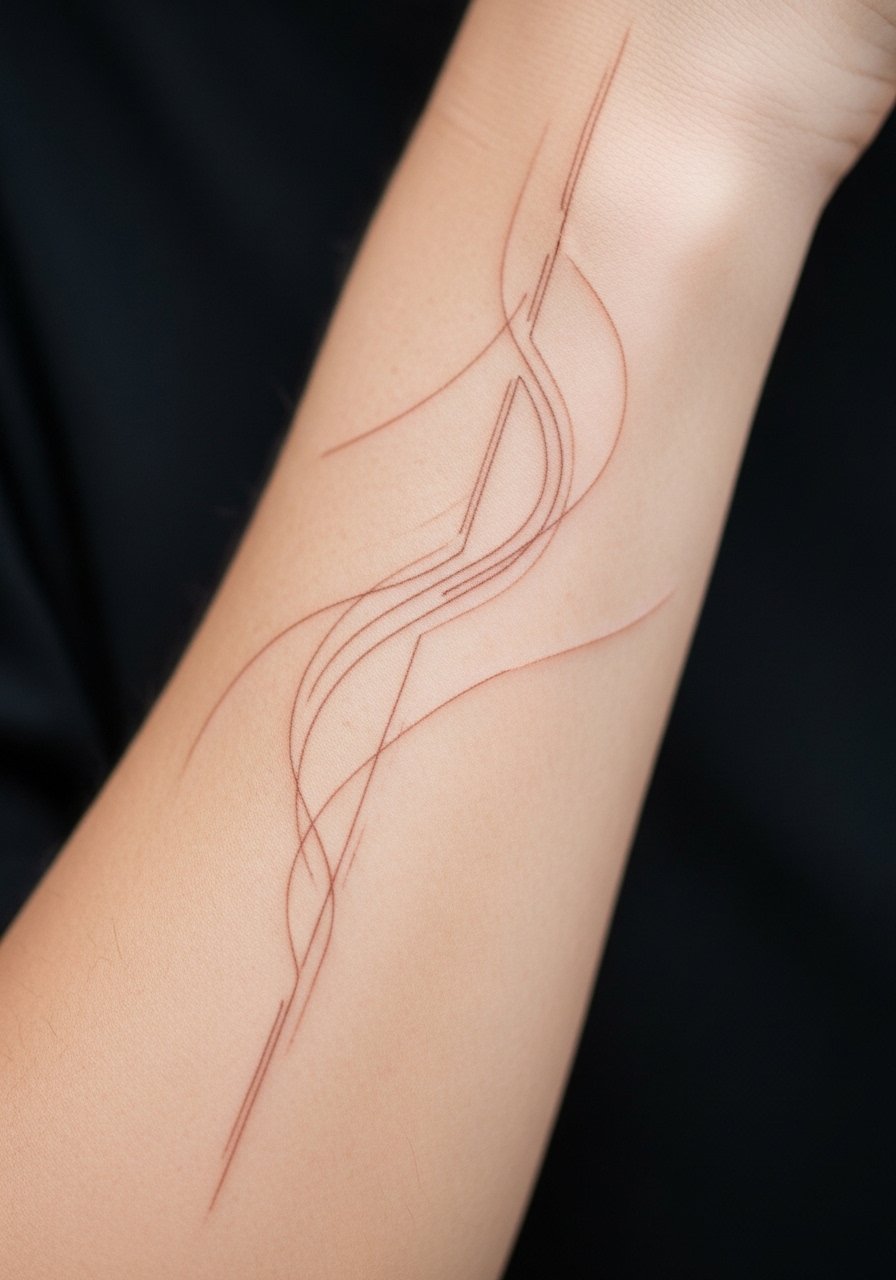
Abstract line flows create the illusion of motion along the arm and usually finish in a single short session with low to moderate pain. Tell your artist the path you want the eye to follow so anchor points sit over flatter skin. A common mistake is putting too many crossing lines on curved spots which creates early line merging. This style ages well with lighter line weight that leaves breathing room. For the session wear a loose tank so the inner forearm is fully exposed.
13. Linear Constellation Band Near Wrist
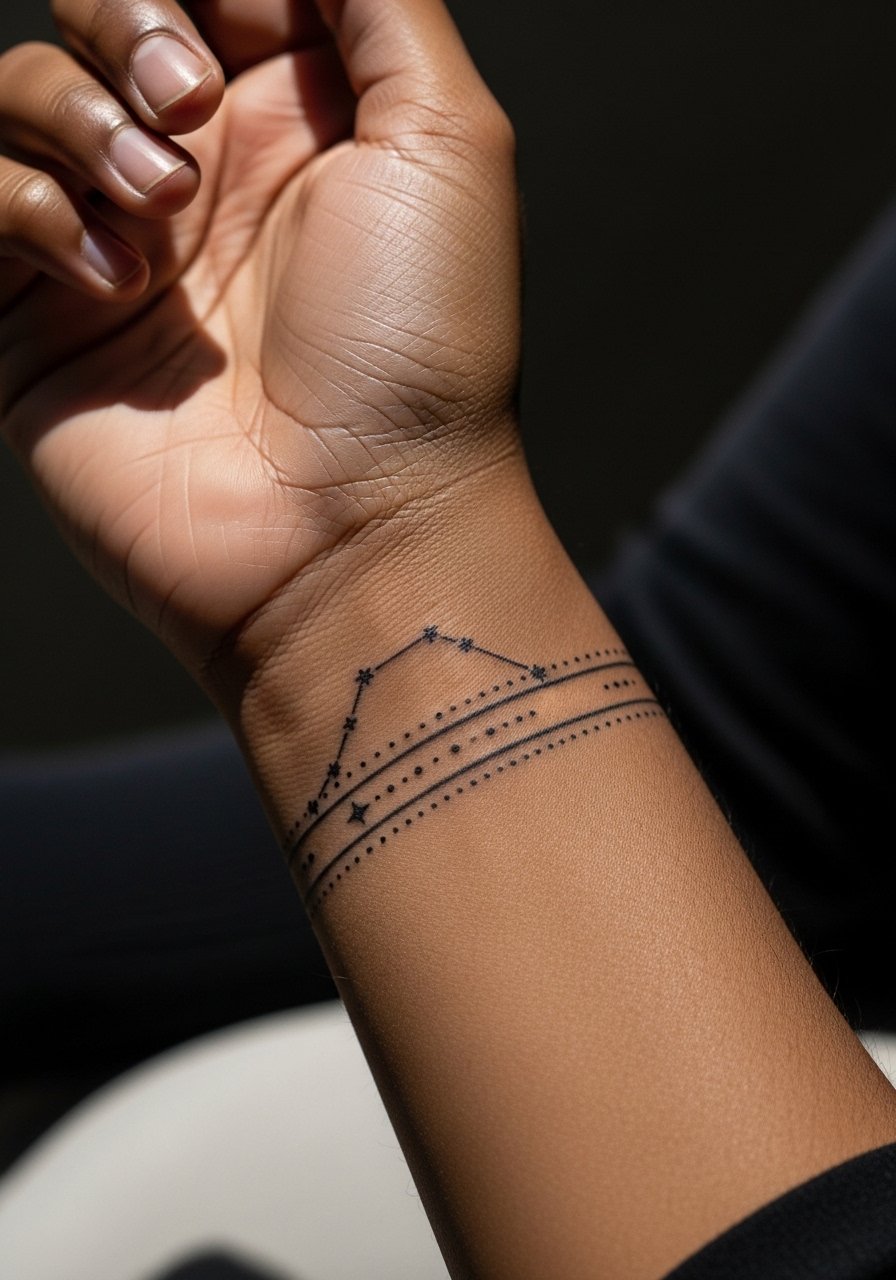
Wrist bands feel personal but face friction from clothing and hand washing. Pain is low to moderate and sessions are brief. Ask for slightly bolder anchor points at the ends of the band to prevent early fading from wrist movement. The mistake is asking for ultra-fine, continuous rings that lose definition where skin flexes. Expect a touch-up within two years for this high-movement zone. Pair with a dainty cuff bracelet when you want to complement the band without crowding it.
14. Stipple-Shaded Geometric Leaf Along Forearm
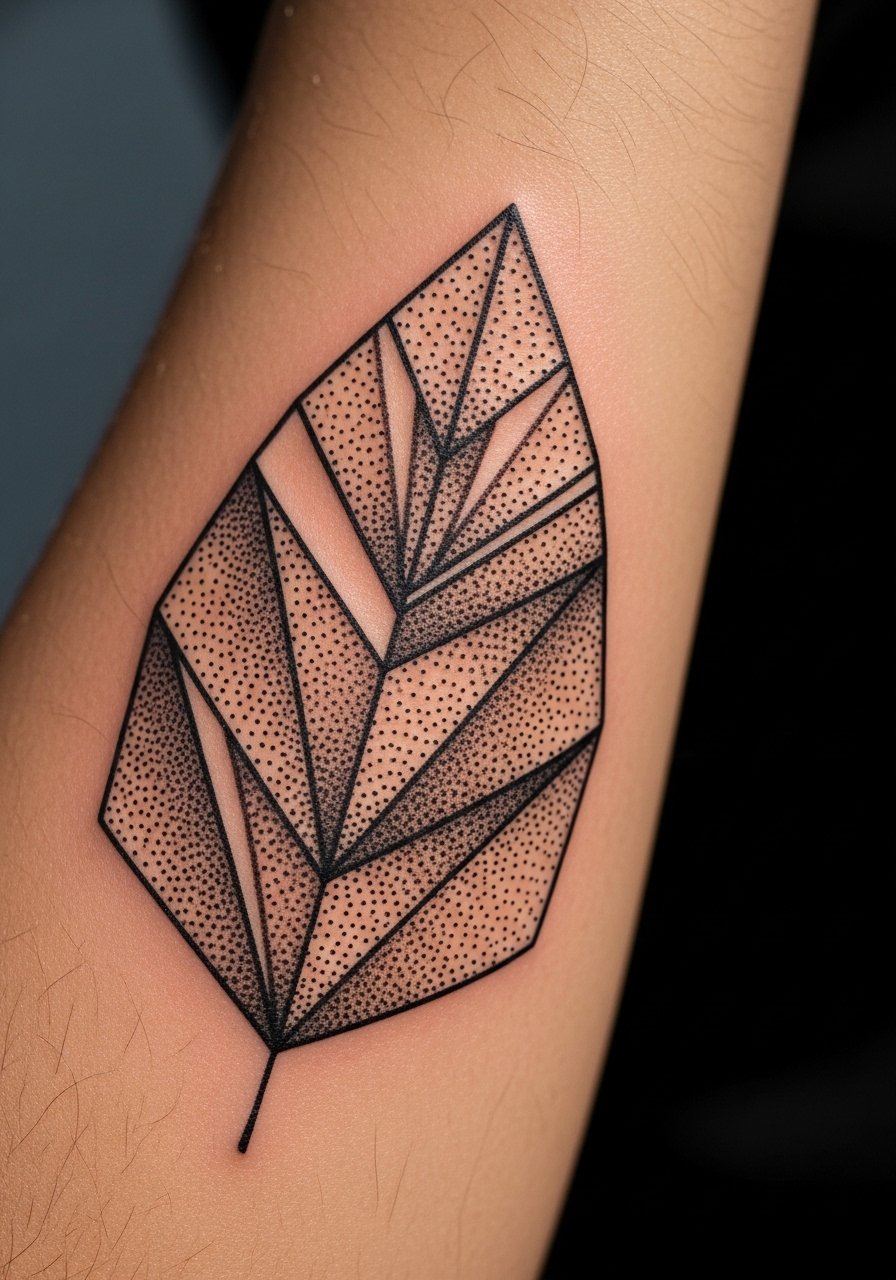
Geometric botanical motifs add organic movement to rigid shapes and usually take a single moderate session. During consultation, specify a taper in stipple density so the leaf reads light toward its tip and solid at the base. New clients sometimes request heavy fill throughout which flattens the leaf as it heals. For longevity, avoid tiny dots packed into tight veins. This placement suits someone who wants a feminine geometric accent that pairs well with everyday jewelry.
15. Interlocking Rings Panel Mid-Forearm
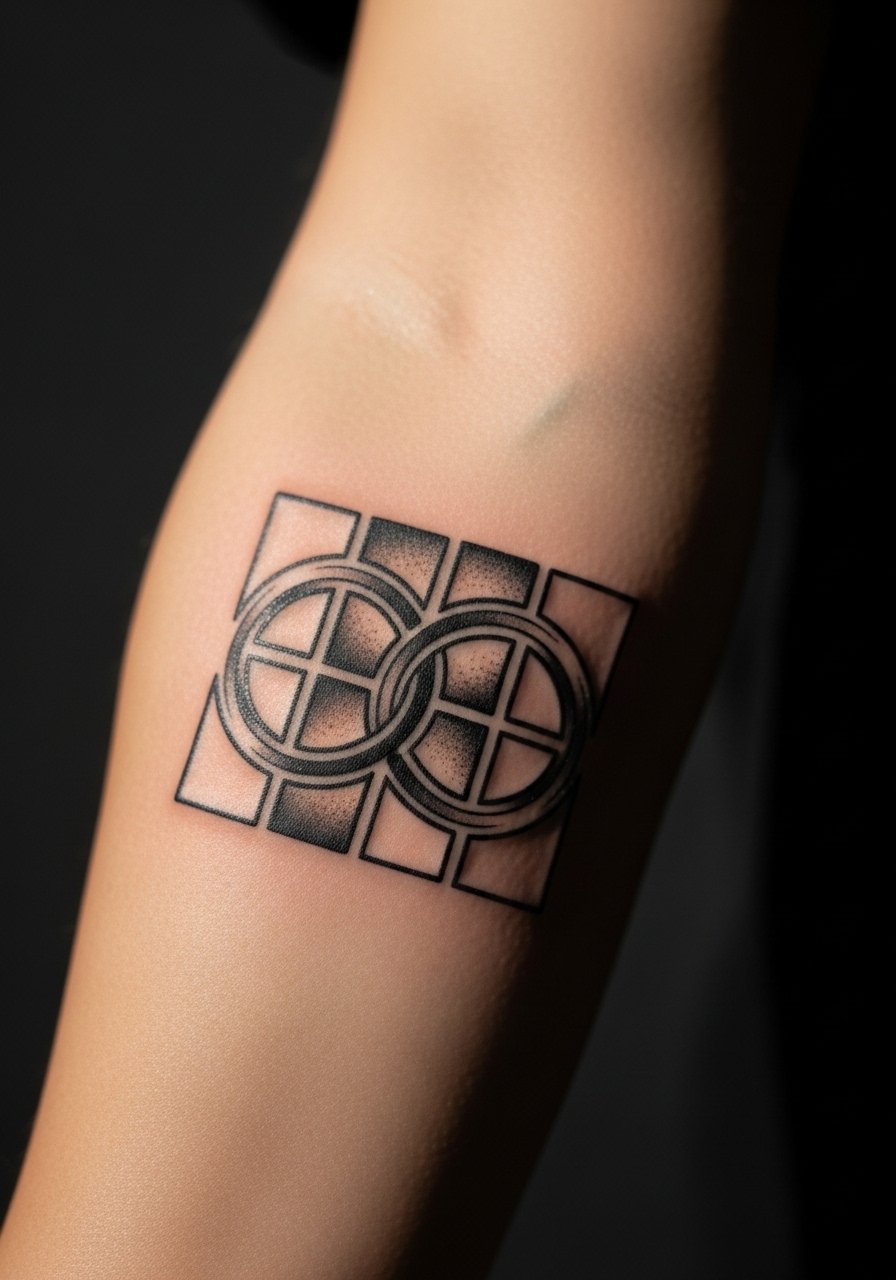
Interlocking rings make for bold negative-space play and usually run moderate session time. Tell your artist to prioritize clean edges on each ring so the negative windows do not collapse when the skin settles. The common mistake is drawing rings too close which creates merged darks after a year. This design is best for outer forearm display where distance and viewing angle let the geometry sing. For showing it off try a loose fit button shirt with sleeves pushed up.
16. Small Isometric Cube Cluster Near Wrist
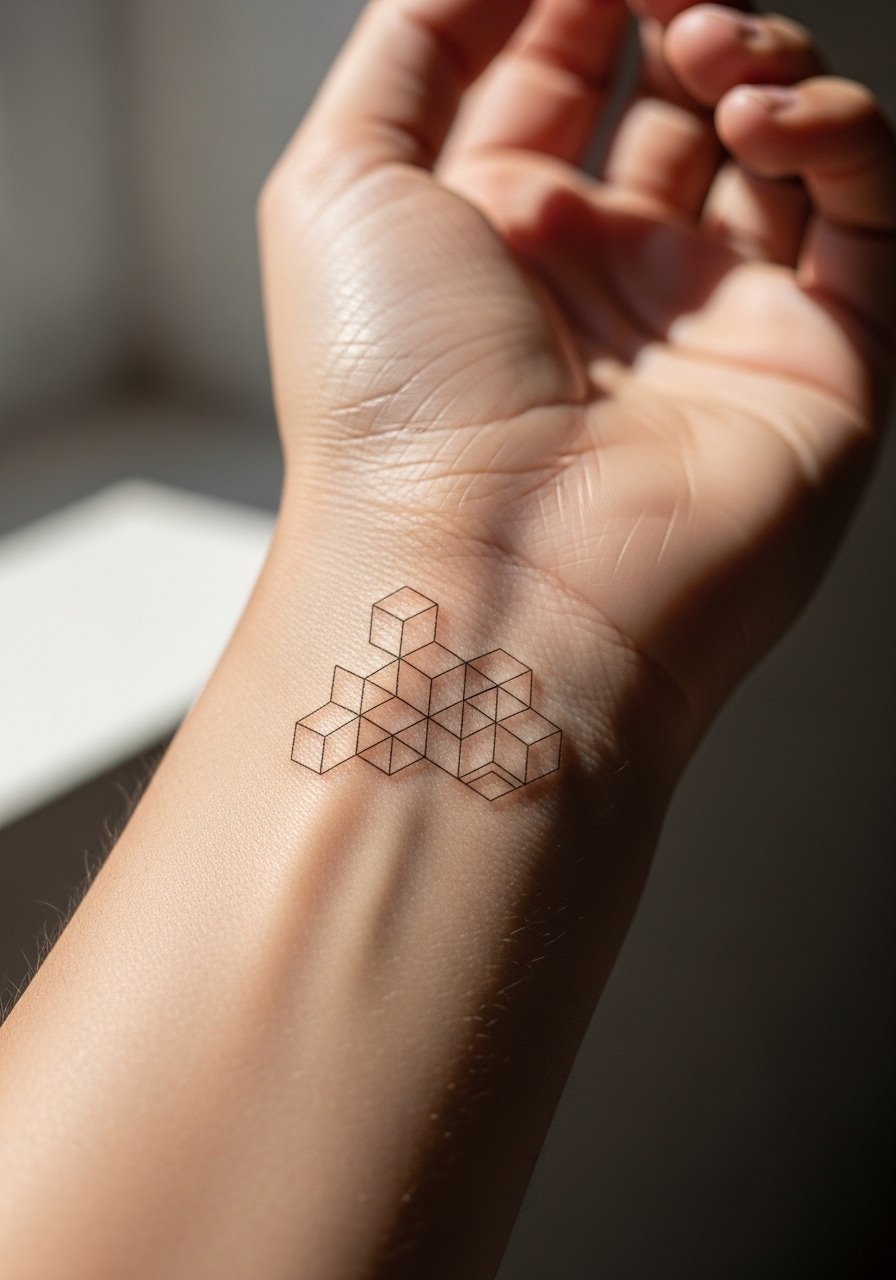
Isometric cube clusters read dimensional when each cube has clear edges. Sessions are short and pain is generally mild. Request slightly thicker corner lines so the cubes keep their skewed perspective after healing. Shrinking them too much is the usual error, since small cubic edges merge. This is ideal for someone who wants a micro-geometry accent rather than a statement piece. For the appointment wear a sleeveless top to keep the wrist area accessible.
17. Elongated Mandala That Follows the Arm Contour
Elongated mandalas respect the arm contour and age better than circular plates on curved skin. Expect multi-session work and moderate pain for extended designs. When you brief the artist, emphasize petal elongation and directional flow so the piece follows muscle lines and does not appear distorted. The common mistake is using a circular mandala without proportion adjustments which puckers on the forearm. For outings, an oversized denim jacket with rolled cuffs frames the elongated form and keeps attention on the texture.
18. Micro-Geometric Patch with Negative Space
Micro patches trade scale for precision and need slightly stronger outlines than ultra-fine pieces. Sessions are short and pain is low to moderate. Tell your artist you prefer defined borders around negative areas so the empty zones remain crisp. A frequent error is relying solely on hairline strokes that blur into soft gray on lighter skin. This approach suits people building a collection of small geometric marks rather than one large piece.
19. Radial Dotwork Compass on Outer Forearm
A radial compass benefits from spokes that are slightly bolder than inner dots so directionality survives skin aging. Expect moderate session time and moderate pain for a 3-5 inch design. During consult ask for graduated dot density and clear spoke endings to avoid a sunken center effect over time. The mistake is equalizing all dots and spokes which blurs focal points by year three. For showing this piece, roll cuff sleeves or wear a linen button down in earth tones to echo symmetry.
20. Asymmetrical Geometric Bar That Follows Vein Lines
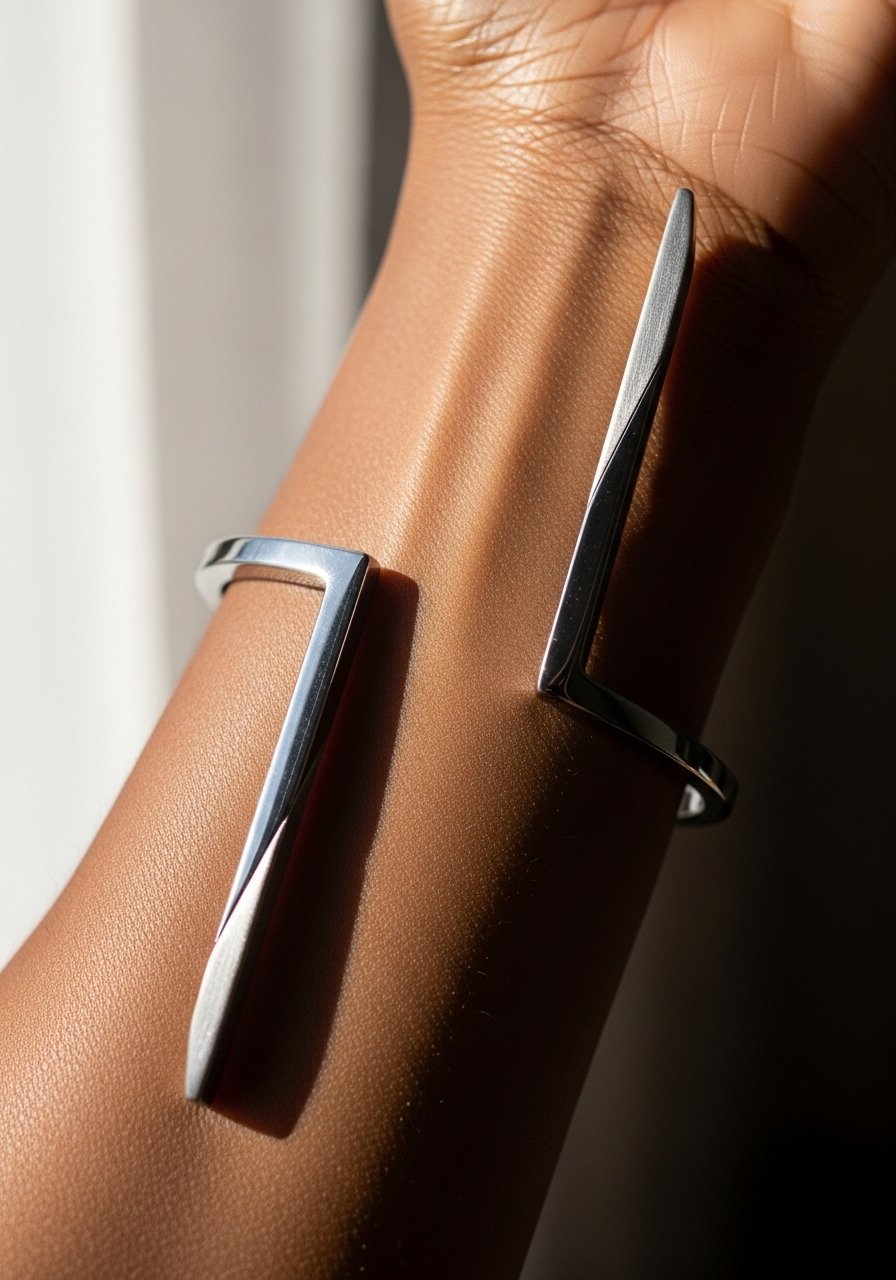
Asymmetrical bars look intentional when artists align them with natural anatomical lines. Pain is low to moderate and sessions are brief. Ask for a stencil check in both standing and seated positions so the bar reads straight whether your arm is relaxed or flexed. People sometimes request perfectly straight bands without considering the arm's natural curve which leads to a crooked look in photos. This style is great for someone who wants low-commitment geometry with clean photographic lines.
21. Layered Triangle Chevron Patch
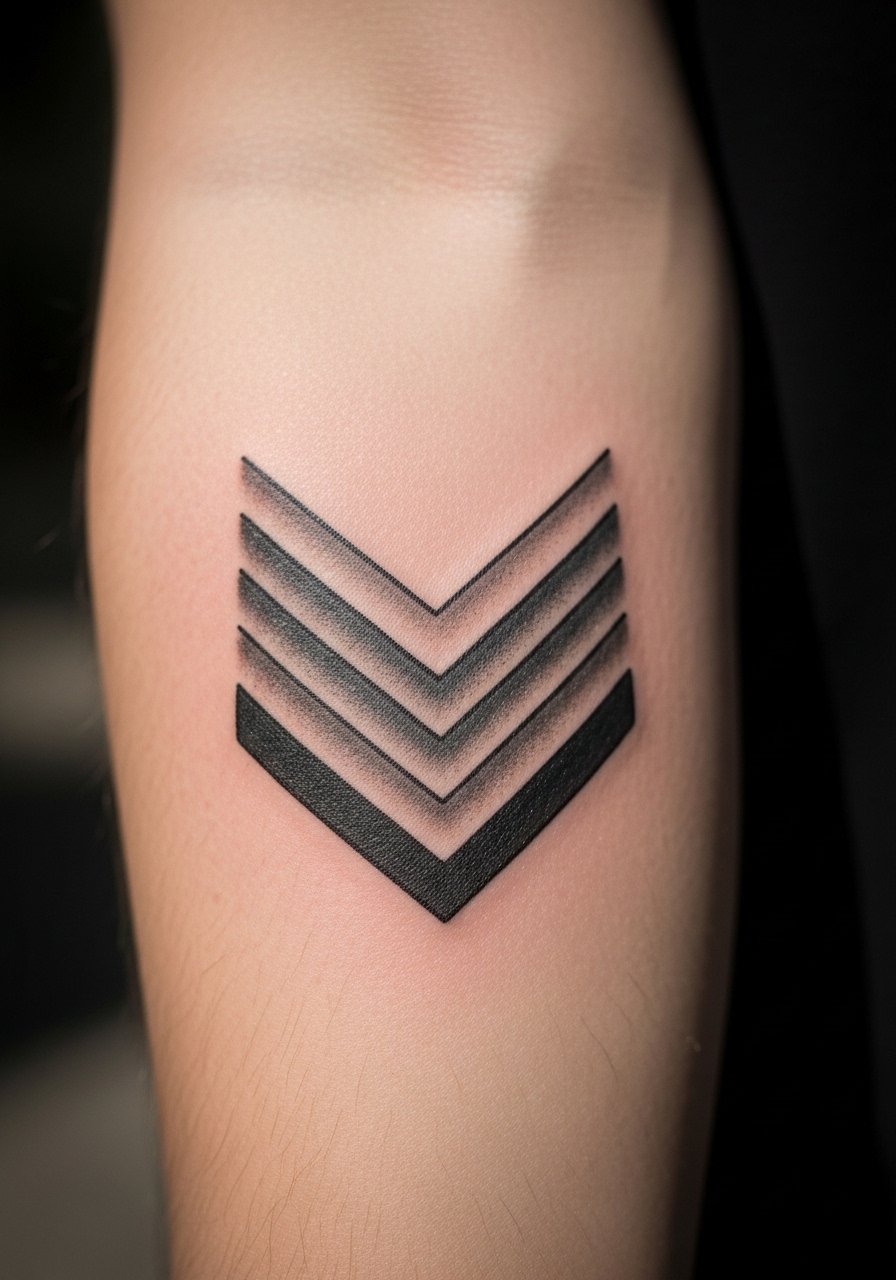
Chevron stacks create movement when each triangle is offset and given negative-space breathing. Sessions are moderate and pain varies with shading. Specify which edges you want crisp and which you prefer softened, so the stack keeps depth across years. The mistake is uniform shading through layers which flattens the optical effect after healing. For evenings out pair the piece with a cropped sweater pushed up to reveal the chevrons stylishly.
22. Minimal Geometric Arrow Along Forearm Edge

Arrows are deceptively simple and need crisp endpoints to read as a symbol. One short session usually completes them and pain is low. Tell your artist to check the arrowhead angle on your arm curvature to avoid a skewed finish. The common error is aligning arrowheads without considering muscle shape which makes them sit oddly when the arm moves. This option suits someone who wants a directional element that complements other small pieces.
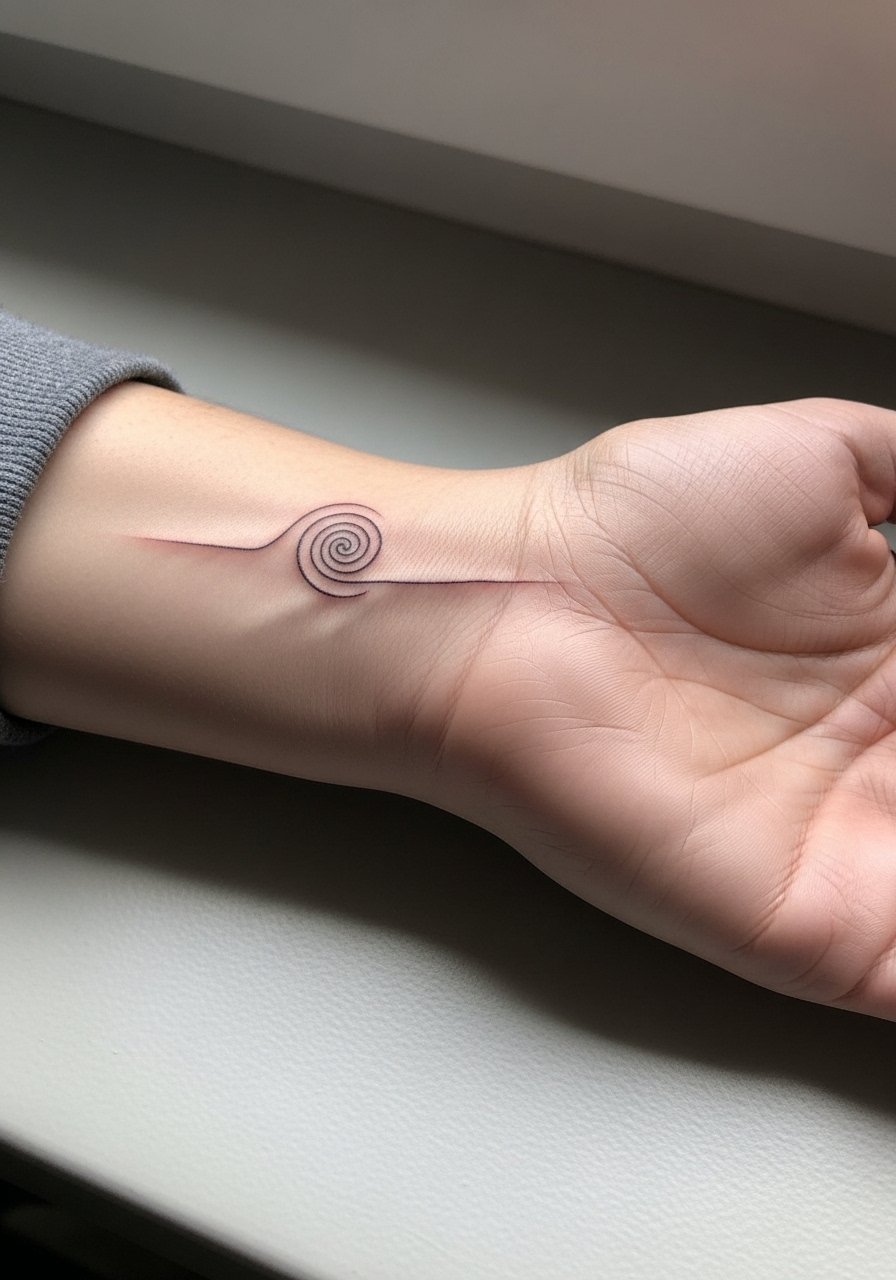
23. Fine Line Spiral Accent Near Wrist
Small spirals near the wrist are subtle but vulnerable to friction from bracelets and watches. Expect mild pain and a short session. Ask for slightly thicker line anchors where the spiral overlaps to keep form as the skin stretches. The controversy about fine line durability applies here too. Some artists claim wrist skin stretches and blurs lines quickly. Others say with correct depth and spacing the spiral holds. Ask your artist where they stand and what their portfolio shows for wrists. For styling, wear a dainty thin chain bracelet on the opposite wrist to balance attention.
24. Circular Grid Medallion Mid-Forearm
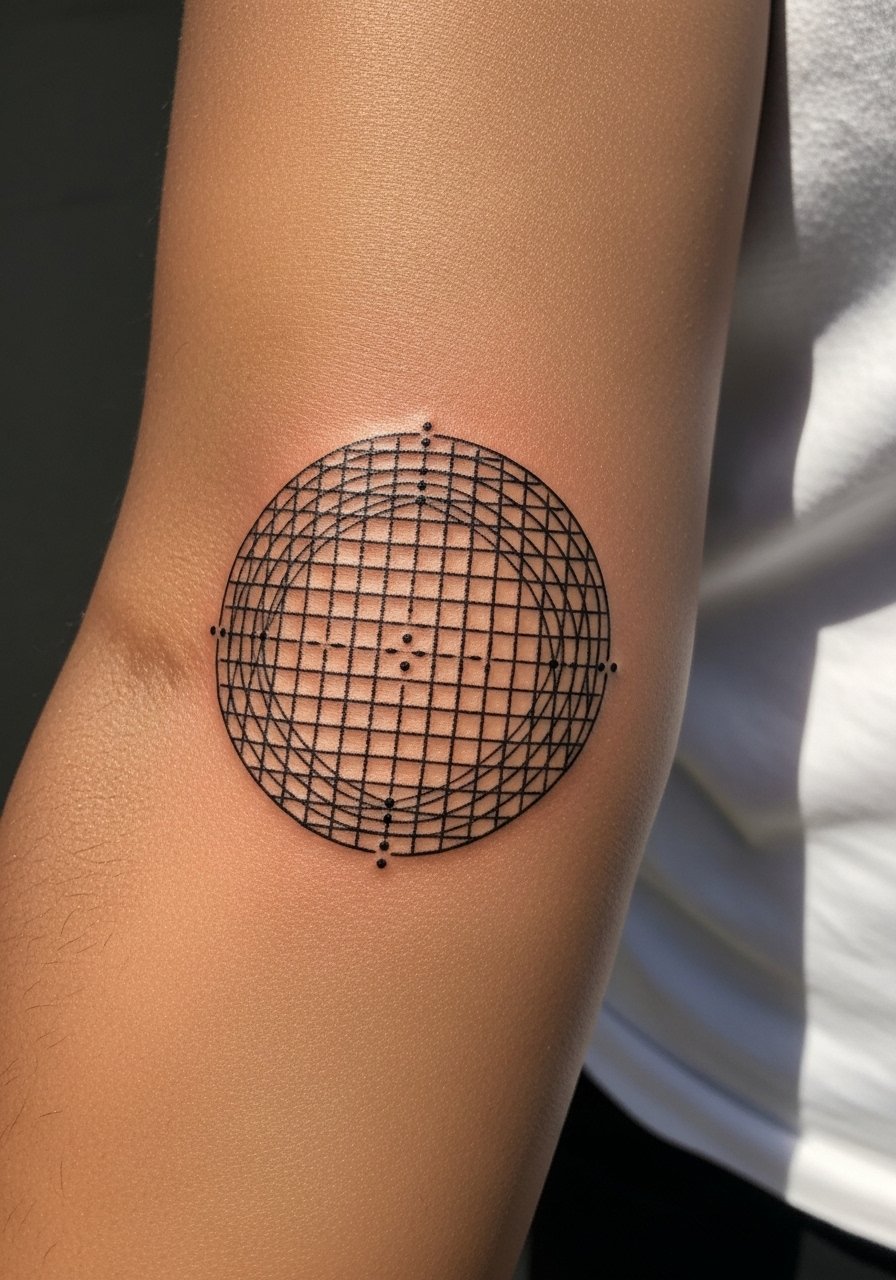
Medallions work when concentric bands have measured spacing and distinct contrast between bands. Sessions are moderate and pain varies with shading. During consult request that inner rings be slightly wider than outer ones so the optical center does not collapse over time. A typical mistake is compressing too many rings into a small circle which blurs into a gray focal spot. This piece pairs well with rolled sleeves and minimal jewelry to keep the medallion visible.
25. Single-Line Geometric Face Outline Along Forearm

Single-line portraits or faces translate into a geometric aesthetic that is modern and minimal. Expect low to moderate pain and a single session for a small composition. Tell your artist you want consistent continuous pressure along the line so it does not thicken in patches. People sometimes ask for a line too thin which fragments after healing. This design suits someone who wants an artistic, wearable sketch that pairs with simple rings or a watch.
26. Stacked Seed Motifs from Wrist to Mid-Forearm

Stacked seed motifs create a rhythm that moves with the arm and favors slightly increasing sizes toward the elbow. Sessions may be split and pain is moderate for longer stacks. Ask for each seed to grow incrementally so intersections do not crowd. The common error is identical sizing which makes the stack look repetitive and crowded as it heals. This layout is ideal for someone who wants a linear narrative without full sleeve commitment.
27. Abstract Geometric Sleeve Starter Patch
A sleeve starter patch must plan for future fills and flow toward the elbow. Expect a moderate session and moderate pain for well-composed patches. When you consult, mention possible future color or blackwork so the artist composes shapes that interlock later. A frequent mistake is treating the patch as a standalone piece without edge planning which forces awkward joins later. This option fits someone mapping a progressive sleeve build over time. For the session, wear a tank top or loose button-down so the artist can reach the area across multiple sittings.
Frequently Asked Questions
Q: How much does a geometric forearm tattoo usually cost and how many sessions will it take?
A: Costs vary with size and detail but planning in ranges is more useful than fixed numbers. Small minimalist patches often finish in one session, while full forearm panels and half sleeves take multiple sessions. Expect denser dotwork or complex interlocking patterns to need extra sessions. Ask your artist for a session plan during consultation so you both agree on timing and spacing.
Q: Will fine line geometric tattoos blur faster than heavier blackwork on forearms?
A: Fine line can soften sooner because the lines are thinner and the skin on the forearm sees sun and friction. One camp argues that fine line fades rapidly in two to three years. The other camp says correct needle depth and spacing keeps them stable longer. In practice it depends on the artist's technique, your skin, and daily sun exposure. Plan for a possible touch-up around year two to three if you choose ultra-fine linework.
Q: What should I wear to the appointment for an inner forearm or outer forearm piece?
A: For inner forearm work wear a sleeveless tank or a loose short-sleeve tee so the artist has unobstructed access. For outer forearm pieces a loose button-down pulled aside works well. Comfort and easy access beat style when you are in the chair.
Q: How do geometric dotwork designs age differently across skin tones?
A: Dotwork visibility can vary with skin tone and contrast. On darker skin tones artists may increase dot size and spacing slightly so stipple remains visible once healed. On lighter tones finer stippling reads well initially but needs careful spacing to avoid early merging. Ask your artist to show healed photos on similar skin tones via tag searches or portfolio filters when researching studios.
Q: Are there discovery pathways to find artists who specialize in geometric forearm work?
A: Yes. Search style-specific hashtags like #geometrictattoo and #dotworkmandala, use location tags such as "geometric tattoo [city]" on social platforms, browse tattoo directories with geometric filters, and check Reddit threads in r/tattoos for before-and-after healing photos. Always ask to see healed work on forearms.
Q: Do I need to plan for touch-ups differently if I want a sleeve later?
A: If you plan a sleeve, tell your artist up front so they can design edges and negative spaces to accept future fills. That planning helps avoid reworking clean pieces later. Expect touch-ups on dense intersections sooner than on single-line accents, and build that into your session timeline.
