
Fine line and bold color meet playful femininity in ways that surprise a lot of people. The classic American traditional toolkit of thick outlines and saturated fills can read soft and distinctly girly when scaled, color-balanced, and paired with delicate motifs. Below are 21 specific takes that keep the tradition intact while leaning into feminine shapes, placements, and wardrobe pairings you will actually want to show off.
1. Classic Sailor Rose on Outer Forearm

I keep pointing people to the outer forearm when they want a traditional rose that reads both bold and feminine. Ask your artist for slightly narrowed petals and a tighter center so the silhouette keeps its shape as the skin moves. The common mistake is shrinking the rose too small and then expecting the petals to remain distinct after two years. Expect moderate pain for the forearm and a single session for a medium piece. For showing it off, roll sleeves up and wear a rolled linen shirt in cream or olive to frame the piece without stealing the palette.
2. Tiny Anchor on the Inside Wrist
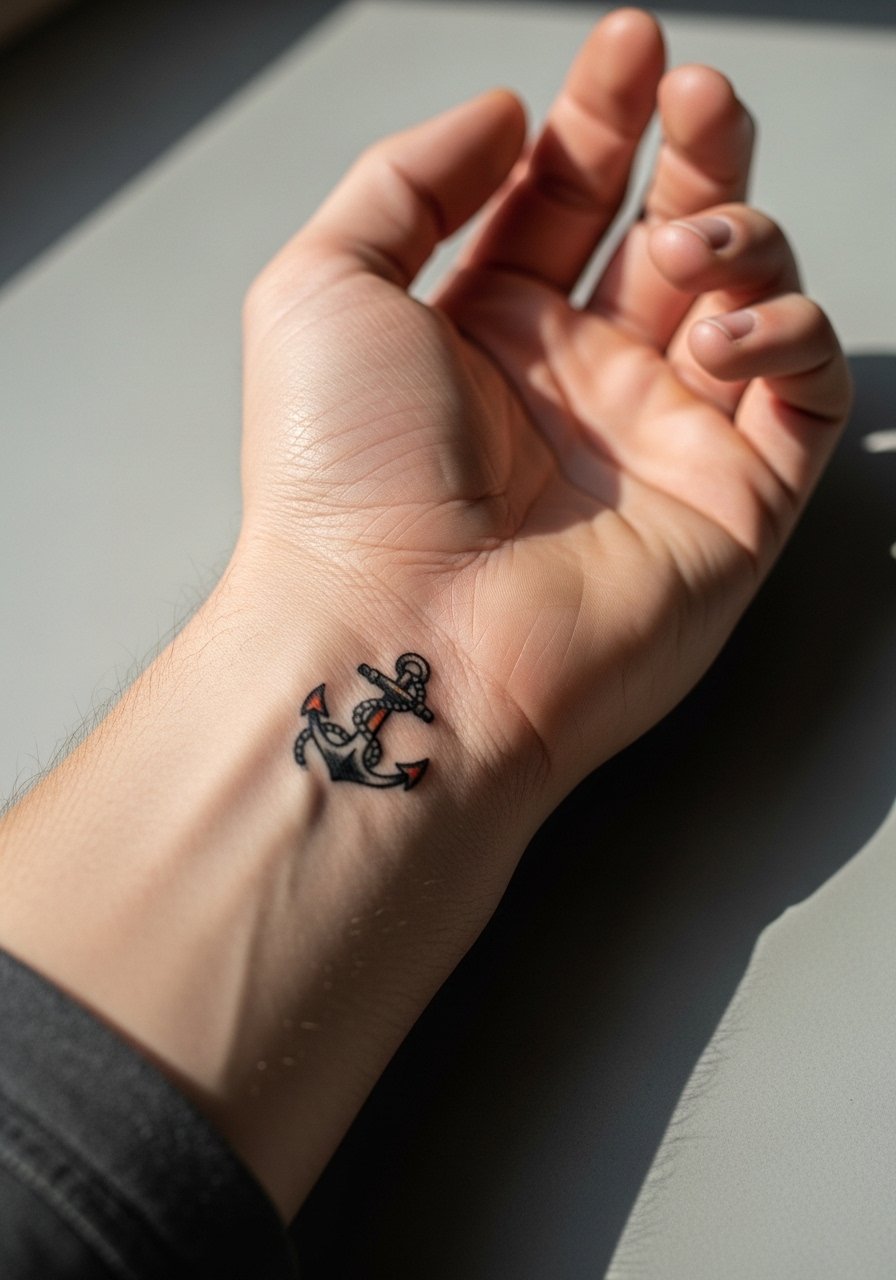
Fair warning about wrist work. The inside wrist is small and moves a lot, which speeds fading. For a tiny anchor, tell your artist you want bold outlines but scaled to allow a bit more negative space inside the shank. The usual misstep is asking for ultra-fine detail in a walnut-sized design. Expect a 30 to 45 minute session and a possible touch-up around year two for crisp anchors. Pair this with a delicate dainty bracelet to highlight the wrist without covering the anchor.
3. Girly Pin-Up Heart on Upper Outer Arm
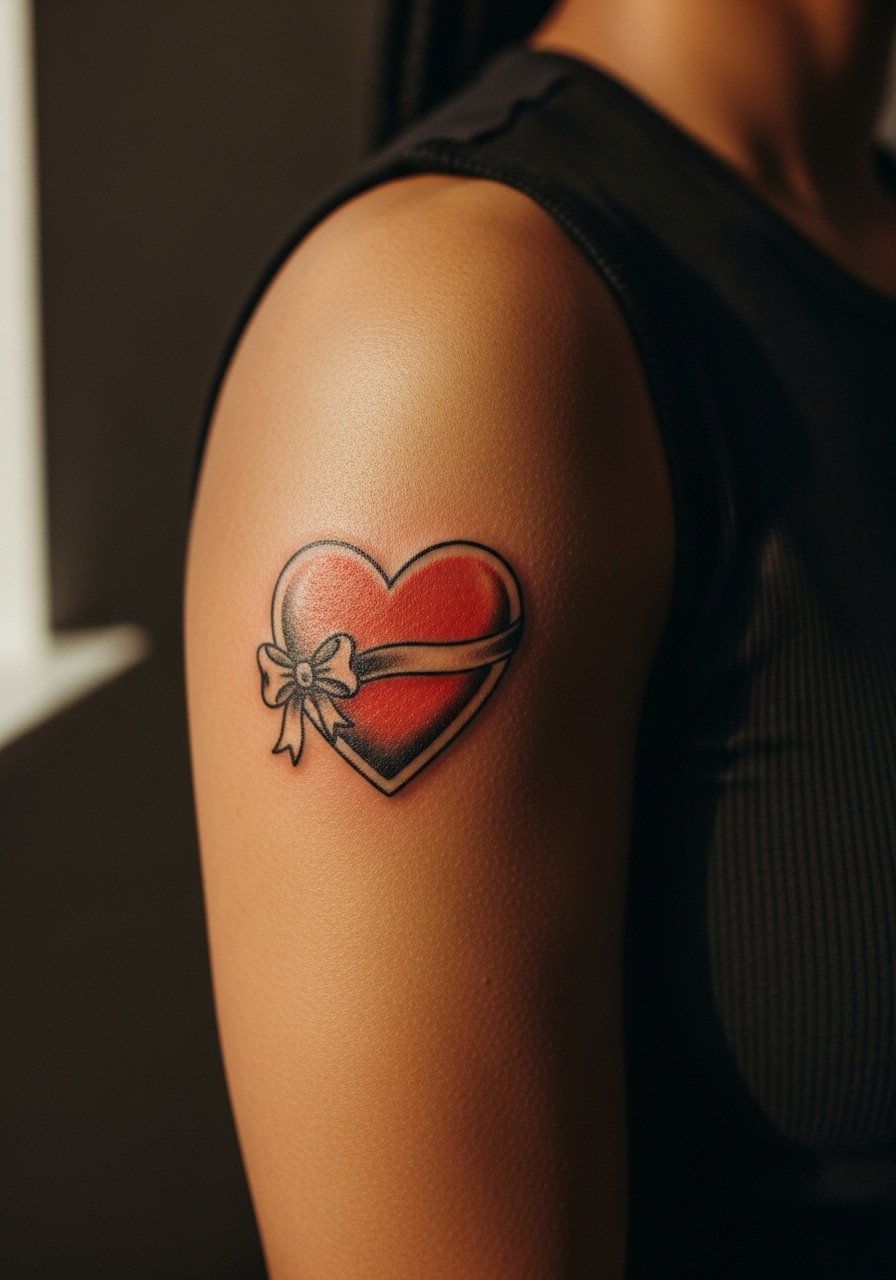
Most people picture pin-ups as big, retro portraits, but a compact heart-and-banner in traditional keys the vintage feel while staying flirty. In consultation, specify that you want saturated fills and clean black linework with a small banner rather than a full portrait. If you push for too much facial detail at this size it blurs into indistinct shading within a couple of years. Upper arm pieces are forgiving and usually finish in one session. For the appointment, a sleeveless top makes access easy and keeps you comfortable during longer shading.
4. Ribbon Banner Name Along the Collarbone

There is a cleanness to a collarbone banner when the ribbon follows the bone rather than crossing it awkwardly. Tell your artist to contour the ribbon to the collarbone curve and to keep lettering bold and slightly rounded. A mistake I see often is tiny script on the collarbone that becomes hard to read after sun exposure. Expect a short session and a touch-up window if you want the letters to stay sharp. This piece pairs with a wide-neck shirt you can pull aside during the session and wear afterwards to frame the ribbon.
5. Little Mermaid in Traditional Color on the Thigh

Thigh placements let you play with scale and color without constant sun exposure. For a girly mermaid, choose simplified shading and bold black anchors for contrast rather than tiny scales. The common error is over-detailing the tail at a small size which loses definition as it heals. Thigh sessions can be more comfortable than ribs, and you might book one longer session for a midsize piece. For the session, slip into high-waisted shorts so the artist can shift fabric without discomfort.
6. Sugar Skull Cameo Wrapped on the Calf

When you want a skull that reads romantic, frame it like a cameo with floral edging and soft color fills instead of heavy black surfaces. Tell the artist you want contrast in the petals and only selective dot shading inside the skull. Calf pieces are lower pain and usually finish in a single session for medium sizes. A frequent mistake is asking for dense black fills that cause the cameo shape to flatten over time. For dressing, try strappy sandals or rolled jeans so the calf stays visible without rubbing while it heals.
Studio Day Picks
The wrist, forearm, and calf pieces above all face different friction and exposure, so a few targeted items smooth the session and the first week.
- Stencil transfer paper kit. Lets you preview line placement on skin, which helps with collarbone banners and forearm roses before the needle touches the skin.
- Topical numbing cream. Useful for calf or thigh sessions when extra comfort keeps you still for cleaner outlines.
- Thin protective film roll. Protects wrist and finger work from daily washing abrasion during the first days of healing.
- Fragrance-free body wash. Gentle cleansing avoids irritating delicate linework on forearms and collarbones while you shower.
- Aquaphor healing ointment. A thin layer for the first few days helps keep fine outlines moisturized without clogging the pores.
7. Classic Swallow on the Shoulder Blade

Artists are split on tiny detail on the shoulder blade. One camp says the skin there moves too much and thin detail softens quickly. The other camp argues that proper spacing and confident black outlines keep the motif readable for years. I fall toward spacing and thicker anchors for longevity. This placement feels bold across the back and ages well if you avoid very fine crosshatching. Shoulder blade pieces often finish in a single session and feel like moderate discomfort. For showing it off, a tank top you can slide aside frames the swallow without exposing more than you want.
8. Floral Dagger Over the Sternum
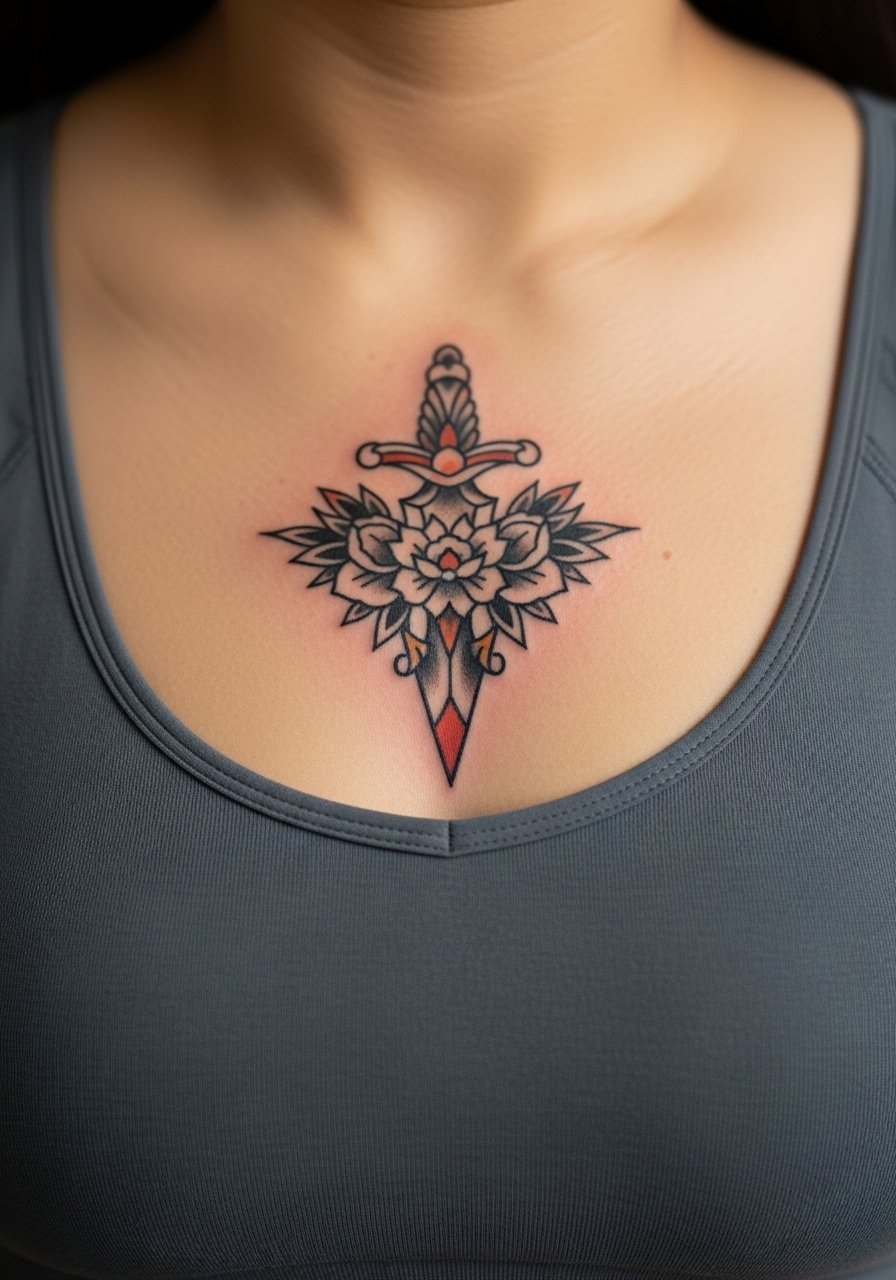
Fair warning about sternum work, it can be sensitive and needs an artist experienced with chest anatomy. The dagger benefits from strong outlines that read well across the contour. A common mistake is excessive tiny stippling that turns into a muddled area after a year. Expect a higher pain rating and possibly a split session if the design is tall. This placement requires a fitted sports bra or bandeau for the appointment so the artist can access the area without exposing more than necessary. Consider an artist who specializes in chest pieces for the best contouring.
9. Old-School Carousel Moon on the Ribcage
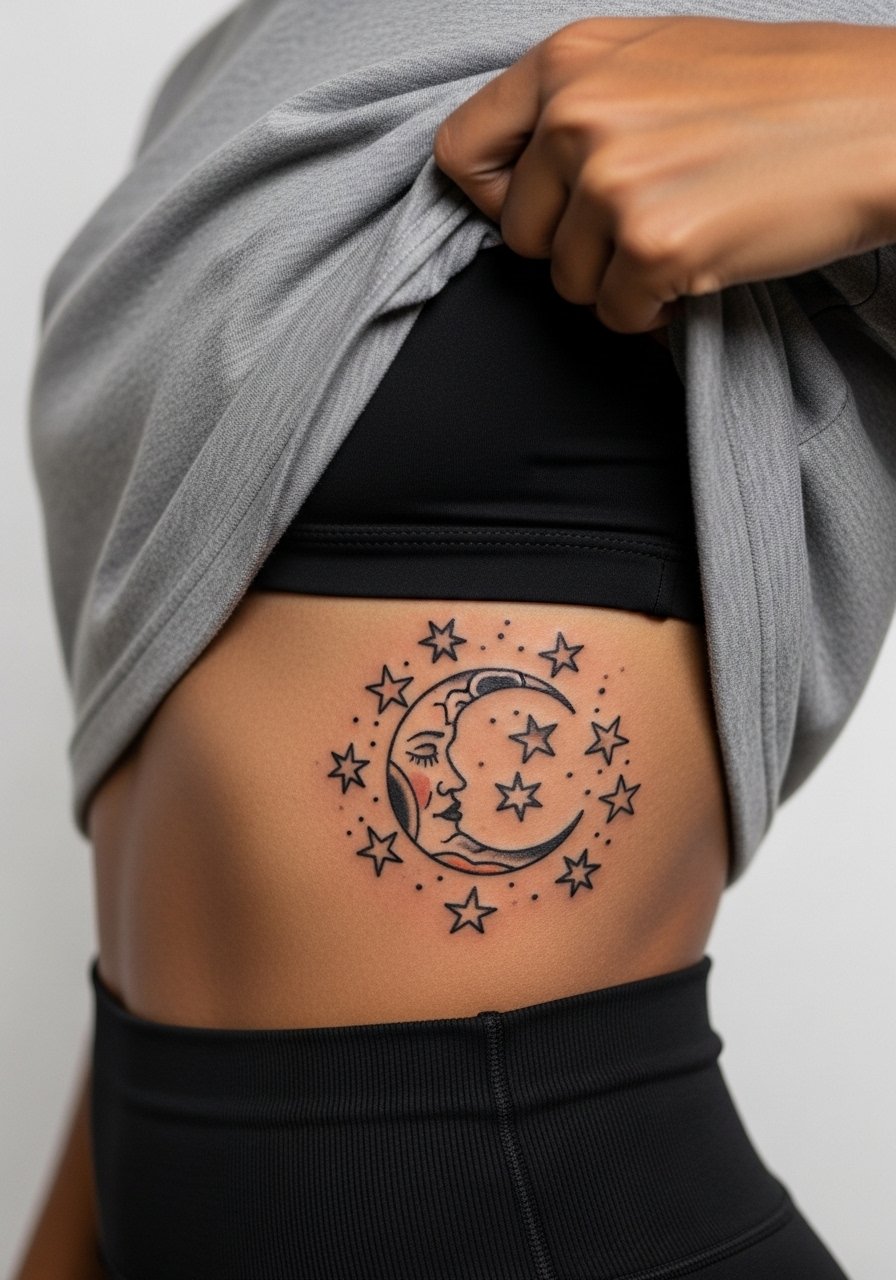
Most people underestimate the ribcage. That curvature and constant breathing means dense detail compresses quickly. For a small carousel moon, opt for bold outlines and simplified star clusters. The aging reality is that dense linework and tight lettering blur faster here than on the arm. Pain is significant and you may prefer splitting into two sessions. Ask your artist about depth and spacing, and avoid pushing for tiny flourishes that add healing risk.
10. Daisy Chain Anklet in Traditional Ink

Anklet tattoos are a clear example where small, bold shapes beat micro-detail. Tell the artist you want slightly thicker outlines on each daisy so the blossoms do not merge after months of shoes and socks rubbing. The typical mistake is asking for ultra-fine petals that disappear with friction. Expect a short session and likely a year-two touch-up if you wear closed shoes often. Pair the anklet with an understated minimalist ankle bracelet or sandals to frame the area without trapping moisture while you heal.
11. Scripted Phrase Along the Side of the Hand

Hand tattoos still affect hiring in some industries so think about your career path before committing. Side-of-hand script demands bold, simple lettering because the skin there is thin and moves constantly. The common error is choosing small cursive which breaks apart within a year. Expect sharp pain and frequent touch-ups for letters that must stay legible. For showing off without hiding it, stack slim rings rather than a chunky watch so you keep focus on the script. A dainty stacking ring set highlights the hand without covering the art.
12. Pinwheel Chest Piece Near the Collarbone

A pinwheel or sunburst on the chest reads feminine when centered and slightly asymmetric toward the shoulder. Tell the artist you want the brightest saturation near the center and feathered edges for a less blocky look. The usual mistake is overcompacting the rays which then merge visually after sun exposure. Chest pieces can be done in a single longer session or split if shading is heavy. For the appointment, wear an open collar shirt you can pull aside so the artist has clean access while you stay modest.
13. Crescent Moon and Stars Behind the Ear
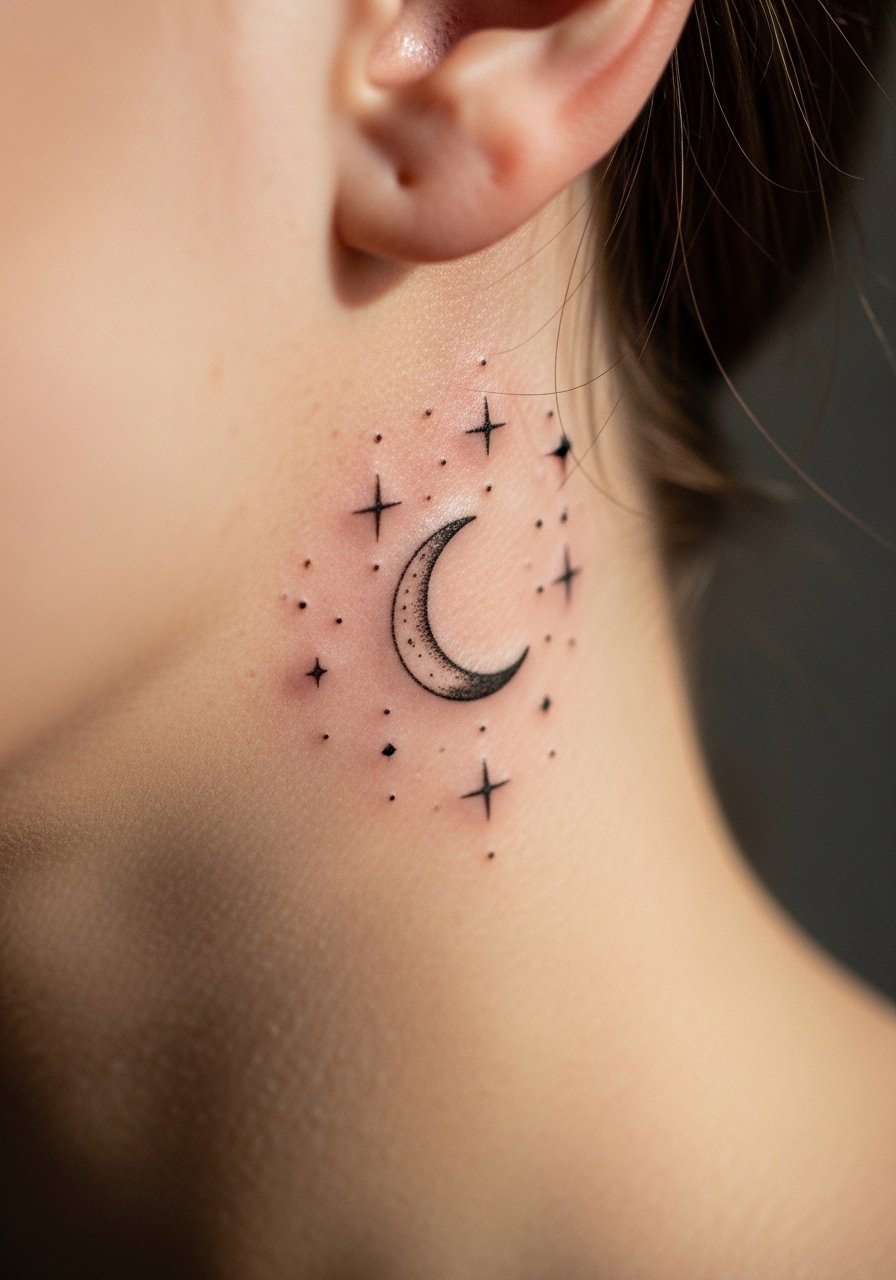
Behind-the-ear placements are intimate and need an artist who knows how to place on that curve. The mistake I see is asking for tiny filled details that an artist cannot space properly on that small patch. These pieces heal fast but are exposed to shampoo and pillow friction, so placement precision matters. Pain is brief and sharp. Because of the sensitive area, ask for clean minimal outlines and plan appointments around shampoos for the first few days.
14. Vintage Key on the Inner Bicep
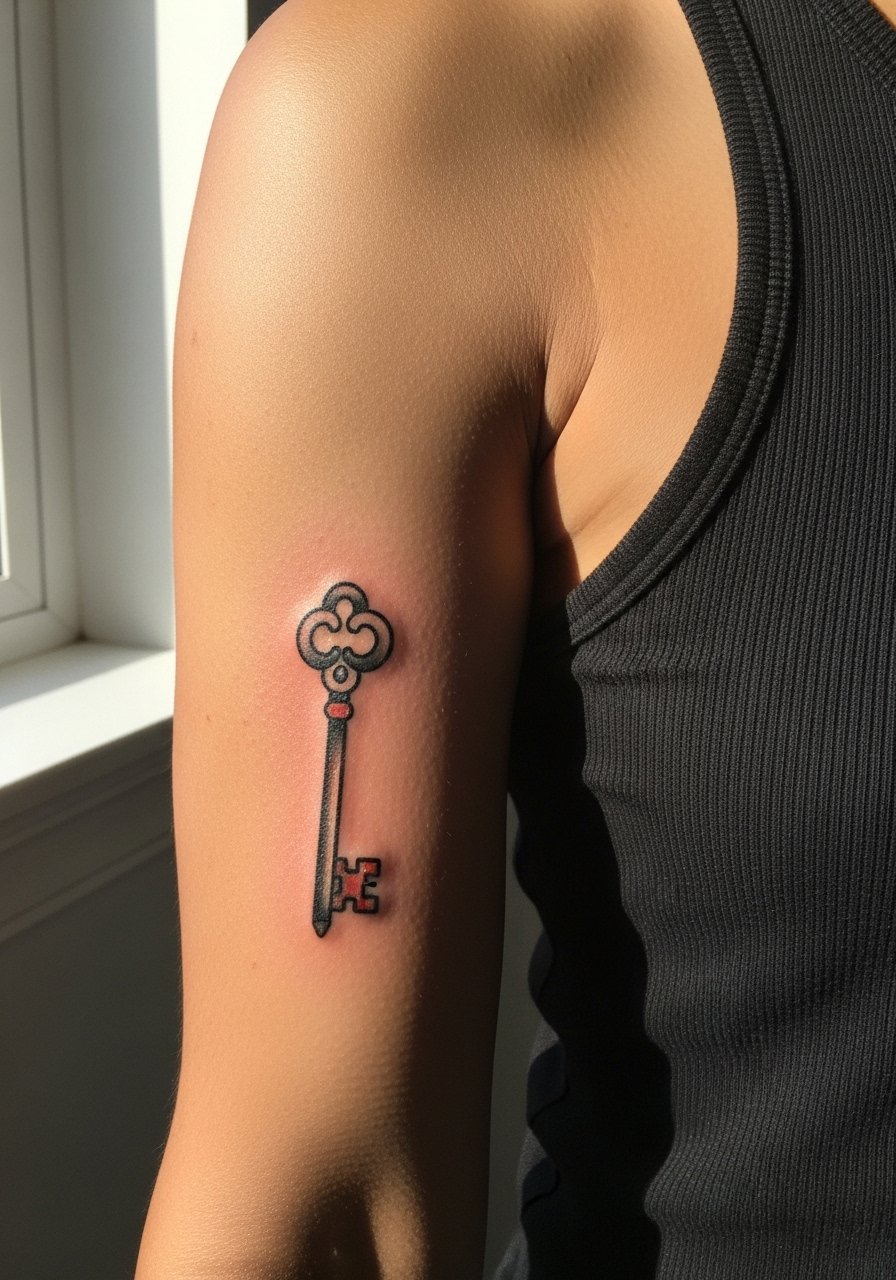
The inner bicep rewards slightly longer, vertical designs that read when your arm is down. For a key motif, specify stronger outlines in areas that will bear compression from the arm movement. A frequent mistake is choosing dense filigree that becomes fuzzy after six months. Inner bicep sessions can be tender and sometimes done in two shorter sittings. For comfort, wear a loose tank top you can lift without straining your shoulder.
15. Anchored Heart on the Upper Thigh

Upper thigh is a great hiding spot that still allows playful showing off. An anchored heart needs clear negative space around the anchor so the silhouette stays readable when you sit or move. The common mistake is hugging the design to the hip crease which compresses the lines. Expect a moderate session time and excellent longevity if you avoid tight waistbands early on. For the session, choose bottoms you can shift with minimal pressure and keep circulation normal.
16. Bold Traditional Butterfly on the Ankle

There is a neat balance between boldness and femininity with a butterfly done in traditional color blocks. Ask for slightly wider wing outlines so the colored panels remain distinct after months of shoe contact. The mistake is using too many tiny veins in the wings which disappear quickly. Ankle work is low to moderate in pain and usually a short session. Show it off with open sandals or low boots and consider a cropped pant or skirt as a frame.
17. Tiny Lucky Cat on the Finger

Finger tattoos are polarizing among artists. One group argues that the constant washing and low dermal depth causes fast fading and frequent touch-ups. The other group says bold, simple shapes done shallowly will last well enough if you accept touch-ups. I tell clients to expect annual refreshes for fingers and to avoid tiny linework. Fingers are painful and sensitive. For daily show, stack thin bands or choose ring-free fingers to keep the cat visible. A set of dainty stacking rings complements tiny finger work without obscuring it.
18. Compass Rose on the Back of the Shoulder

A compass rose reads classic when its cardinal points align with muscle flow. Tell the artist to orient the compass so it points naturally with your posture. A regular mistake is placing it too close to the shoulder cap where stretching blurs the outer points. Back-of-shoulder pieces heal well and usually take one session. For the appointment, wear a loose tank top you can slide off the shoulder for unobstructed access.
19. Stipple Shaded Rose Accent on the Forearm

There is a visual richness when traditional outlines meet stipple shading as an accent rather than the sole technique. Ask for stipple only in shadow pockets and keep saturation in the petals strong. The thing that ages poorly is mixing dense stipple across large areas which looks like uneven texture later. Forearm pieces are visible and tolerate touch-ups well. Show it off with a rolled sleeve linen shirt to keep attention on the forearm without competing textures.
20. Nautical Star on the Lower Back
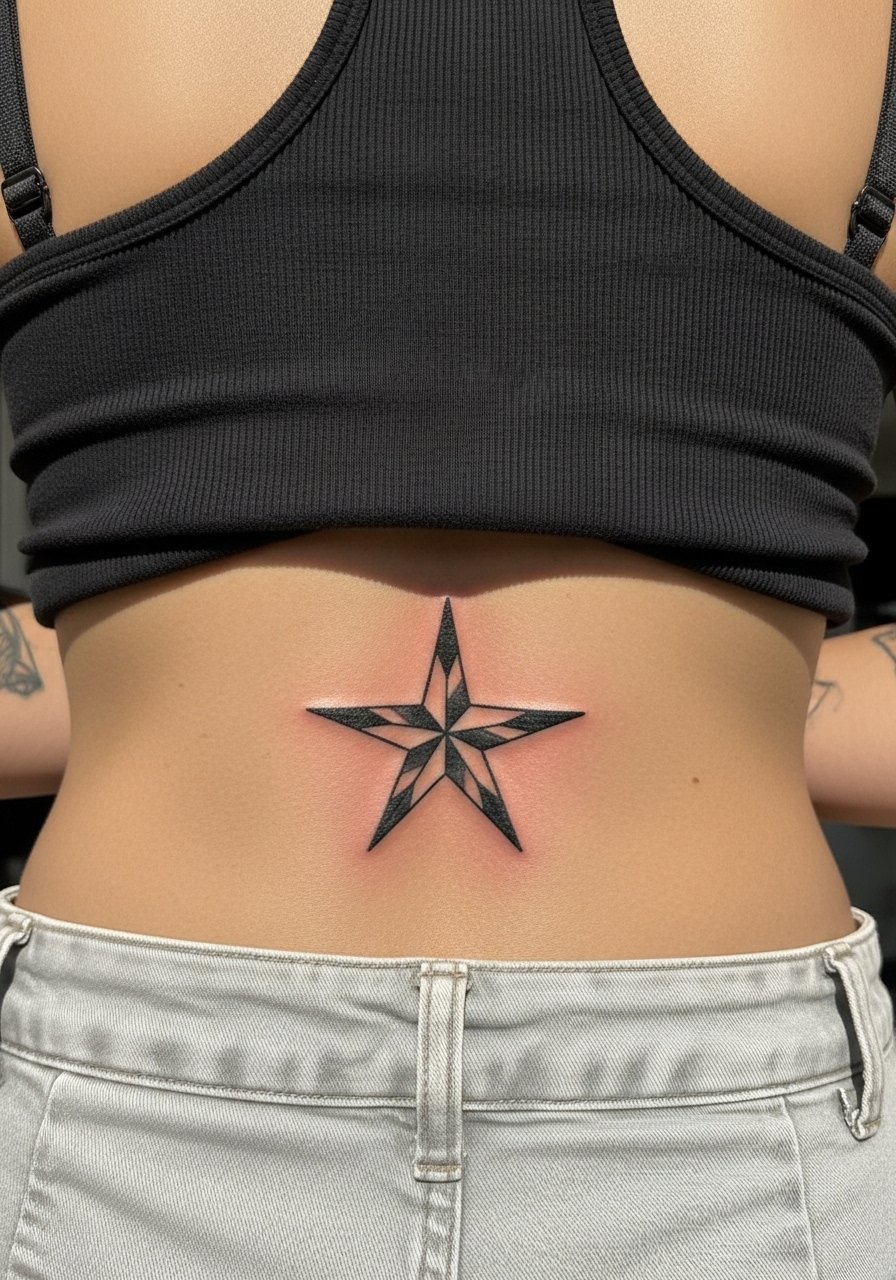
Lower back placements read bold but they are prone to stretching with weight shifts and certain clothing lines. For a nautical star, recommend a slightly larger star with solid black points so the geometry survives seasonal changes. The common error is tiny stars that become distorted with sitting and bending. Pain is moderate and touch-ups depend on how often the area rubs against waistbands. Choose clothing that avoids constant friction during the first two weeks.
21. Cherry Pair Wrapping the Calf
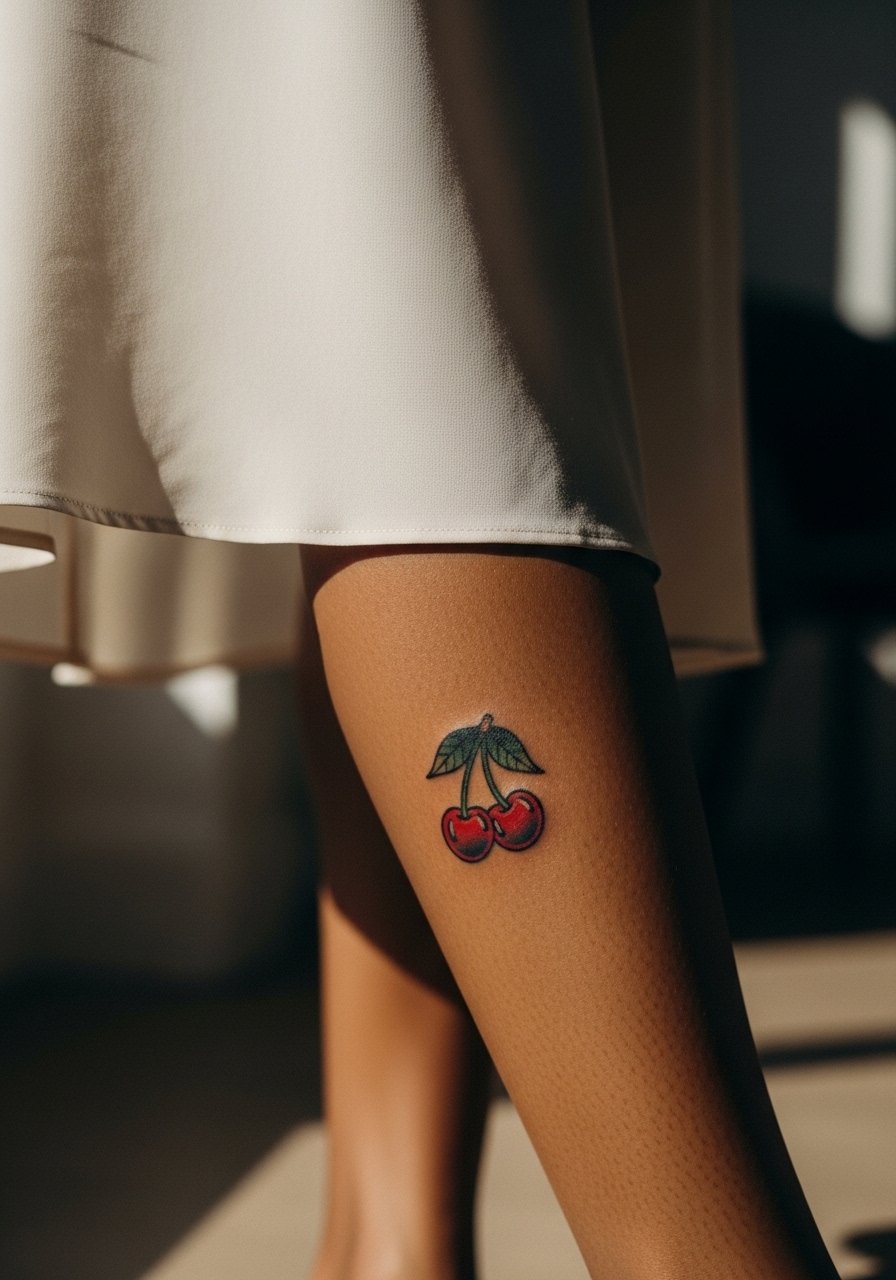
A wrapped cherry motif is playful and photographs well when placed on the calf curve. Ask for a small stem separation and bold fill to keep each cherry readable from the back and side. The mistake I see is pushing for tiny highlights that lose contrast over time. Calf work is comfortable and often finishes in one session. For evenings out, a midi skirt or ankle boots frame the calf without rubbing the fresh ink.
Frequently Asked Questions
Q: Will a traditional rose on the forearm need a touch-up more often than a sleeve piece?
A: It depends on exposure and size. A single forearm rose with bold outlines and good saturation can last many years before needing a touch-up if you protect it from the sun. Sleeves have more surface area and more potential friction, so they often need maintenance sooner. Using sun protection when healed helps longevity.
Q: Are sternum or chest pieces more painful than thigh tattoos and do they heal differently?
A: Sternum and chest placements are generally more painful because the skin sits over bone and the area moves with breathing. Healing mechanics are similar but chest work may scab differently due to movement and wardrobe contact. Wear a fitted sports bra or bandeau to the appointment so the artist can work cleanly.
Q: If I want a delicate banner near my collarbone what should I ask for in the consultation?
A: Ask for contouring that follows your collarbone curve and for slightly bolder lettering than what you see in tiny fonts. Specify the distance between letters and ribbon edges so the artist knows you prioritize long-term legibility. Bring photos of healed banners you like for reference.
Q: Do finger and wrist tattoos affect my work options and how often will they need touch-ups?
A: Finger and wrist tattoos are the most exposed and washed areas, so they fade faster and often need periodic refreshes. Hand placements may be visible to employers so consider your career context before committing. If you go ahead, plan annual touch-ups for fingers and every few years for the wrist depending on wear.
Q: Can traditional color palettes be adjusted for darker skin tones without losing the classic look?
A: Yes. Strong outlines and high-contrast color choices translate well across skin tones when artists adjust saturation and shading placement. Mention your skin tone in the consultation so the artist can adapt the palette and find colors that read vibrantly when healed.
Q: What clothing should I wear to a calf, forearm, or chest session to make the process easier?
A: For calf work, wear a midi skirt or shorts you can shift without tightness. For forearms, a rolled sleeve linen shirt is easy and keeps the area clean. For chest pieces, an open collar shirt or fitted sports bra lets the artist access the spot while keeping you covered.
