
Fine line brown ink feels like the quiet kid at a party who keeps getting asked for a solo. People love the low-contrast look, then learn the hard way that tiny lines, sun, and the wrong placement can turn crisp detail into a soft blur in a couple of years. These ideas pick styles and spots that age better with brown ink, and show what to ask your artist in the consult.
1. Fine Line Mushroom on Inner Forearm

I see this one everywhere on saved boards because it hits the earthy, slightly psychedelic vibe without shouting. For inner-forearm placement expect low to moderate pain and a single short session. Tell your artist you want a 1-2 inch single-needle brown dilution and ask to see healed forearm examples on similar skin tones. A common mistake is packing tiny, dense stippling that merges after a year. Ask for slightly more space between dots and a mid-tone wash so the silhouette survives touch-ups. For showing it off, roll up a cream linen shirt and keep bracelets minimal during healing.
2. Neo-Traditional Fox Portrait on Outer Bicep
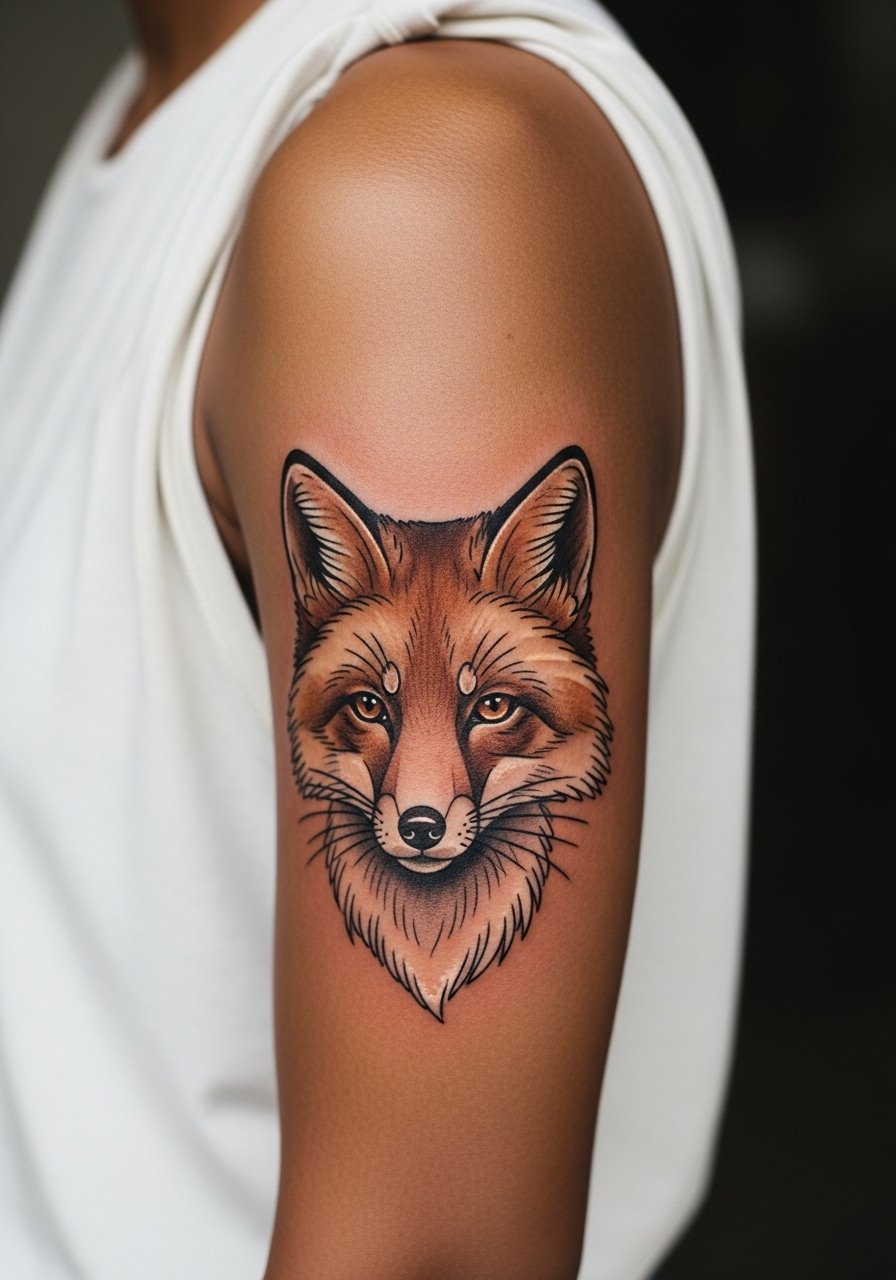
This neo-trad take keeps the silhouette bold while using brown washes instead of saturated color, which reads warmer on medium to dark skin. Outer bicep sessions are comfortable and let the artist work at medium speed over two sessions if you want extra texture. During the consult say you want brown and tan washes, not flat sepia fills. The common aging issue is too-fine facial details on the fox that soften into mud. Ask for a mix of linework and stipple shading so contours are defined over time. For casual reveals try an olive fitted tank that frames the piece.
3. Minimalist Wave Outline on the Wrist

Wrist waves are a low-commitment first tattoo for many people but they demand honest sizing. Wrist skin moves and gets constant sun exposure so tiny single needles can blur within 18 months. Ask for a slightly thicker lineweight than what looks perfect on the phone so the form keeps reading after a year. Session time is usually 20 to 45 minutes and pain is low to moderate. If you want to show it off without crowding the wrist, pair it with a dainty silver chain bracelet on the opposite wrist. For healing, avoid constant wrist flex for the first week.
4. Blackwork Geometric Mandala with Brown Accents on Shoulder Blade

Shoulder blade pieces give geometry room to breathe, which matters for dot work and dense patterns. This hybrid keeps the mandala grounded with blackwork and uses brown highlights for warmth. Pain is moderate and sessions may span two visits for clean stippling. The biggest mistake is compressing too many rings into a small space. Tell your artist you prefer spacing that will tolerate skin movement and aging. If you want easy session access, wear a loose button-down shirt you can pull to one side. For darker skin tones request higher-contrast black foundations with brown accents rather than brown-only fills.
5. Micro-Realism Coffee Cup Still Life at the Ankle
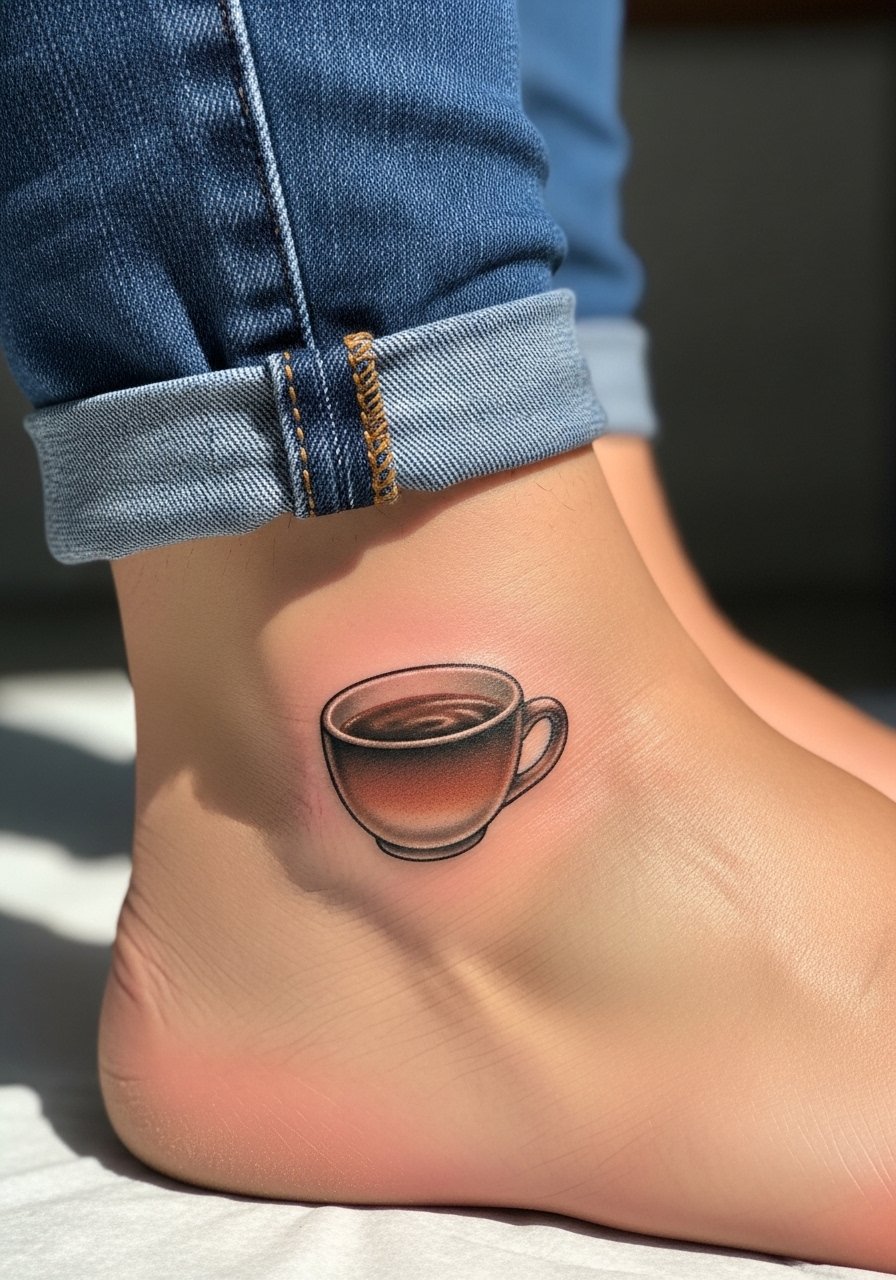
Ankle micro-realism reads like a secret nod to daily habits, and brown gradients create believable warmth without color. This placement involves low to moderate pain but watches for friction from shoes. Ask for dense mid-tone layering so the tiny highlights stay visible after a year. The usual error is trying to cram ultra-high detail into a 1-inch space. Opt for a slightly larger scale if you want shading that survives. Showing the design pairs well with cuffed chinos or summer shorts. For the session, wear pants you can pull up easily and skip socks when possible.
6. Ornamental Feather with Brown Texture on the Collarbone
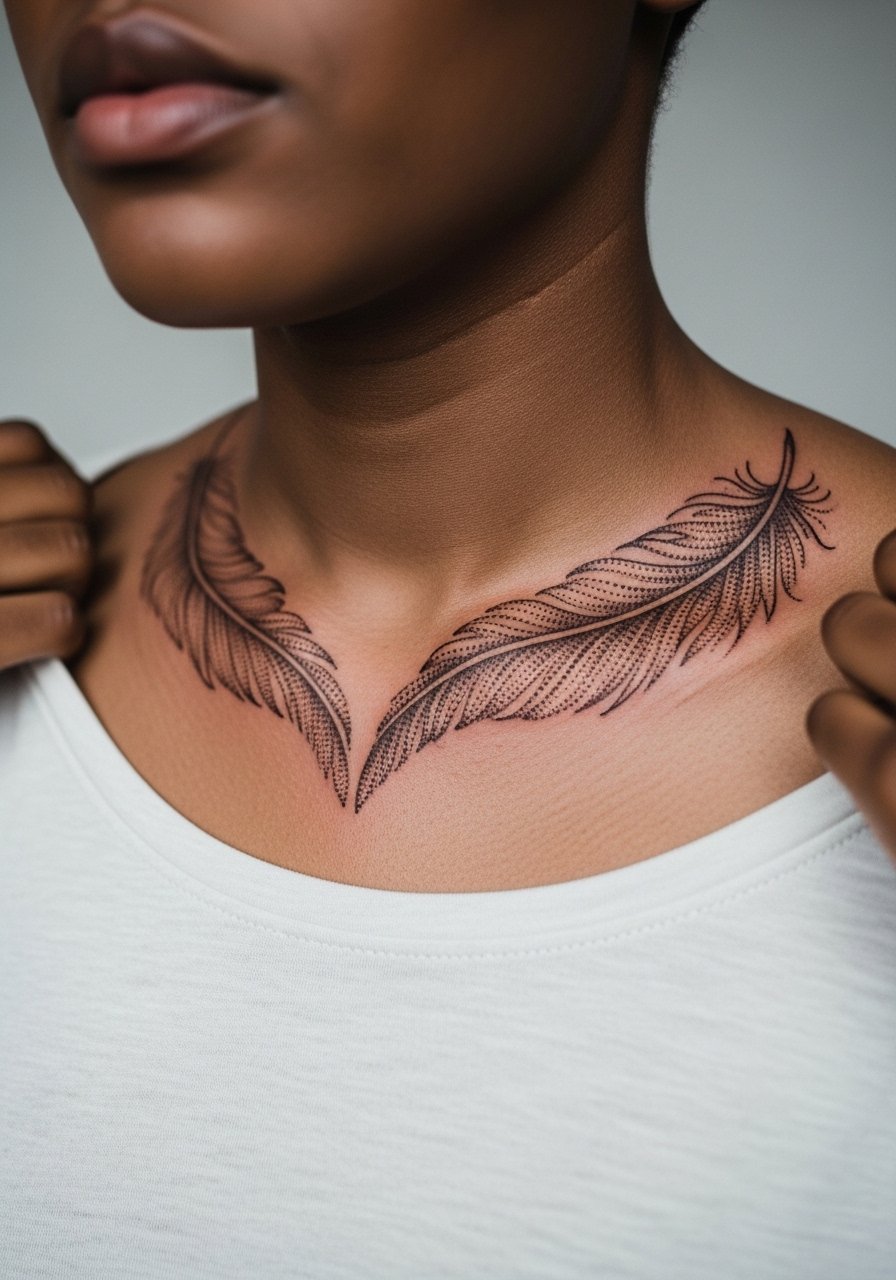
Collarbone tattoos age beautifully when placed and scaled correctly, but they are exposed to sunlight more than many spots. Expect moderate pain and a two-session plan for detailed dotwork. Ask the artist to keep the feather 3×4 inches and to use dot shading rather than heavy fill so the texture photographs well. A common mistake is going too narrow, which causes the feather vanes to merge over time. For evenings out, pair the piece with an off shoulder blouse that frames the collarbone. Consider stricter UV protection for this area during the first six weeks.
Studio Day Picks
The forearm, wrist, ankle, shoulder blade, and collarbone pieces above need different prep and protection, so a small kit smooths the appointment and the first week of healing.
-
CeraVe Healing Ointment. Lightweight and non-greasy for winter heals, this helps brown ink on dry skin keep saturation without feeling clogged.
-
Australian Gold Aftercare Spray. No-touch sprays are handy for ankle and collarbone spots that rub against clothing during the first days.
-
Tatt2Away Balm. Indie balm that forum users praise for keeping brown wash tones vibrant without heavy occlusion for people prone to milia.
-
Hada Labo Lotion. A light hyaluronic option some collectors use months in to plump skin and slow apparent fading on fine line work.
-
Hustle Butter Deluxe. Thinner alternative to thick ointments that many people pick for oily skin areas where heavy petrolatums trap pores.
7. Ignorant Style Brown Bear Head on the Calf

Calf pieces tolerate thicker, graphic lines which suits the ignorant style. Pain is low and session times are usually under two hours for a 4-inch design. A common misstep is requesting too many tiny interior marks that disappear with muscle changes or after gym-driven gains. If you lift and bulk, expect some shape shift over time. Show it off with cuffed joggers or rolled denim shorts. For the appointment wear pants you can pull up comfortably and keep the leg relaxed so the artist can access the curve without distortion.
8. Watercolor-Inspired Brown Leaf Cluster on the Ribcage

Ribcage tattoos are high on the pain chart but they offer a flat canvas for washy brown blends that avoid the fading pitfalls of bright color. Artists split on whether second-skin helps here, with one camp favoring sealed film for active people and the other preferring dry healing to avoid trapped moisture. If you choose brown washes, ask for soft transitions and slightly larger shapes so the washes do not bleed together. Expect a single long session or two shorter visits. Given the sensitivity, plan a comfortable day and wear a lifted cropped top to give clean access.
9. Traditional Anchor Reimagined on the Inner Bicep
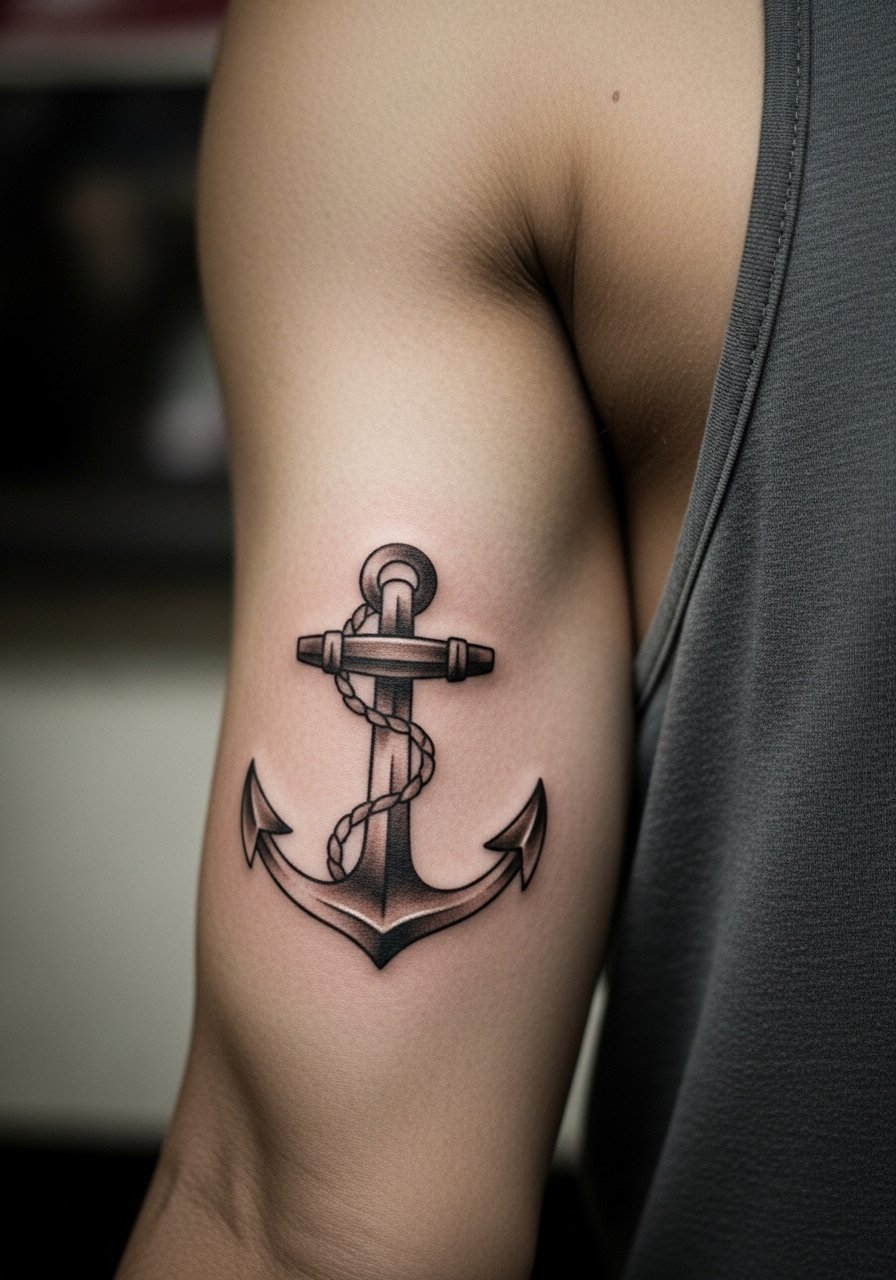
Inner bicep work reads intimate and ages differently from outer bicep pieces due to skin texture. This reimagined anchor keeps bold outlines but uses brown instead of black for a warmer effect. Pain is moderate and session time is usually under an hour for a 3-inch piece. The common error is relying on too-light lines that fade into skin tone. Ask your artist to balance a strong outline with tasteful brown fills so the anchor stays legible. For the session wear a loose tank top that gives full inner arm access and keep arm motion limited for the first day.
10. Dotwork Sacred Geometry Down the Spine
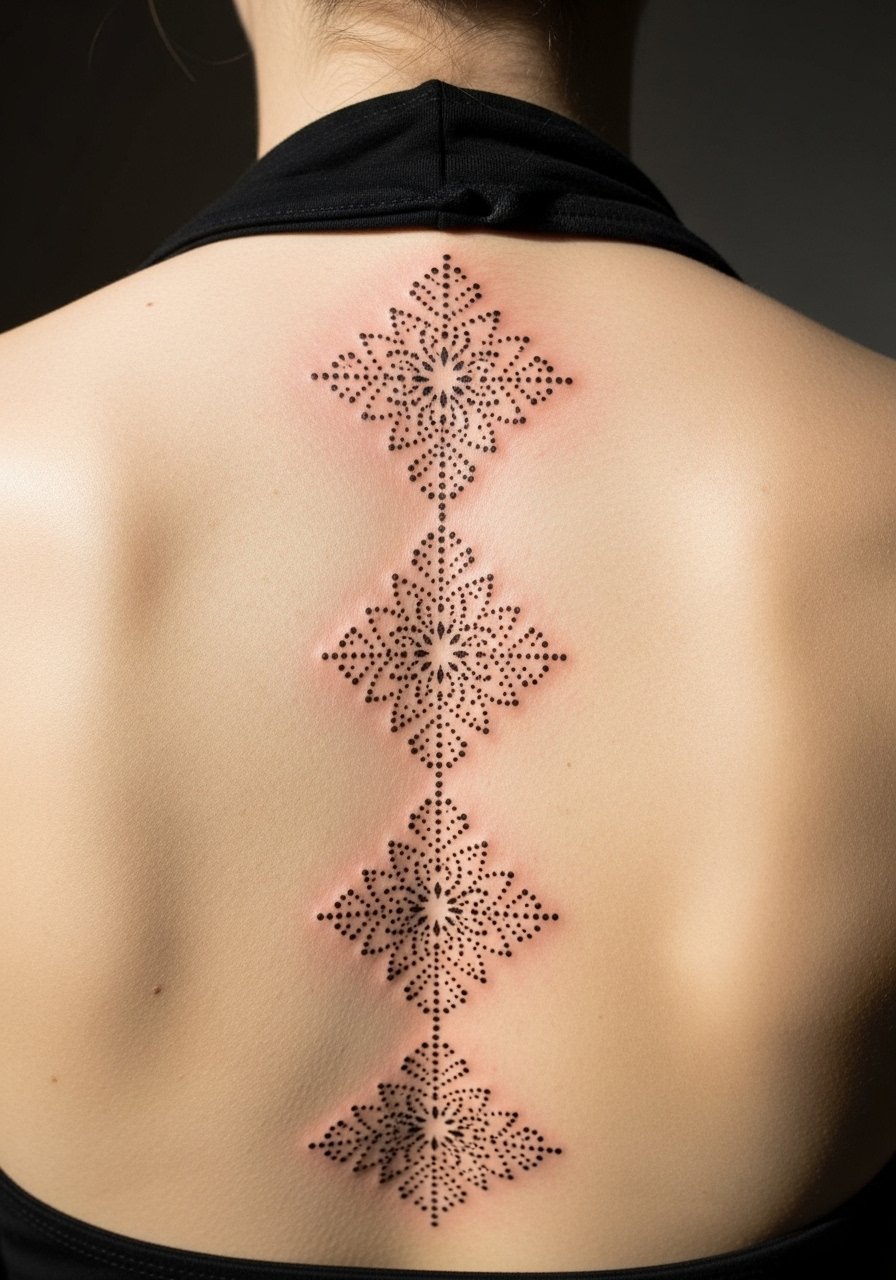
Spine dotwork needs scale and patience. Dense pointillism looks incredible fresh but will merge if the pattern is too tight. Pain can be high depending on your tolerance and sessions usually split across two to three visits. Tell the artist you want deliberate negative space between key nodes and request healed examples at one and two-year marks. Some artists prefer slightly larger dots for brown ink so the geometry keeps crisp contrast. Pair the finished piece with backless tops for nights out and use careful sun protection when the area is exposed.
11. Illustrative Brown Snake Coil on the Thigh

Thighs give artists room to build flowing coils that wrap naturally with muscle. This placement tolerates shading and detail and the session comfort is generally good. Common mistakes include making the coil too tight which creates distortion when the leg moves or when muscle mass changes. Ask for a 5-inch scale and for the artist to show how the design looks on a posed thigh so you can judge tension. For summer shows or pool time, a pair of beige swim trunks or high-cut shorts will frame the piece without exposing more than you want during early healing.
12. Patchwork Brown Botanicals for a Forearm Sleeve Buildup

Collectors love building organic sleeves in brown because the palette ties disparate motifs together. Expect multiple sessions and plan the flow so each piece breathes. The most frequent error is placing too many high-density details adjacent to each other which creates visual crowding over time. Ask your artist to map negative space and to sequence pieces so touch-ups can be limited. For sessions wear a cream linen shirt you can roll and a comfortable sleeve you can pull up without stretching the skin. Plan touch-ups at roughly six months for the fine line connectors.
13. Hyper-Realistic Brown Eye Portrait on the Upper Arm

Eye portraits in brown rely on precise halftone layering and contrast planning. Upper arm placement is forgiving for touch-ups and allows a three-session staging for depth. The common misstep is underprepping the mid-tones which makes the pupil and iris lose dimensionality after a year. In the consult request healed examples at multiple time points and ask how they plan halftone buildup so depth remains. For casual wear, a muscle tee frames the upper arm cleanly and keeps the portrait visible without rubbing against collars.
14. Tiny Script Accent on the Side of the Neck
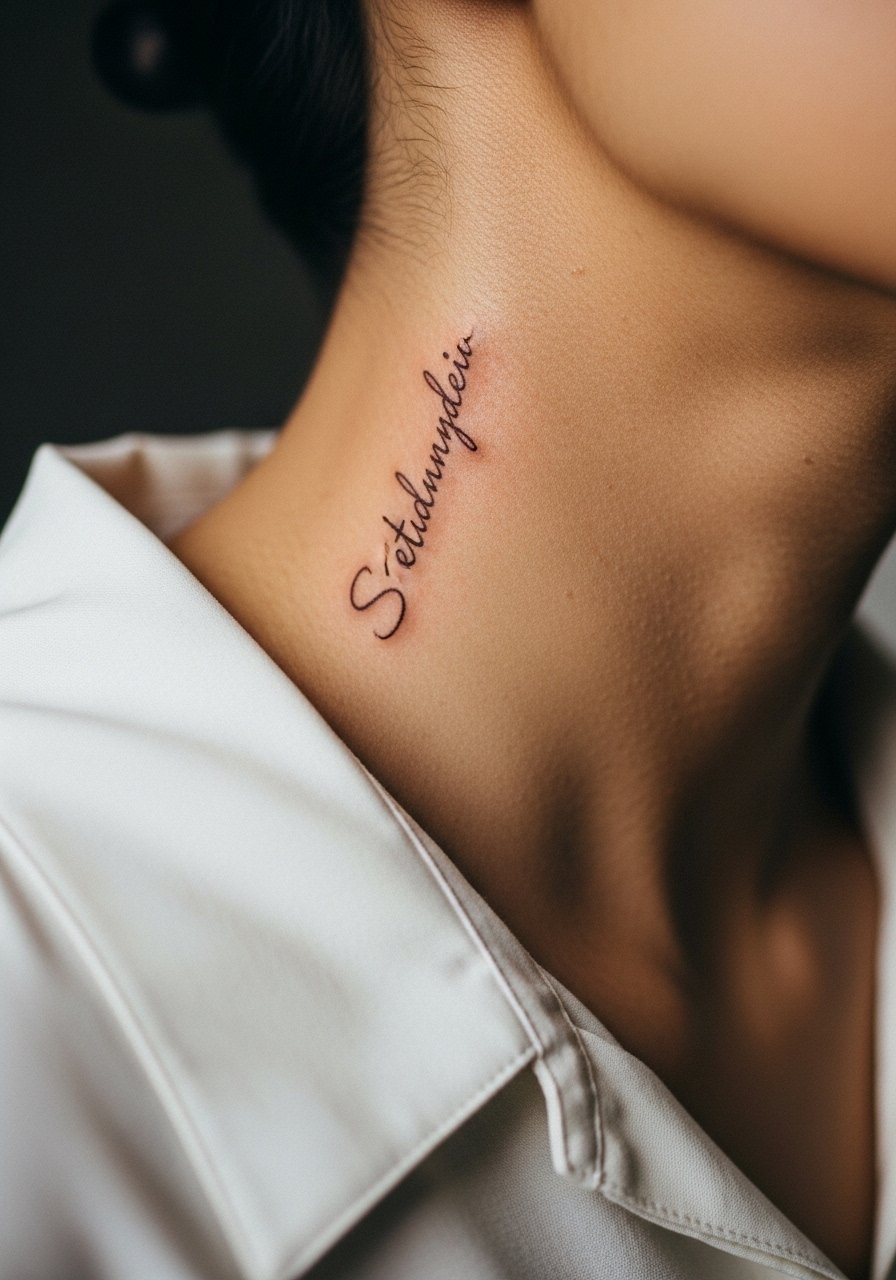
Neck scripts are visible and age with sun and motion. Pain is moderate and sessions are usually quick. The biggest error is text that is too small or too light, which becomes illegible within a couple of years. Ask for a slightly bolder lineweight and request the exact script size on paper placed against your skin before committing. For sensitive placements like this some artists will decline or ask for portfolio matches, which is okay. Think through career implications before booking and plan for yearly touch-ups to keep the lettering crisp.
15. Brown Ink Cover-Up Techniques for Faded Black Tattoos

Cover-ups with brown ink can reduce the stark contrast of old black lines and create a warmer composite piece. This approach depends on how faded or saturated the original black is. The common mistake is attempting a single-session cover when the black is still dense. Ask the artist for a tone-match test and for staged layering so each pass blends rather than forces a heavy mask. Expect at least two sessions and a candid look at healed mockups. A careful plan saves touch-ups and prevents re-darkening that defeats the brown palette.
16. Dot Ring Around the Finger for Subtle Band Work
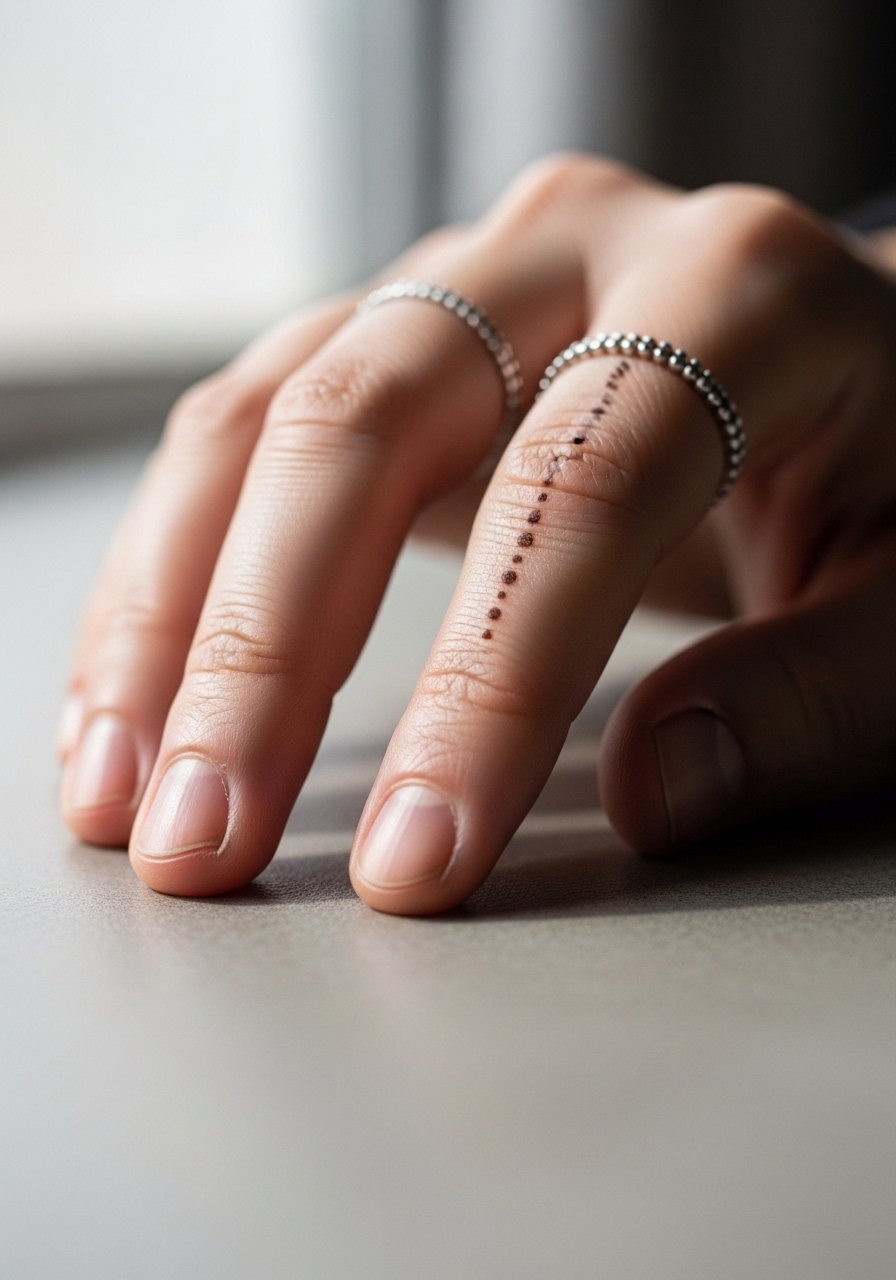
Finger bands are visibly charming but they face constant wash friction and sun exposure. Dot rings age faster than solid bands if the dots are placed too close. Ask for a spaced dot pattern and thicker dots that will hold up through hand use. Sessions are short but touch-ups are common, often at year one. For showing it off, pair the ring with a thin gold midi ring or delicate stack to keep attention on the tattoo without compressing it during wear. Consider a plan for annual touch-ups if you use your hands heavily.
17. Scar-Textured Brown Hybrid on the Upper Thigh
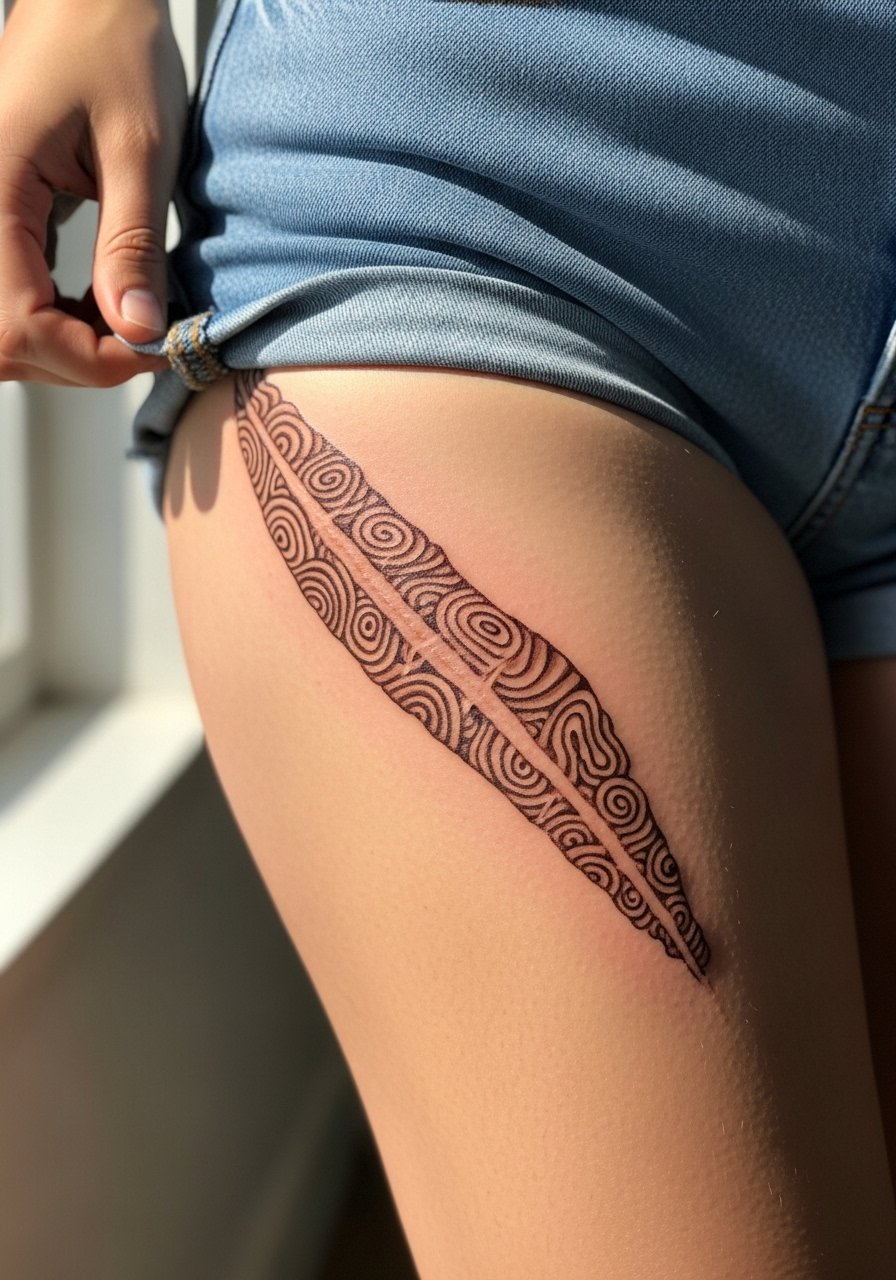
Hybrid pieces that integrate light scarwork or textured stippling with brown ink are rare but striking. Thigh placement is forgiving for contraction and changes in body shape, but these hybrid approaches need an artist experienced with scar textures. One sentence note on professional considerations. Expect a consultation that discusses scar history and possible grafting of texture. The common mistake is trying this with a walk-in artist who lacks experience in textured surfaces. For session wear bring loose shorts you can pull up easily so the artist can work across the area without distortion.
Frequently Asked Questions
Q: Will fine line brown ink on the wrist blur faster than the same design on the forearm?
A: Generally yes. Wrist skin moves more and gets more sun which accelerates softening. For the wrist ask for slightly thicker lineweight and plan a touch-up at about year two if you want sharpness preserved.
Q: Which healing method is better for brown washes, second-skin or dry healing?
A: Artists are split. One camp likes sealed film for active people because it reduces scabbing. The other camp prefers dry healing for brown washes so the ink can settle without trapped moisture. Ask where the artist stands and follow their proven healed examples.
Q: How does brown ink behave on darker skin tones compared with black?
A: Brown can read warmer and softer on darker tones but it can also look muddy if the dilution is wrong. Request healed examples on similar skin tones and ask the artist about dilution ratios they use for undertones before you book.
Q: Can brown ink be used to cover a faded black tattoo without laser first?
A: Sometimes. If the black is very dense a cover-up may require multiple passes or laser fading first. A candid consultation and test mockup will show if a brown overlay will work cleanly.
Q: Do certain clothing choices speed or slow early fading?
A: Yes. Repeated friction from tight sleeves or shoe straps can abrade fine line work during the first weeks. For visible spots choose breathable fabrics and low-friction shoes while healing. A soft backless halter or a rolled linen sleeve minimizes rubbing.
Q: What should I ask my artist about touch-ups for a brown fine line sleeve?
A: Ask for a recommended touch-up timeline, likely around six months for fine connectors, and for portfolio examples of sleeve continuity across multiple sessions. Also confirm deposit and reschedule policies so cancellations do not cost you extra time.
