
Fine line Alice tattoos are trending hard online, and the gap between what photographs great fresh and what actually holds up on skin is wider than most people expect. I see saved boards full of delicate cats and tiny keyholes that blur or vanish within a year when placed on high-friction spots. This list focuses on gritty, aging-aware takes on Wonderland motifs so you get a design that still reads after a few summers, not just on day one.
1. Cheshire Cat Grin with Dripping Clock, Forearm Blackwork
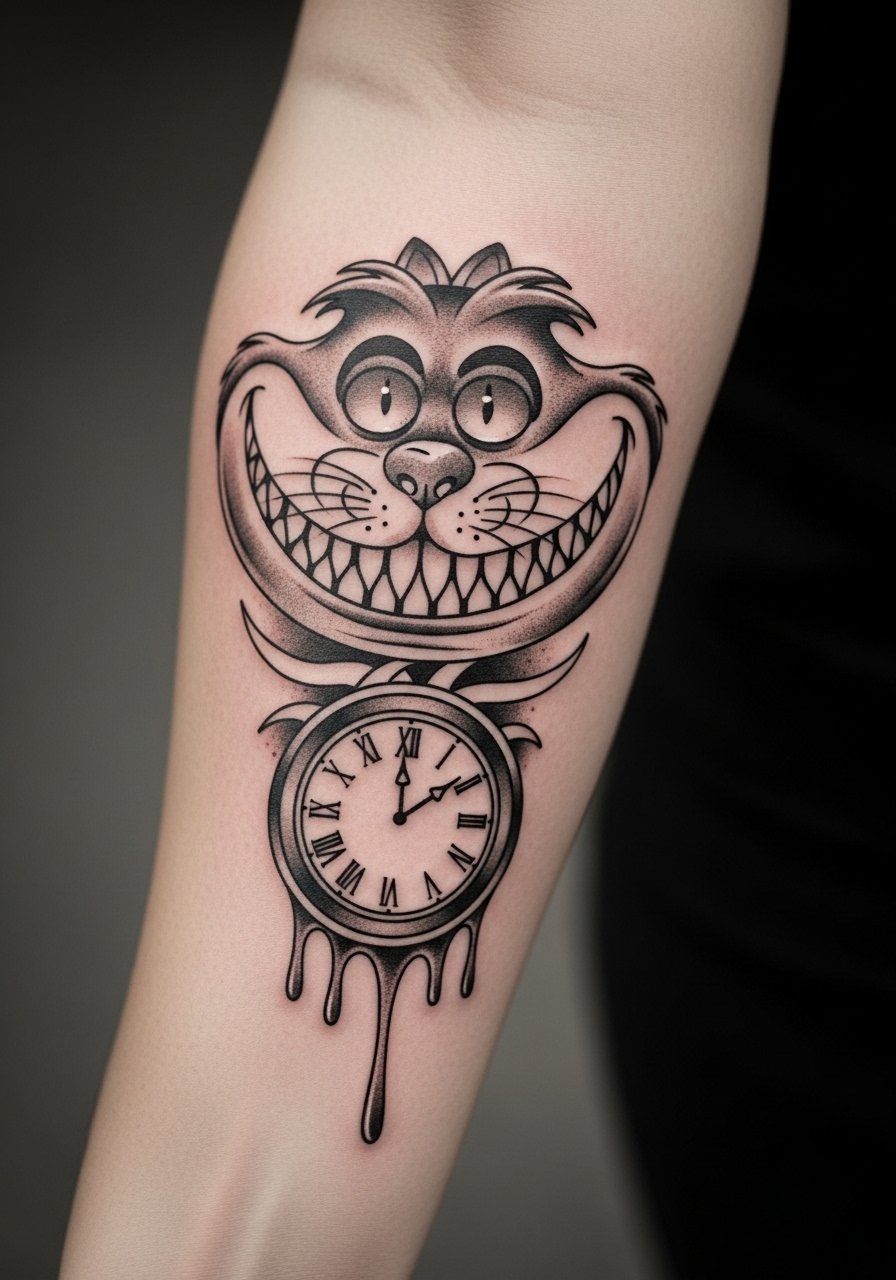
I've seen forearm Cheshire grins that looked amazing the first month and then softened into an unreadable smudge by year two. For forearm use bold linework and a little negative space inside the grin so the teeth read even when saturation softens. Tell your artist you want strong linework with heavy saturation in the clock area and light stippling for texture. Expect one to two sessions and moderate pain during longer fills. Common mistake is asking for ultra-fine detail at small scale. For the session wear a fitted black crop tee so the artist can roll the sleeve without rubbing fresh ink.
2. Punk Alice Falling Down a Rabbit Hole, Thigh Neo-Traditional
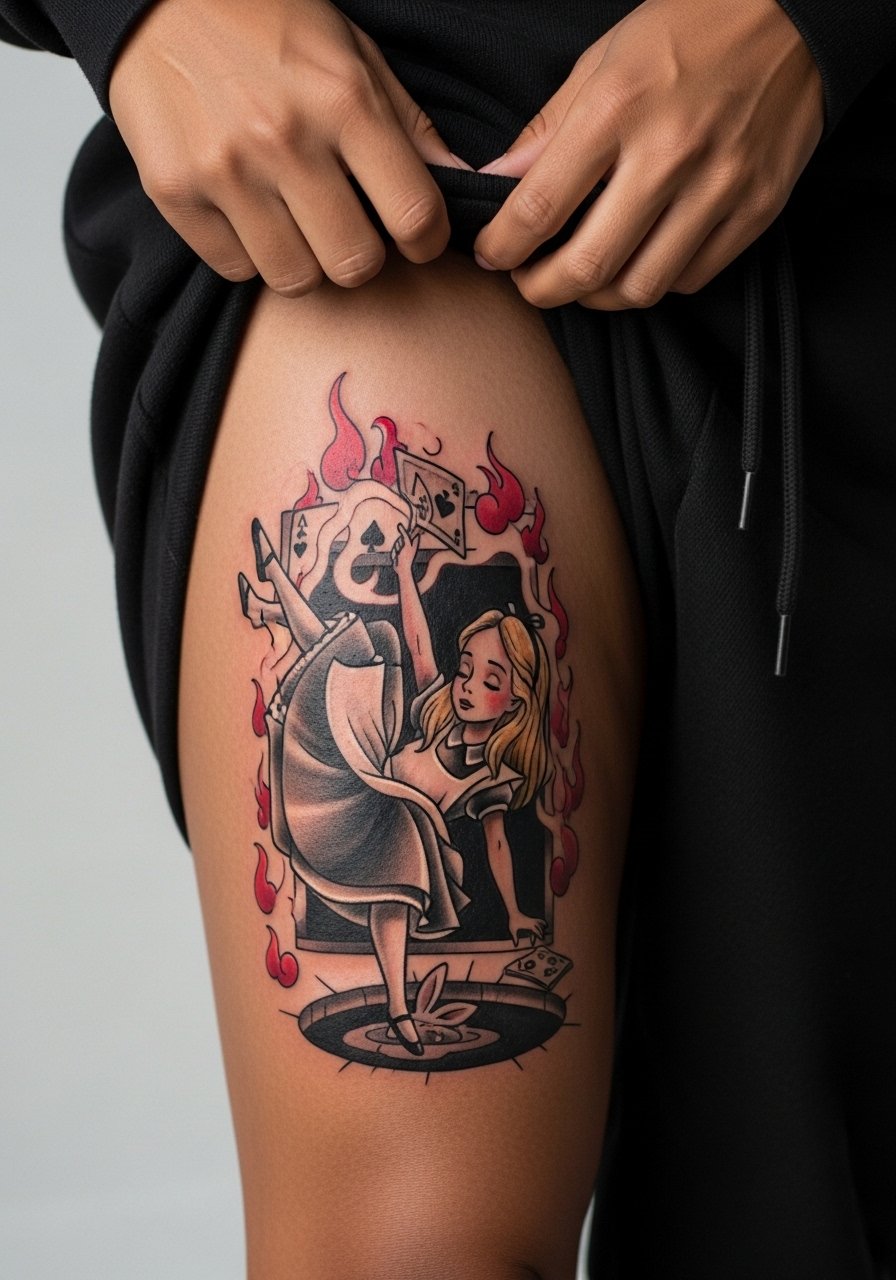
Thigh pieces tolerate bold shapes well, and they survive weight changes better than some curves. This falling-Alice design benefits from larger scale, five to eight inches, and selective red accents to keep contrast on darker skin. In consultation ask for simplified facial detail and broad shading planes so the image does not get lost when the skin stretches. Pain is moderate and sessions are comfortable if you wear loose joggers or a skirt. For showing it off, pair with high waisted black shorts or ripped tights that frame the outer thigh without compressing the ink.
3. Distorted Mad Hatter Top Hat with Eyes, Shoulder Bold Lines
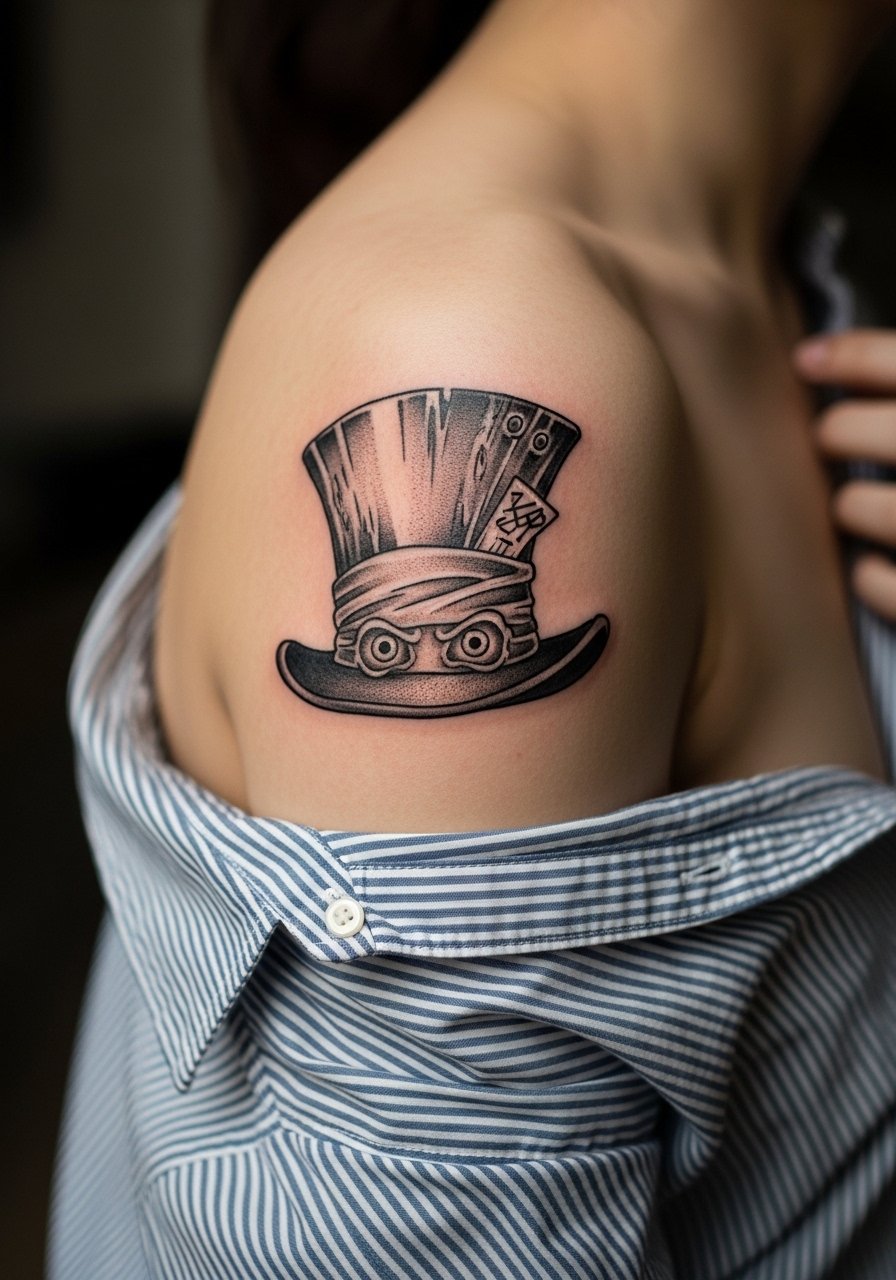
Shoulder work reads from across a room when the outline is bold and the negative space is clear. The distorted hat plays well with thick black strokes and high-contrast fill. Tell the artist you want exaggerated eye shapes and to avoid tiny hairline lines in the brim. Sessions are single and quick, with low to moderate pain. A common mistake is packing tiny stipple details that disappear on the shoulder. For session comfort wear a loose button-down shirt you can pull aside so the artist has clean access.
4. Gothic Queen of Hearts Decapitation Scene, Upper Arm Neo-Traditional
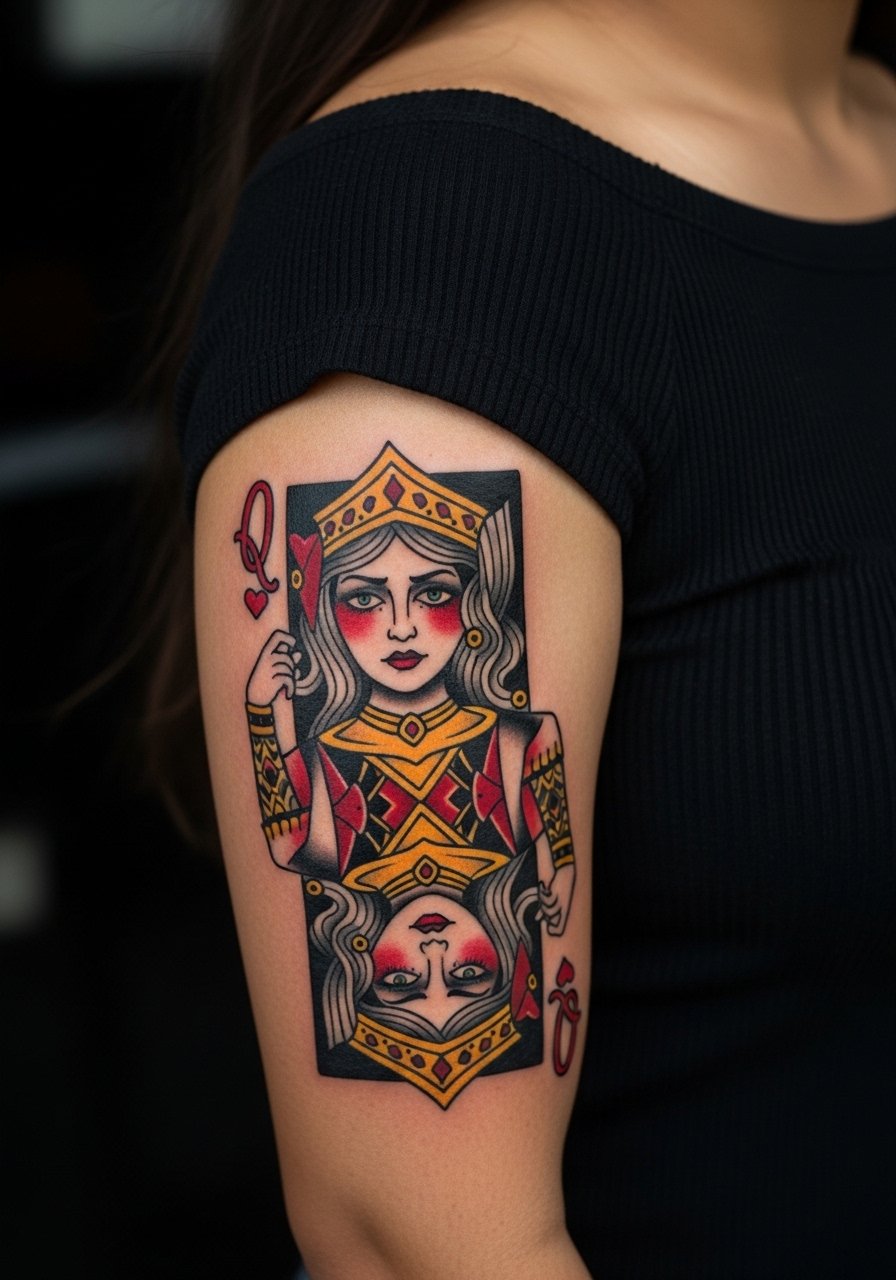
Upper arm pieces age well because they avoid constant friction. For a dark Queen of Hearts piece go full saturation in the main color blocks and heavy black outlines around the silhouette. Tell your artist to simplify small facial features and to keep the red areas bold rather than gradient-heavy. Expect two to three sessions and variable pain depending on how close the design gets to the inner arm. People often overcomplicate the crown details, which reads messy after a touch-up. Pair the finished piece with an off shoulder black top for nights out so the shaded edges breathe visually.
5. Skeleton White Rabbit with Pocket Watch, Ribcage Blackwork
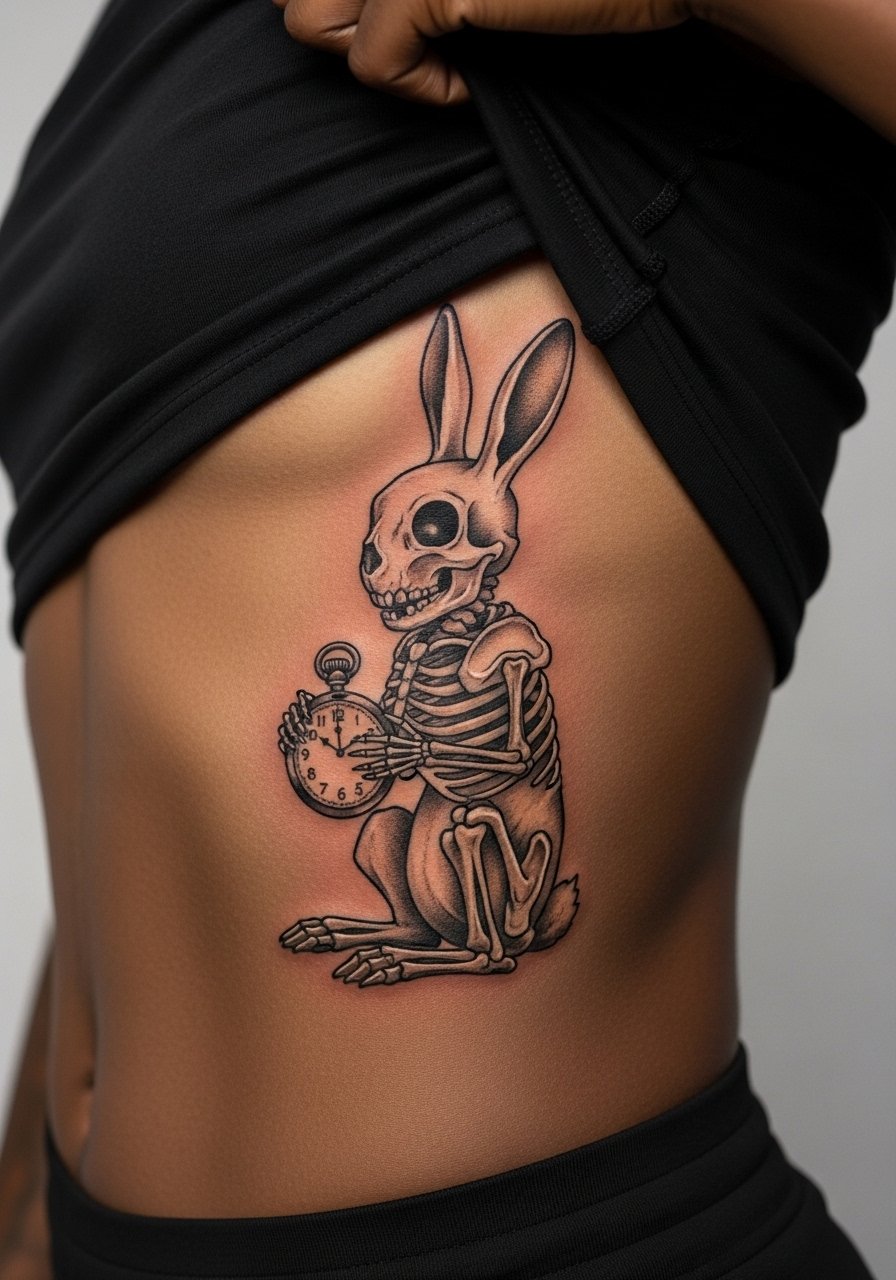
Fair warning, ribs are often a 7 to 9 for pain on most scales. The reward is a dramatic, high-contrast canvas. For a skeleton rabbit keep the lines bold and the clock face simplified so time elements remain readable as the skin settles. Discuss needle depth in your consult because the ribs can be prone to blowout if the needle goes too deep. The common mistake is requesting tiny script date details inside the watch. Expect one to two sessions. For the appointment wear a cropped sports bra so the artist can access the area without straps digging.
6. Edgy Alice with Spiked Tea Party Knives, Back Black and Gray
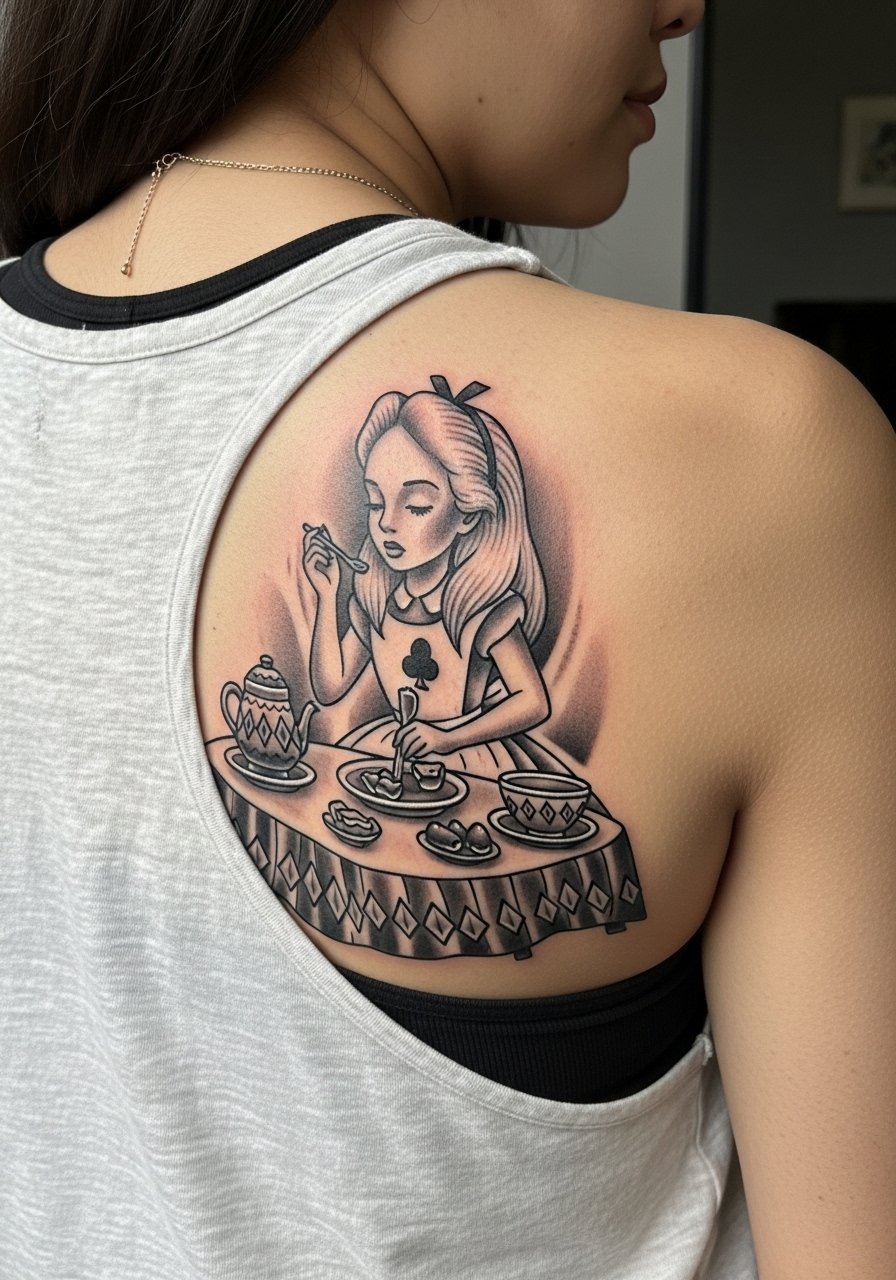
Large back pieces let you push scale and drama without worrying about daily abrasion. This spiked tea party scene benefits from layered composition and gray washes for depth. Bring references that show the knife silhouettes clearly so they do not read as clutter when healed. Expect three sessions for the full back panel and variable pain during long sits. A frequent error is packing too many small props into the scene. For sessions wear a button-down shirt you can slip off the shoulder for comfort.
Studio Day Picks
The first six ideas include wrist, forearm, ribcage, thigh, upper arm, and back placements, and each asks for different prep and first-week care.
-
CeraVe Healing Ointment. A thin, non-cakey option that many people use for blackwork areas during the first few days to keep saturation from scabbing dry on high-movement zones like forearms.
-
Indie tattoo butter. Lightweight balms breathe better in humid weather and help fine line edges avoid heavy residue on smaller wrist pieces.
-
Hada Labo lotion. A gentle hydrating lotion that prevents dry cracking around delicate chest and collarbone tattoos without leaving a greasy layer.
-
BV balm for tattoos. Fast-absorbing formula that reviewers mention for darker skin tones where heavy white-casting balms show.
-
Tattoo Goo aftercare ointment. A classic thinner option some people prefer for the first week on finger and wrist pieces to avoid clogged needle channels.
7. Floating Cheshire Cat Skull, Wrist Fine Line Minimal Horror
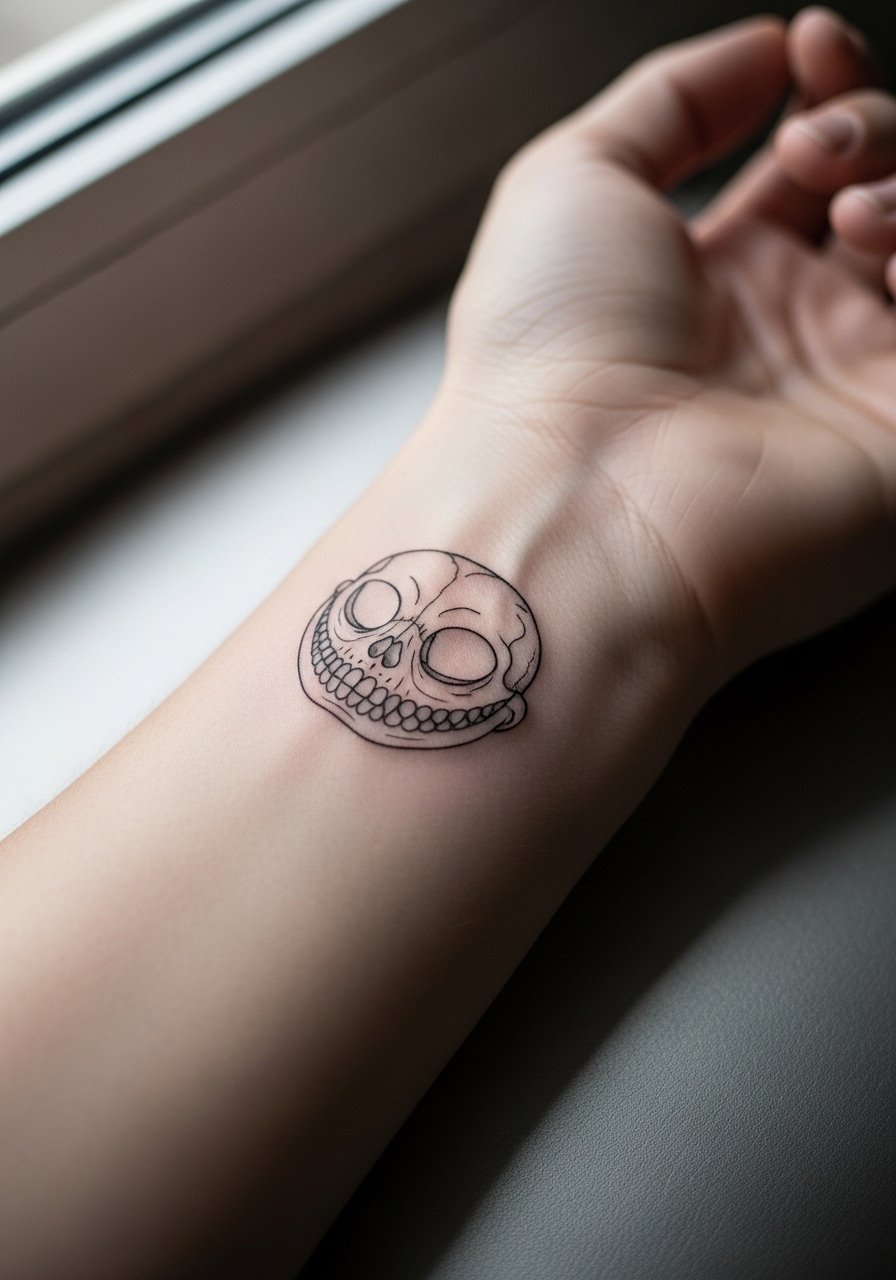
Fingers and wrists are notorious for fading fast because of washing and sun exposure. If you want a small Cheshire skull on the wrist, ask for slightly bolder outlines than a typical micro to keep the eye sockets readable after a year. Sessions are quick but the healing window is fussy. A common mistake is insisting on ultra-fine teeth lines at tiny scale. For showing this off layer delicate jewelry like a thin silver chain bracelet on the opposite wrist rather than stacking chunky cuffs that rub the fresh ink. Expect touch-up at 12 to 18 months.
8. Rabbit Hole Vortex with Eyes Watching, Inner Bicep Dotwork
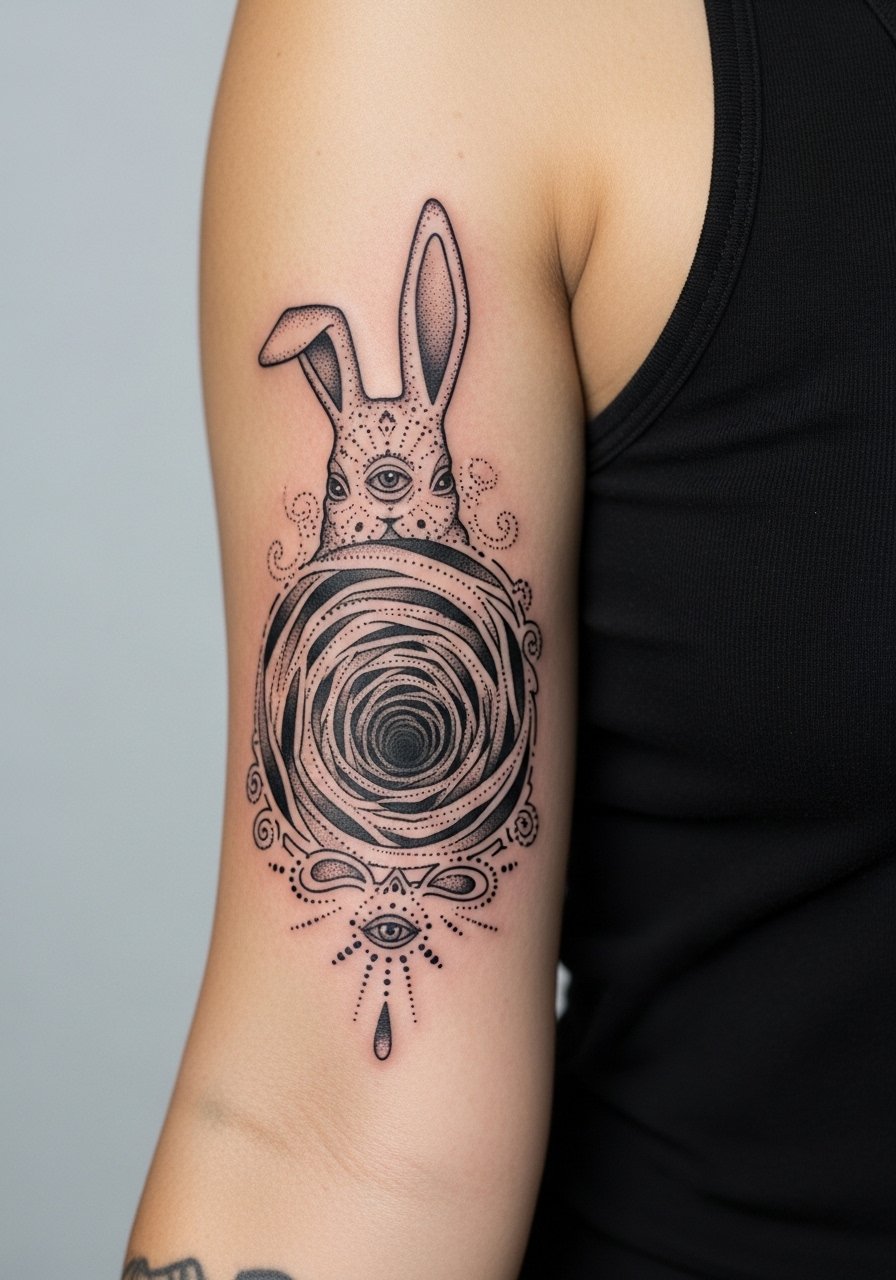
The inner bicep offers shelter from sunlight and daily abrasion, which helps dotwork keep its texture. This vortex design relies on graduated dot density to imply depth. Tell the artist you want open spacing in the tightest areas so stippling does not merge. Expect two sessions and medium pain. People often pack too many tiny eyes inside the swirl which creates muddy areas after a couple of years. If this is part of a sleeve start, plan negative space around it for breathing room.
9. Punk Card Soldiers Marching in Chains, Calf Traditional with Color
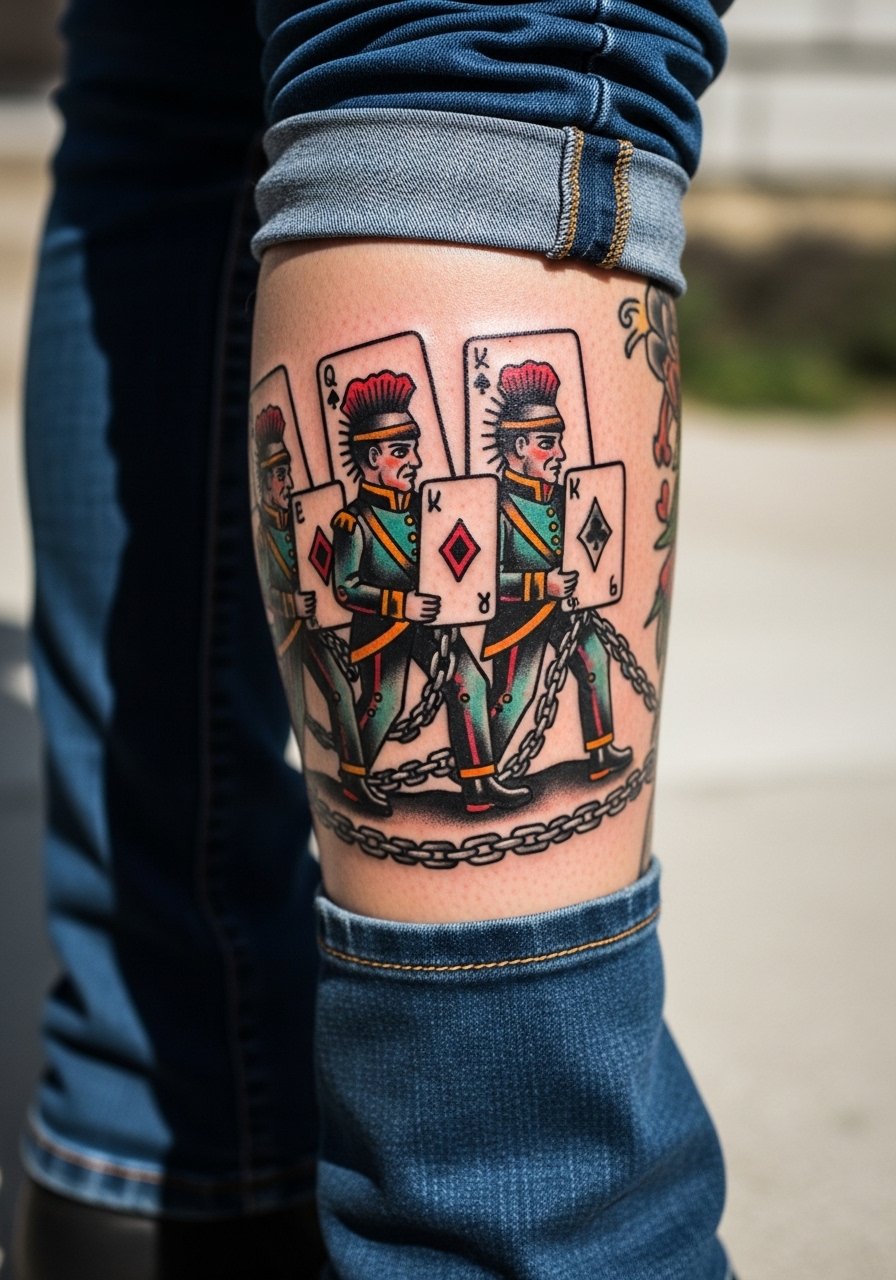
Calves hold well through muscle change and seasonal exposure, so heavy traditional color works here. The marching cards benefit from solid blacks around red fills to stop color from bleeding into patterned areas. Request bold outlines and limited color palette in consultation. Sessions are two shorter sittings and pain is usually low. Avoid tiny facial features on each card, because repetition at small size blurs. Pair with combat boots platform and rolled trousers to keep the imagery visible and dramatic.
10. Distorted Alice Mushroom with Spikes, Collarbone Micro-Realism
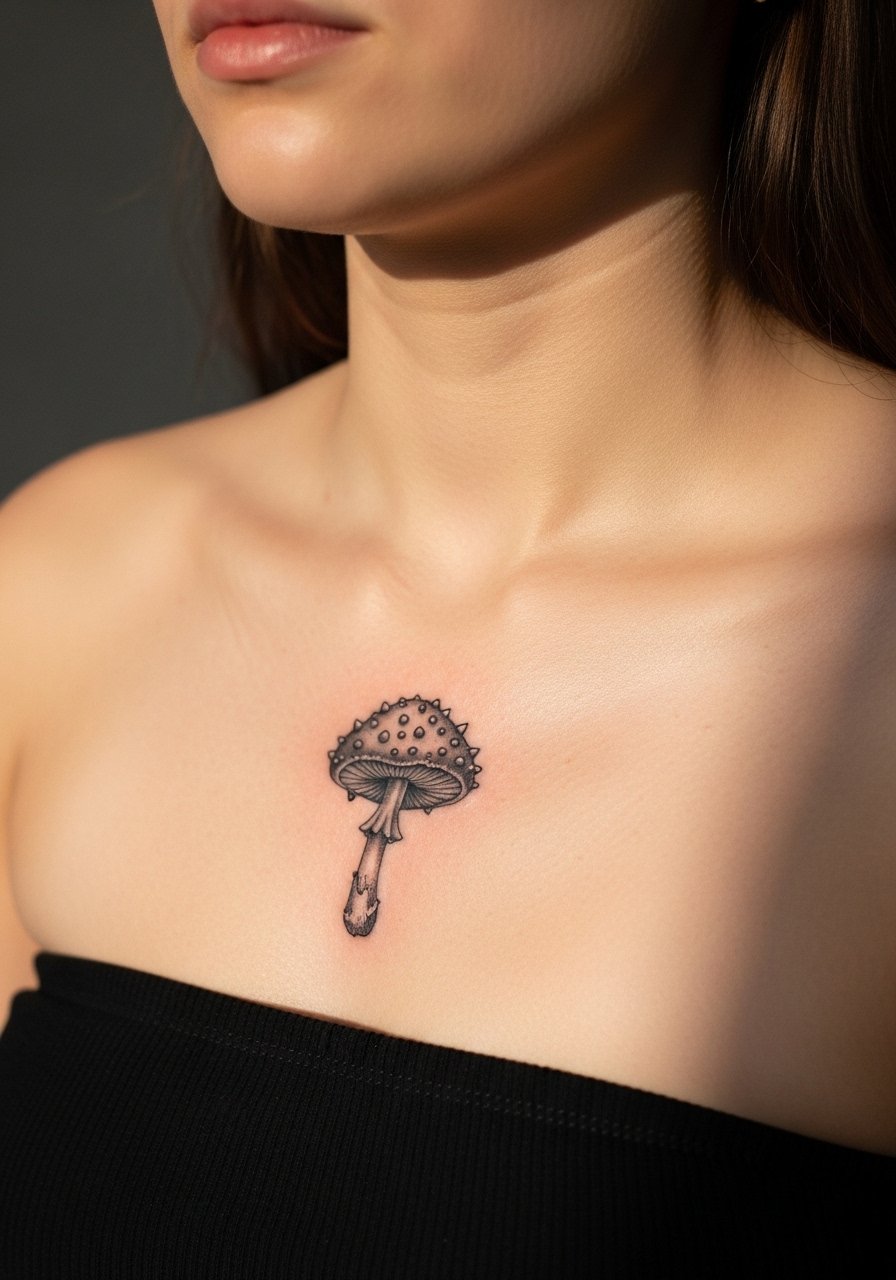
Collarbones work best for small, bold motifs that sit just under clothing lines. Micro-realism mushrooms need simplified cap textures and defined shadow edges to read after scabbing. Because collarbone skin is thin, expect a sharp initial sting and short sessions. The usual mistake is trying to cram gradient-heavy realism into three centimeters. For showing this off pick chokers or a choker velvet black that frames the piece without covering it.
11. Edgy Tweedledee and Tweedledum with Knives, Forearm Sleeve Start
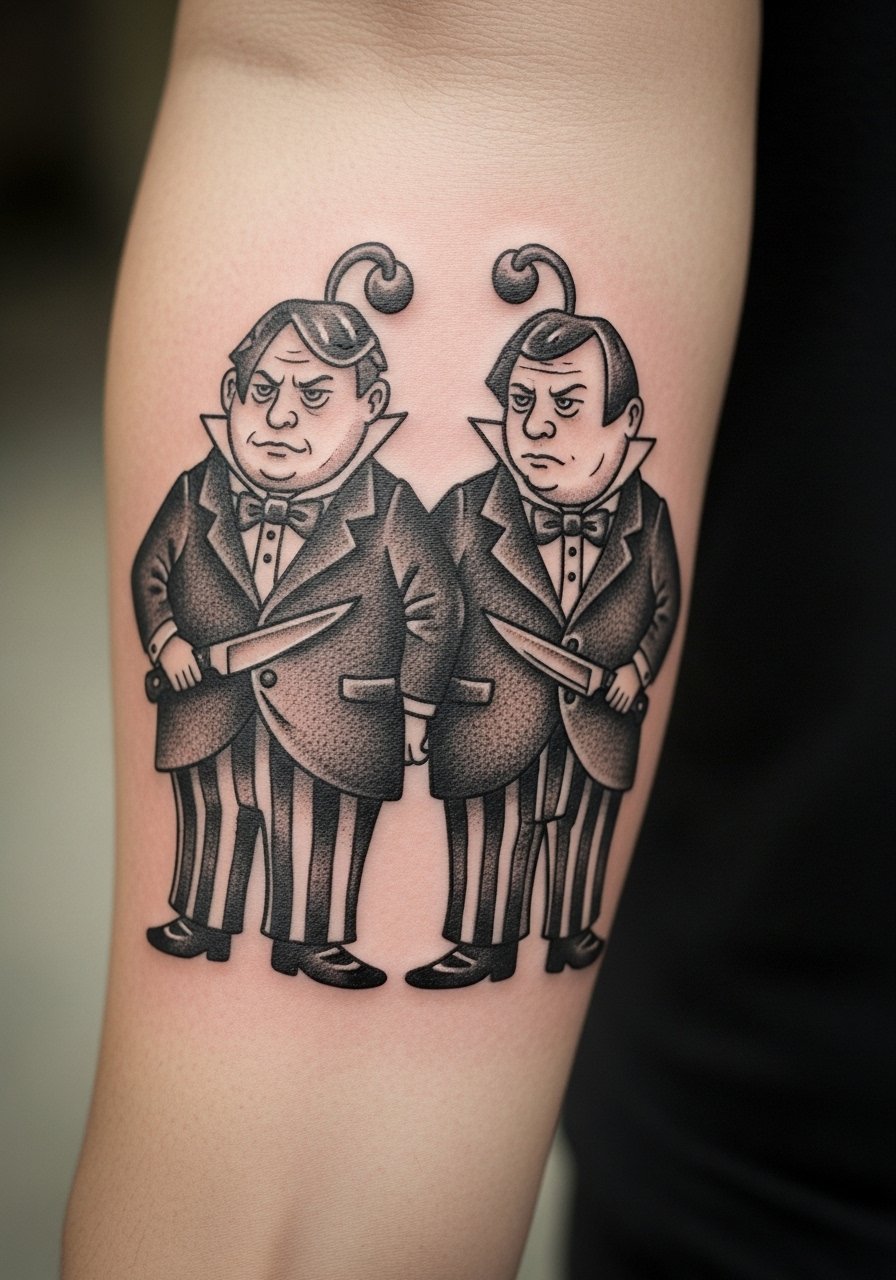
Forearm sleeves start strong when the first motifs have plenty of negative space. The twins read best as bold silhouettes with knife shapes emphasized as solid black accents. In a consult ask for simplified faces and heavy black fill on the knives so they contrast with the background. Expect two to three sessions for the initial section and moderate pain during longer fills. Common mistake is over-detailing the twins' clothing. For session wear a rolled sleeve muscle shirt you can push up without rubbing the area.
12. Gothic Door Knob Alice Keyhole, Finger or Behind-Ear Minimalist
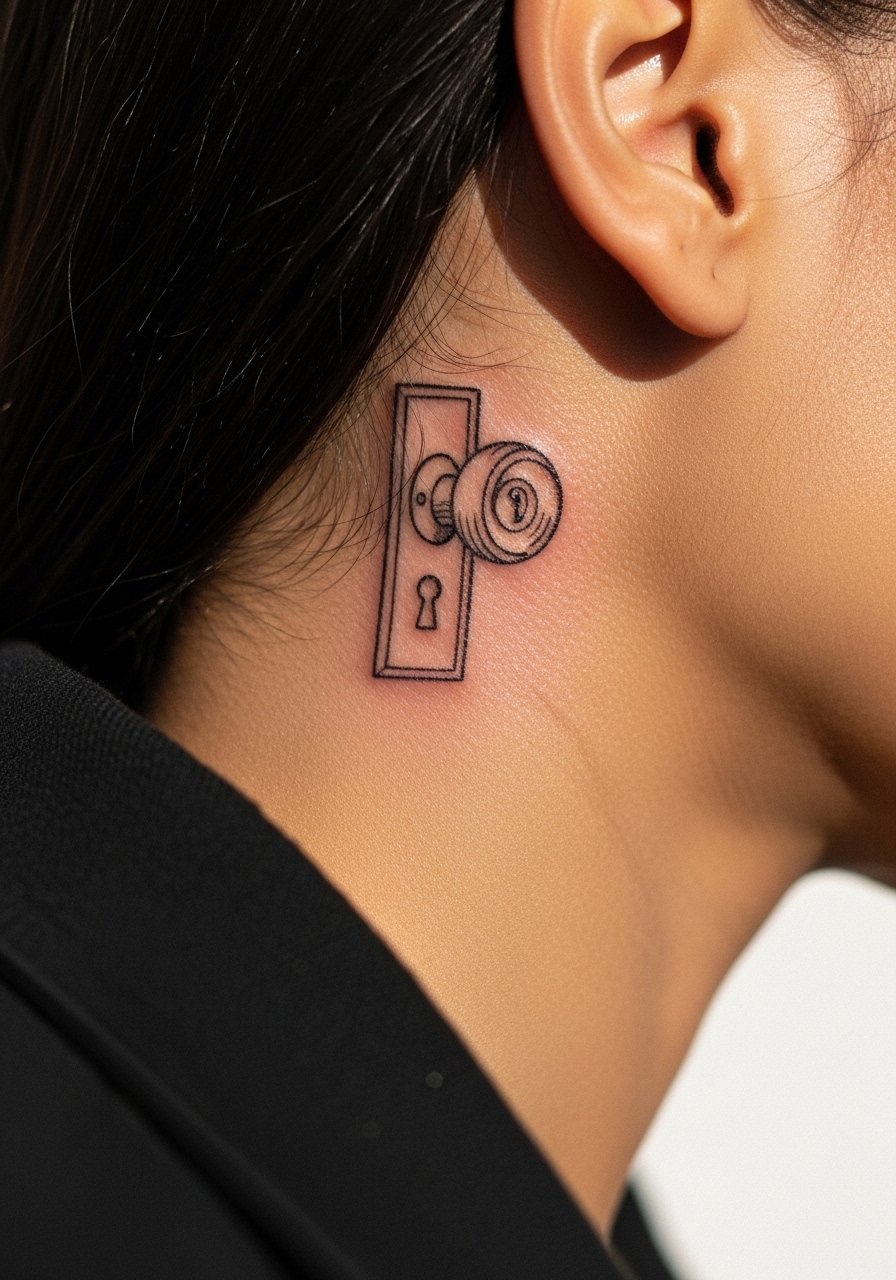
Fine line minimal keyholes split artists into two camps. One group argues that fine line on fingers and behind the ear fades quickly and needs constant touch-ups. The other group says with correct depth and spacing, the lines settle and last. Ask your artist where they stand and ask to see healed photos on the same placement. If you choose fine line, keep scale slightly larger than you imagine so the hole stays crisp after a year. For behind-the-ear sessions keep hair up and wear a thin chain pendant necklace that does not interfere.
13. Floating Cheshire Skull Micro on Ankle, Fine Line Minimal
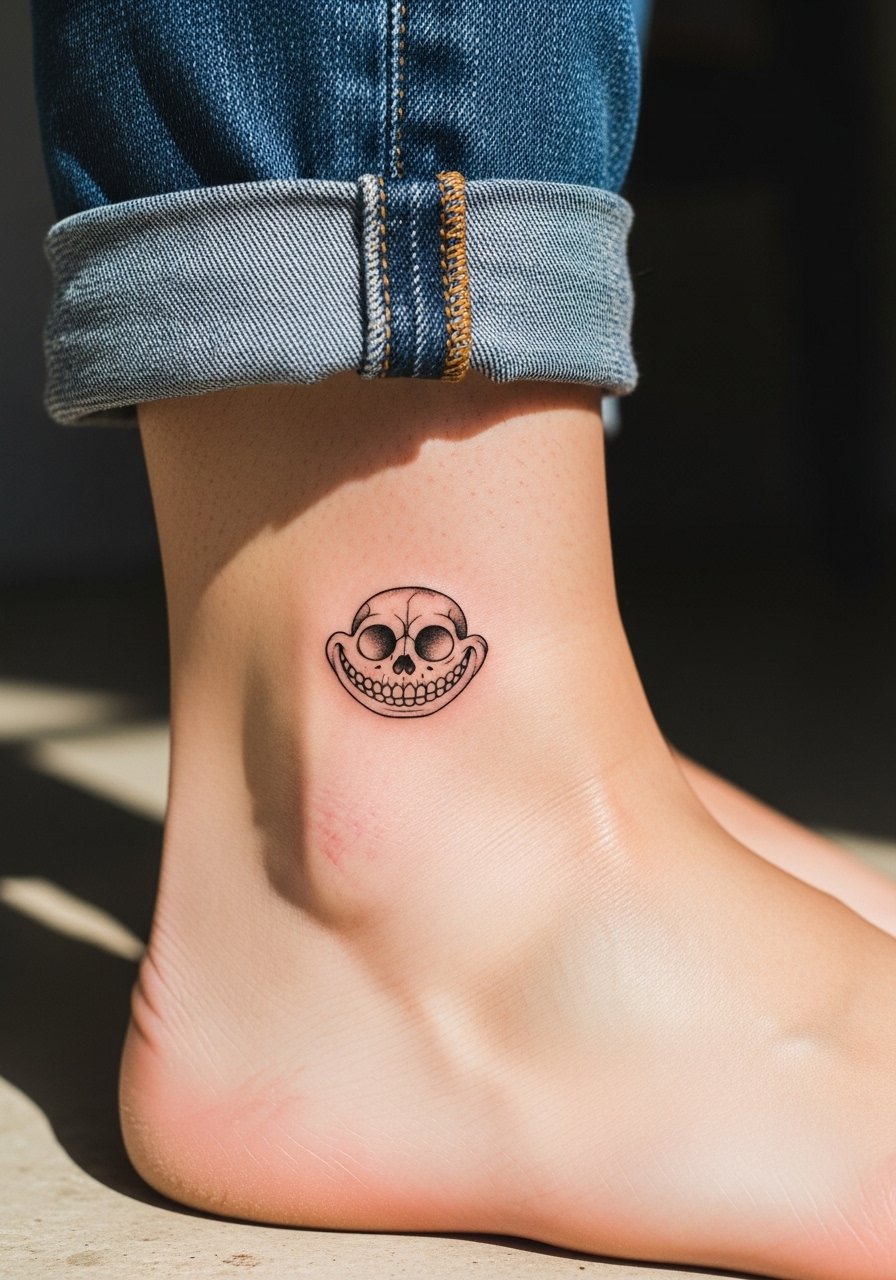
Ankle tattoos face constant friction from socks and shoes, so even micro designs need slightly bolder anchors. For a tiny skull ask your artist to thicken the outermost contour and rely on negative space inside. Sessions are brief and pain is low to moderate. The usual mistake is choosing the thinnest possible lines for detail. For showing it off roll your jeans and consider pairing with a simple rolled ankle jeans look that keeps the design visible.
14. Cyberpunk Glitch Alice, Outer Calf Pixelated Blackwork
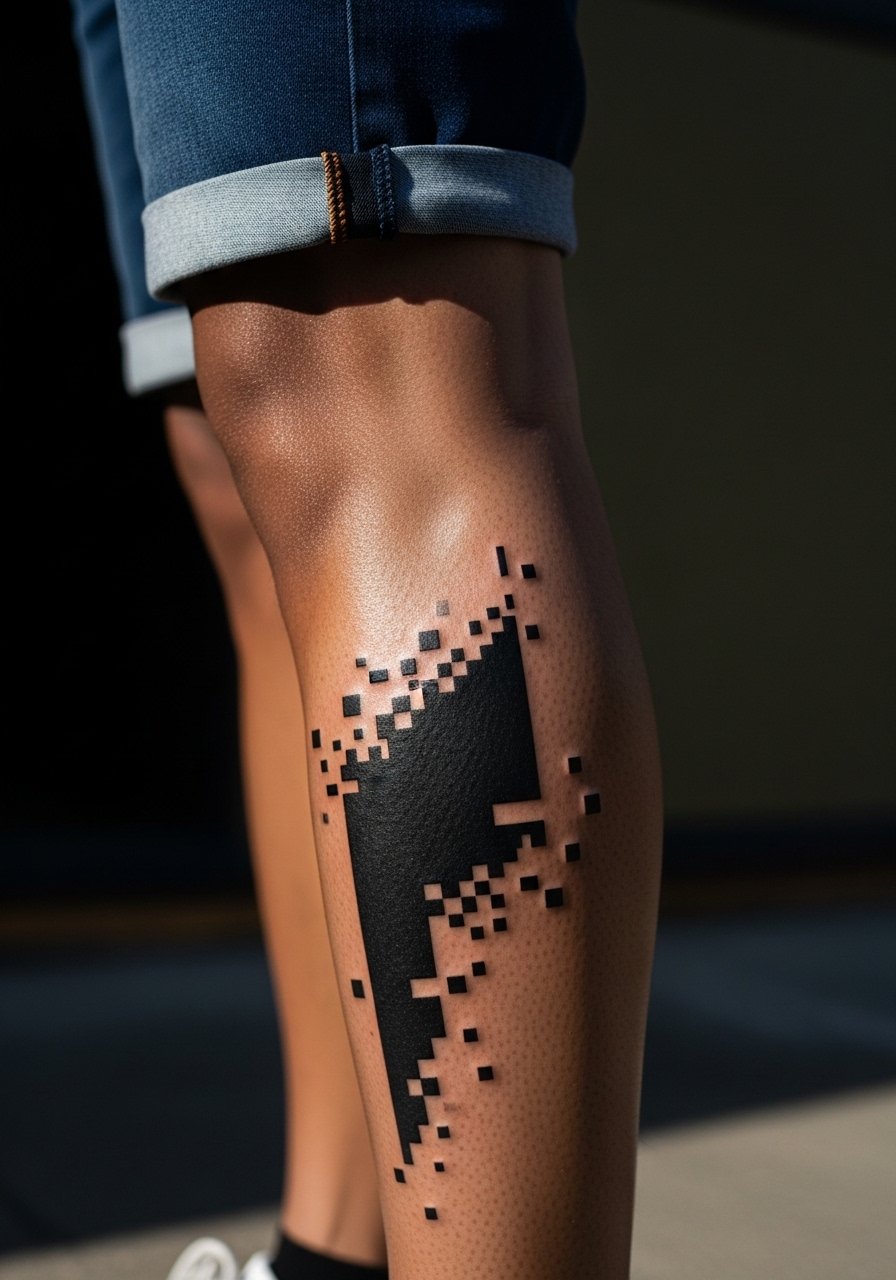
This cyberpunk pixelation is one of the under-covered ideas people ask about. Calves handle bold geometric blackwork well, so translate the glitch into blocks and empty space. Tell your artist you want chunky pixel blocks and avoid tiny dot gradients that will blur into each other. Expect two sessions and low to medium pain. A common mistake is making the pixels too small. Pair the finished work with rolled pants and bootcut black jeans for shows and nights out.
15. Zombie Mad Hatter, Back Horror Neo-Realism
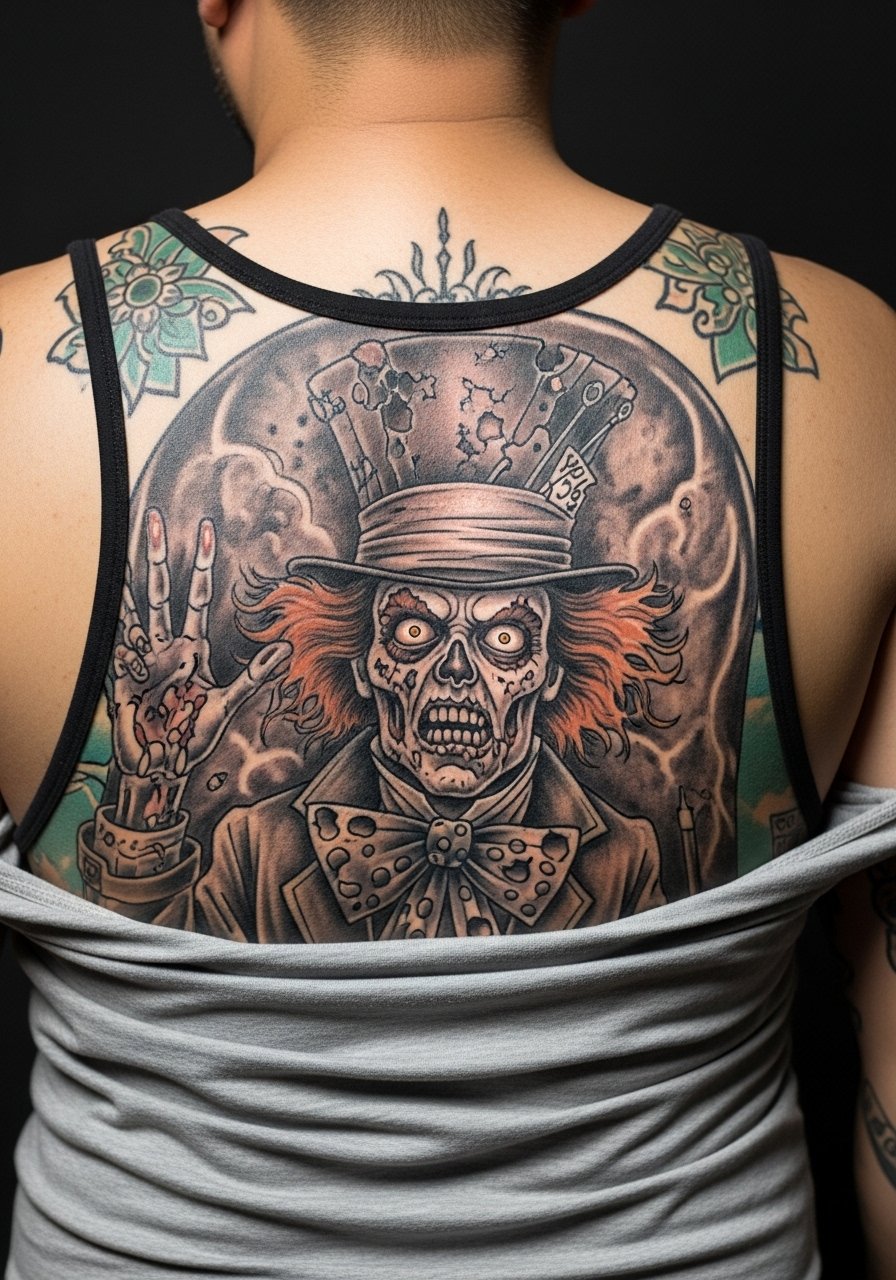
Horror reinterpretations let you push gore and texture because the back heals with less abrasion. Ask for clearly separated shadow areas and avoid too many micro-details in the faceplate. This design benefits from layered shading and one heavier outline around focal areas. Sessions are long and expect moderate to high pain during extended fills. The usual mistake is tiny teeth and excessive stipple that merges over time. For the session wear a loose tank top you can remove or shift easily.
16. Knuckle Wonderland, Short Aggressive Knuckle Set
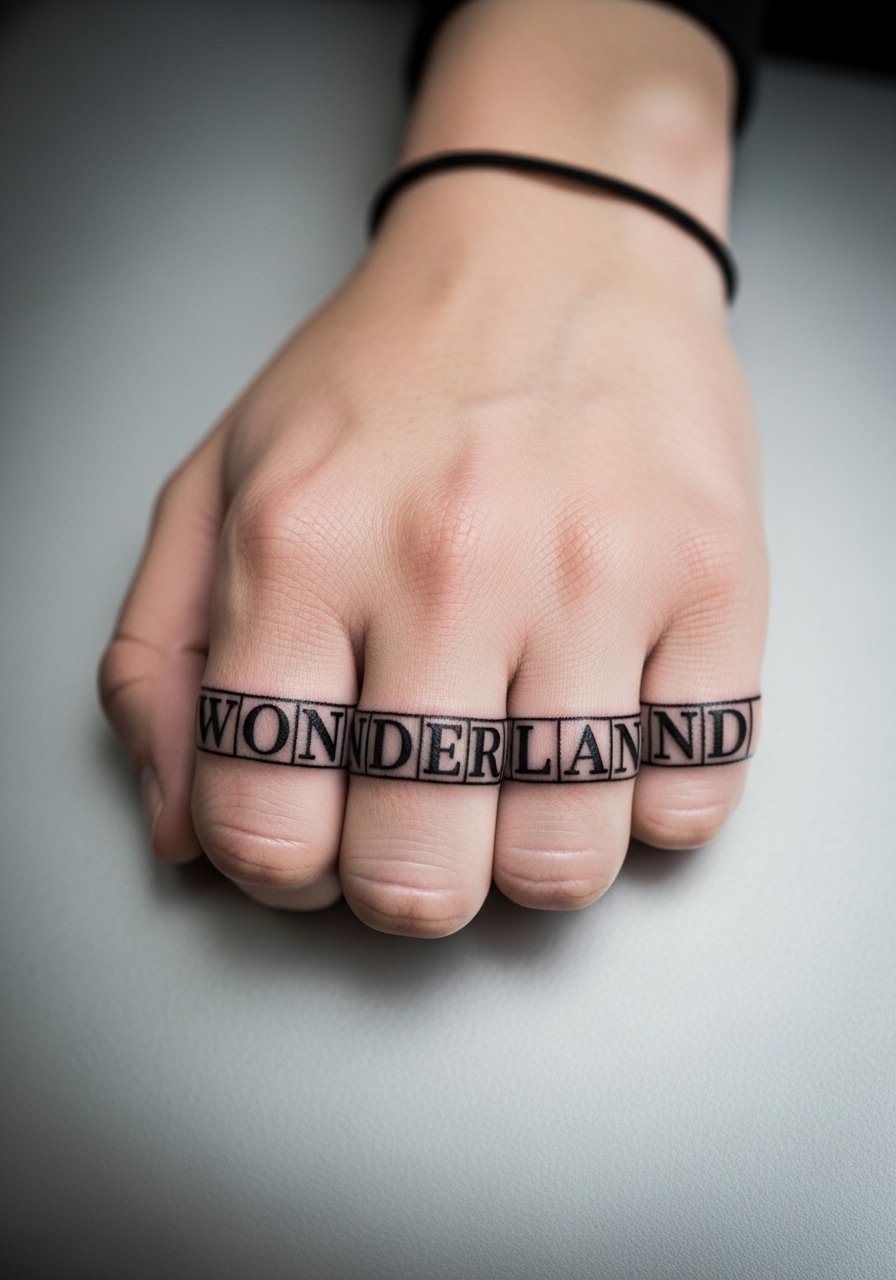
Knuckle tattoos are aggressive and highly visible, and they age differently because the skin there is thin and often used. Keep the word short and the letterforms broad. Tell your artist you want deeper saturation and to avoid ultra-fine serif details. Sessions are quick but healing is fussy because of hand washing. A common mistake is picking tiny script letterforms that fall apart. Understand that some workplaces still react to hand ink. For session access no special clothing is needed, but plan for slowed healing because of regular use.
17. Queen of Hearts as Coverup Sleeve, Upper Arm to Elbow Traditional
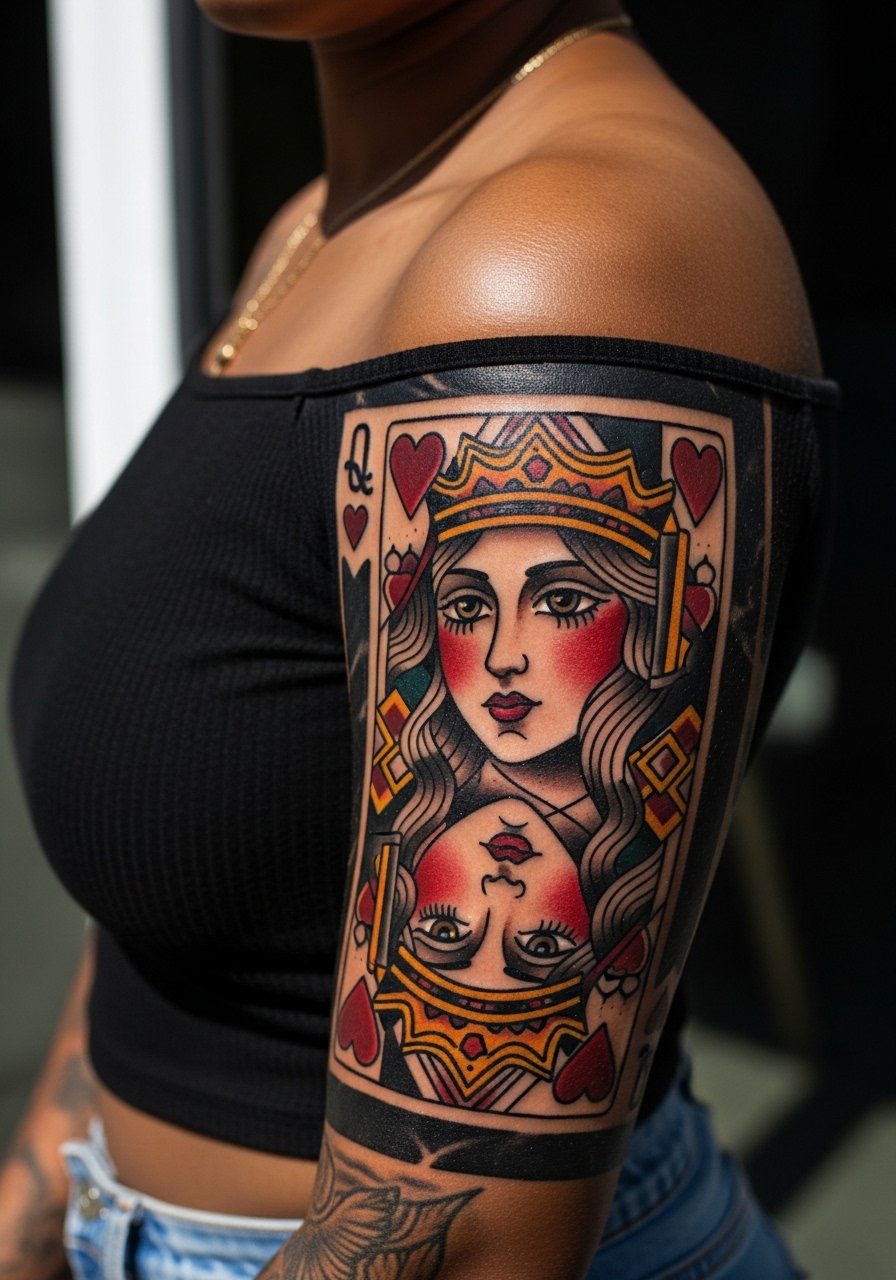
Coverups need solid contrast and clear shapes. If you are covering an old whimsical piece, swapping to heavy black outlines and denser color blocks in the Queen motif helps mask older lines. Tell the artist where the old ink sits and ask for testing stencils over the faded areas. Expect two to three sessions and stronger pain during denser cover fills. Common mistake is trying to cover light ink with pale shading. For showing this off pick layered chain necklaces or an off shoulder black top so the upper arm artwork reads.
18. Pocket Watch Rabbit on Calf, Realistic Blackwork
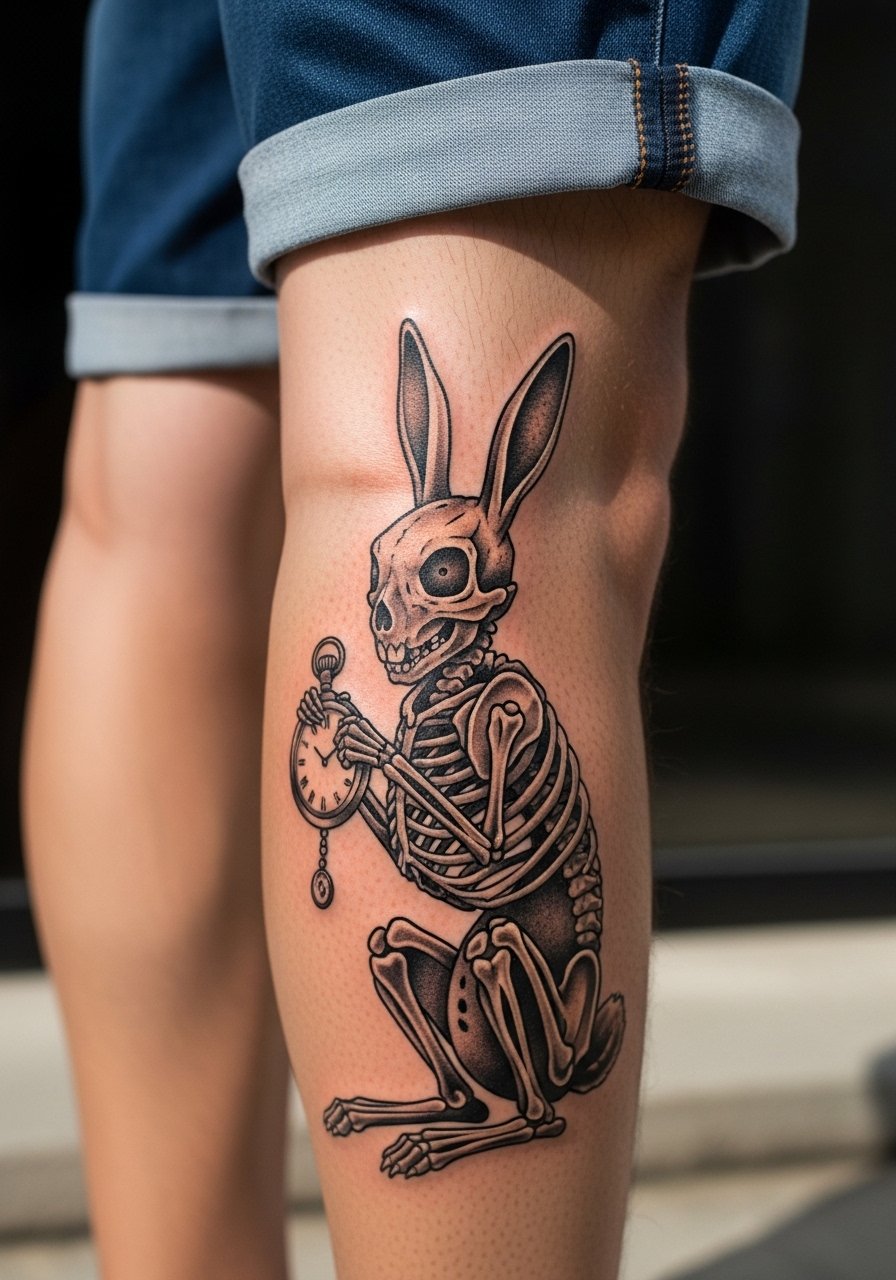
A calf pocket watch holds up well because it is away from harsh daily abrasion. For realism keep clock numbers bold and the rabbit silhouette slightly simplified so forms remain distinct after healing. Ask for limited micro-detail inside the watch face. Expect a couple of sessions and low to moderate pain. A common issue is trying to over-render tiny gears. For outings pair the piece with combat boots platform or rolled trousers to show the scene.
19. Distorted Alice Mushroom with Spikes, Collarbone Two-Tone Variant
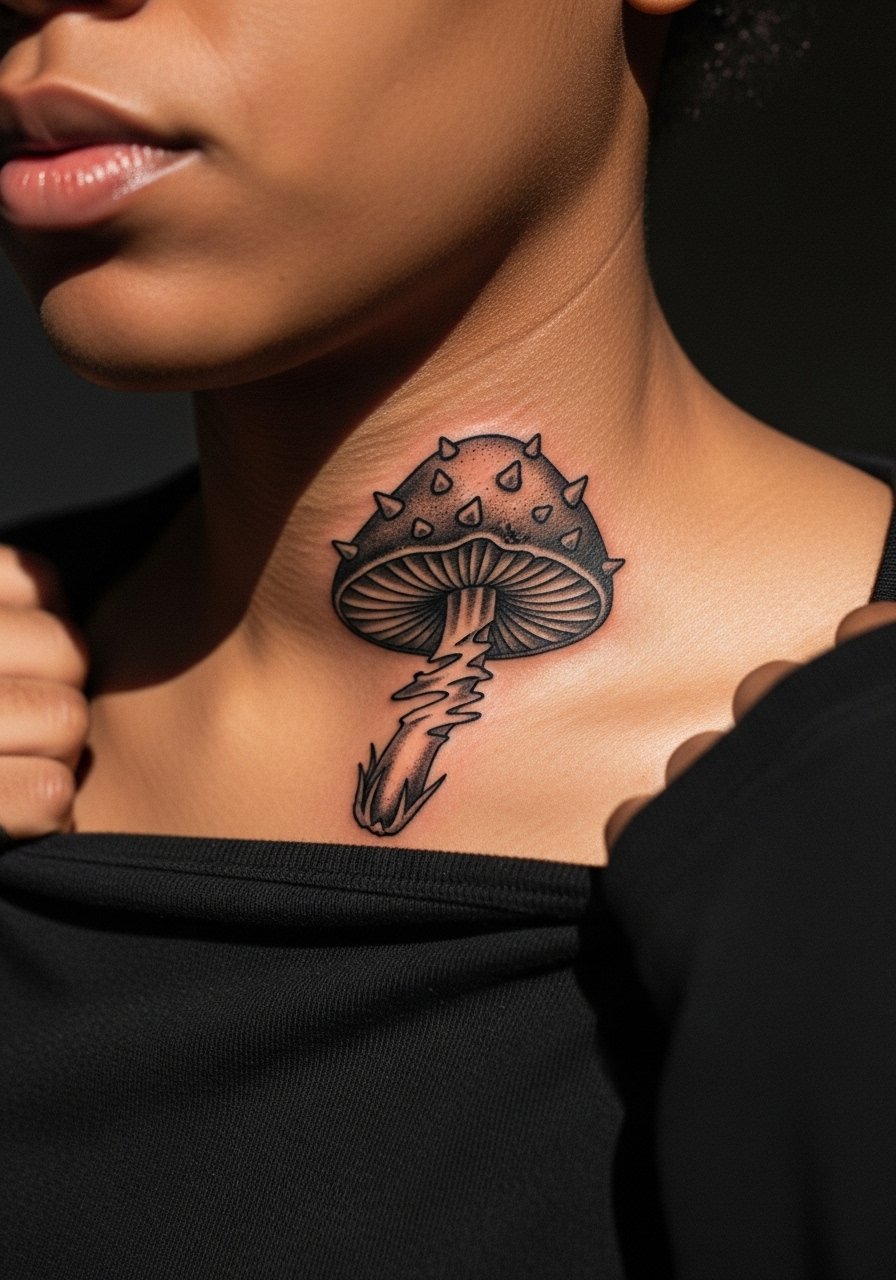
This alternate collarbone mushroom leans into texture rather than color. Use halftone shading and a thicker cap outline so the spike elements keep shape after the first sun exposure. Tell the artist you want texture via stipple and halftone rather than fine hairline shading. Sessions are short and the pain is sharp but brief. Avoid tiny filament details that disappear. Pair it with a wide neck shirt to reveal the piece tastefully.
20. Punk Alice with Spiked Tea Knives, Full Back Panel
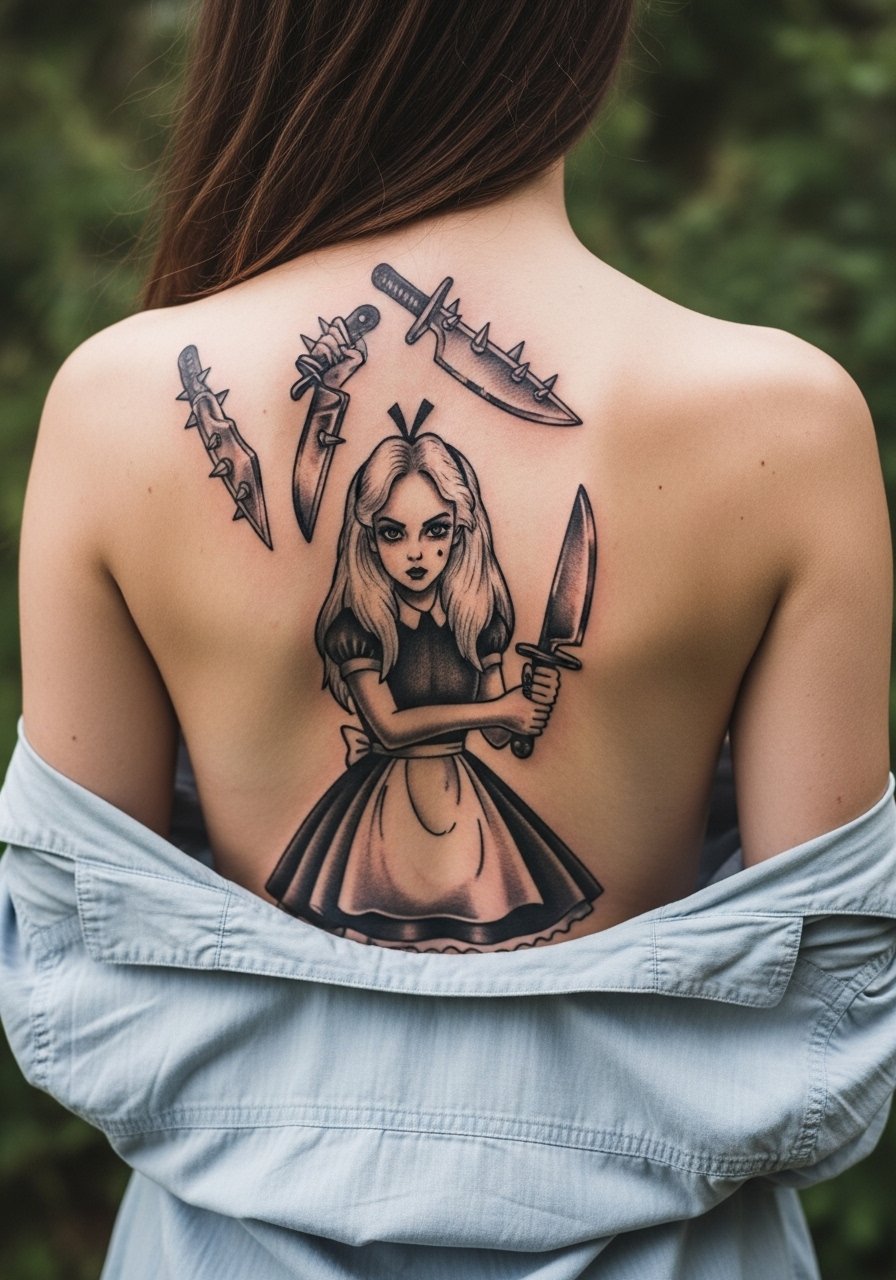
Full-back panels allow storytelling and multiple focal points without crowding. For a punk Alice scene prioritize silhouette contrast and avoid tiny repeated props in the background. Ask your artist to map composition in a preliminary session. Expect multiple long sessions and significant pain in some areas. The common error is cramming text or small props around the main figure. For session prep bring a loose button-up so you can stay comfortable between long sits.
21. Micro Keyhole Behind Collarbone, Hidden Anxiety Symbol
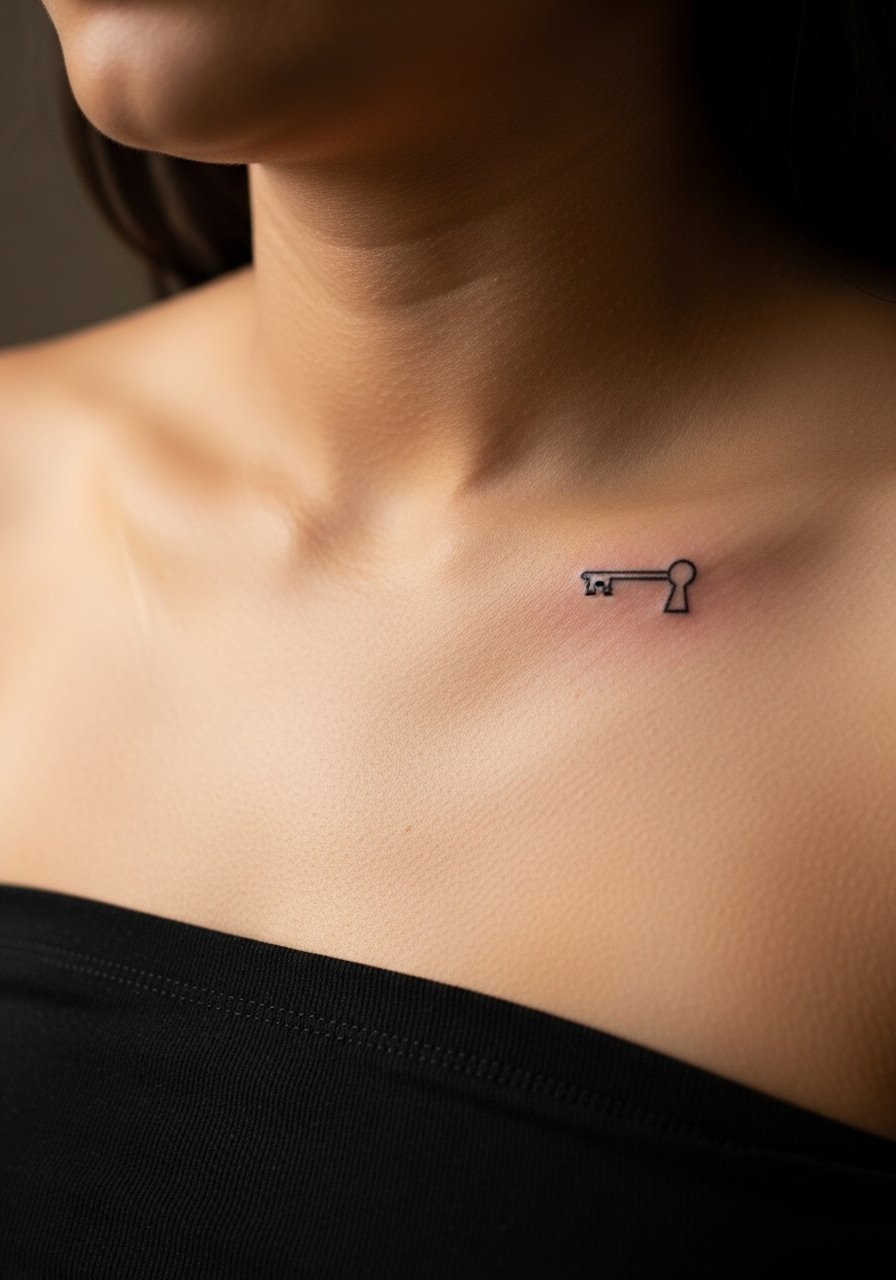
Tiny keyhole placements above the collarbone are discreet and personal. Because the skin is thin, ask for slightly thicker terminal strokes so the keyhole keeps its definition. Sessions are very brief and the sting is quick. A typical mistake is insisting on hairline script inside the keyhole. For showing this off consider a strapless tube top that frames the area without covering it. Touch-ups are common at two years for micro fine line work.
22. Punk Card Soldiers as Calf Sleeve, Repeated Motif
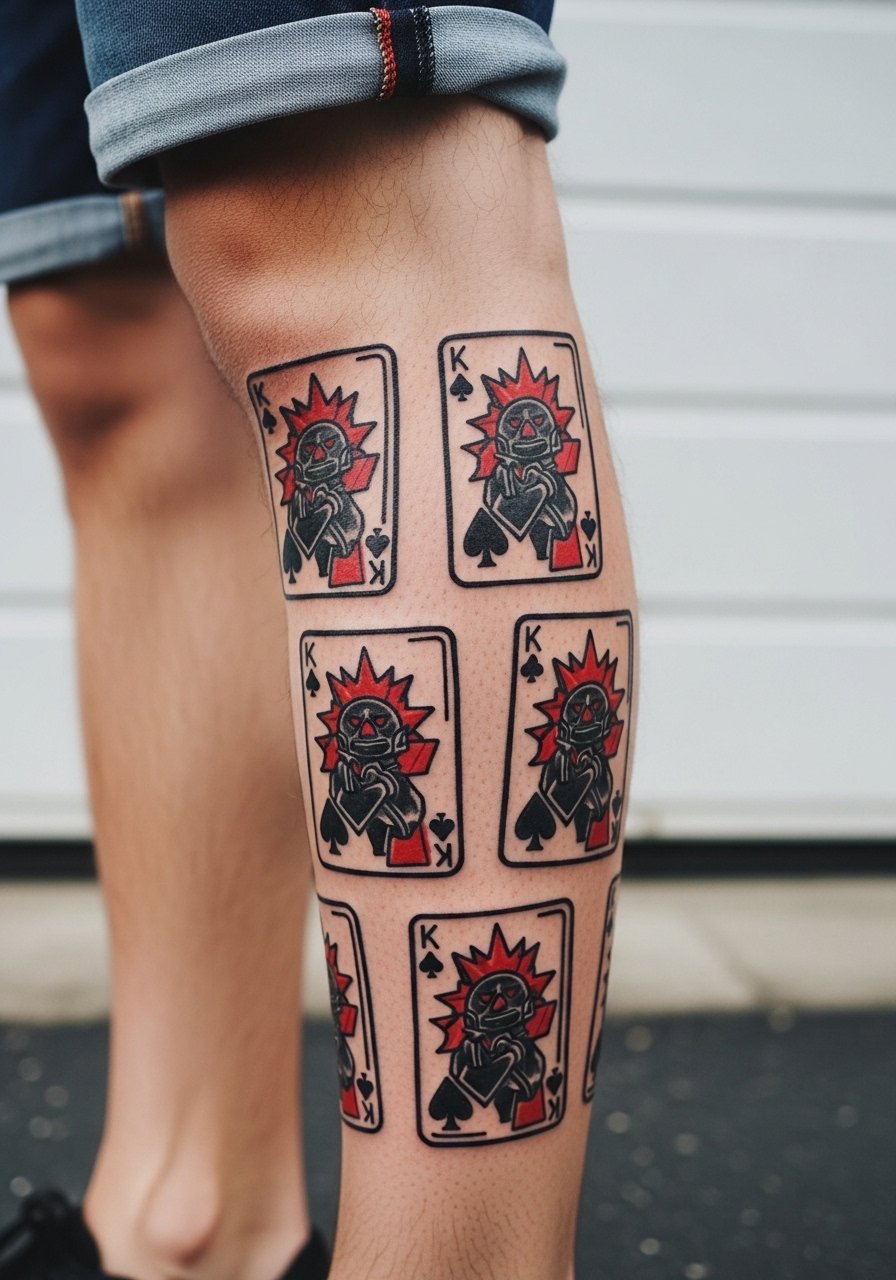
When repeating motifs for a sleeve give each soldier a slightly different silhouette so the eye reads motion rather than pattern. Calf sleeves tolerate color and dense black, but keep spacing between repeated elements to avoid merge over time. Ask your artist to stagger the soldiers vertically. Expect multiple sessions and manageable pain. People often try to compress too many figures into a small area. For showing it off wear rolled ankle jeans that keep the vertical narrative visible.
23. Healed Blackwork Alice After Pregnancy, Post-Weight-Change Placement
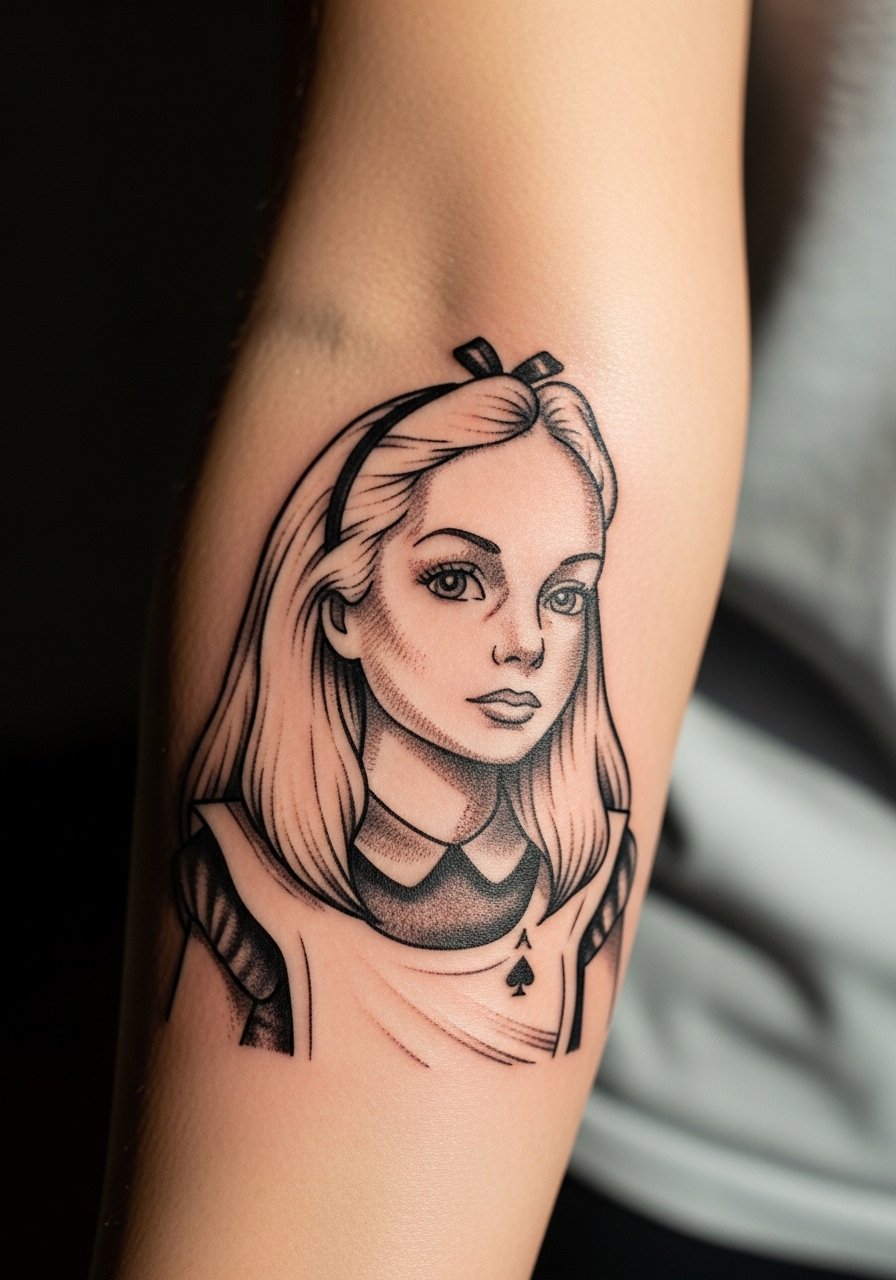
If you anticipate weight fluctuation, choose placements and scale that tolerate stretch. I have noticed that bold blackwork on forearms and calves tends to hold shape better than delicate chest or thigh detail after major body changes. For this Alice portrait request thicker outlines and simplified facial zones. Sessions are usually one or two and pain is low. Avoid tiny hairs and subtle shading across stretch-prone zones. If you are planning life changes mention them during the consult so the artist can adapt the composition.
24. Tiny Key on Finger, Minimalist Script Key
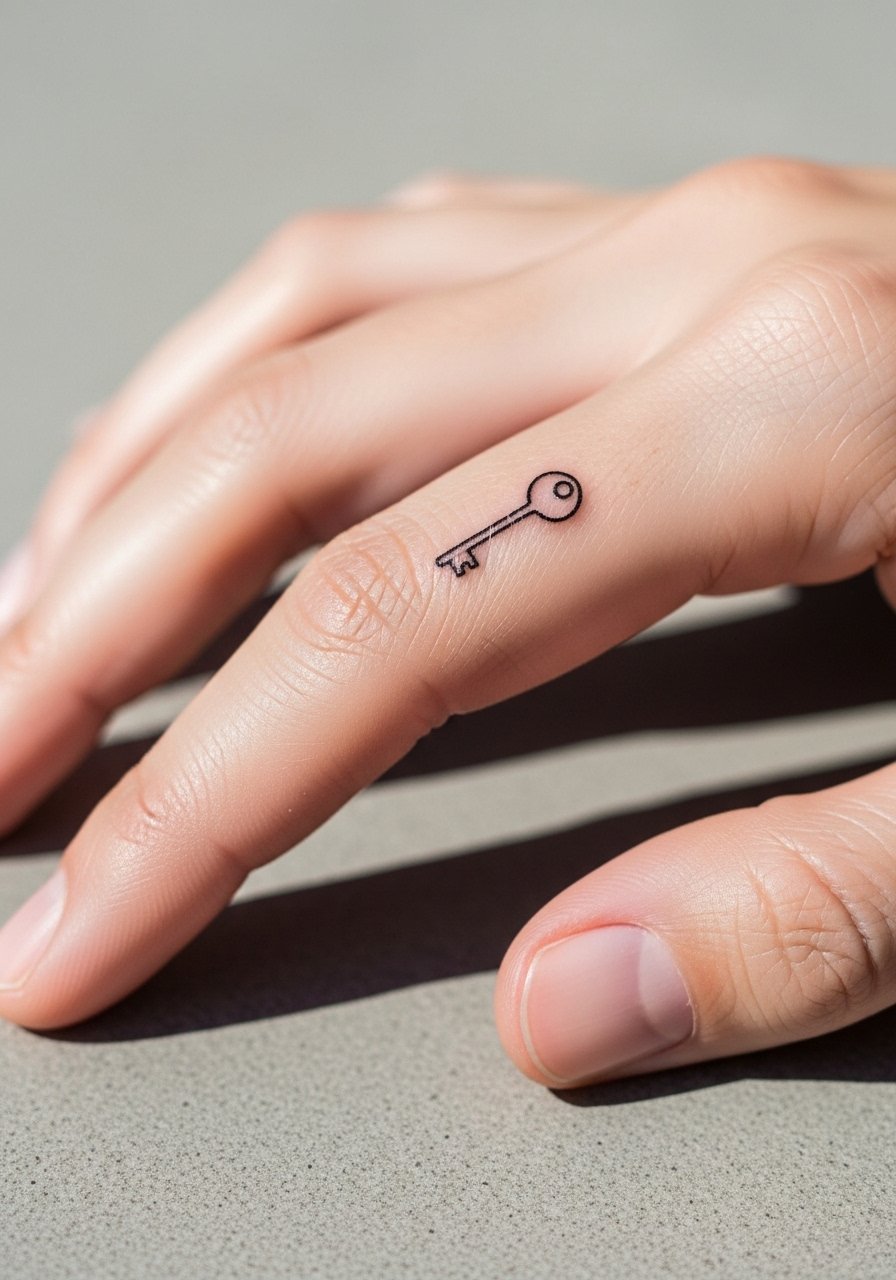
Finger skin is thin and the area is high-wear, so micro key tattoos require more maintenance. Ask the artist for slightly bolder stem lines and to avoid tiny cross-bars in the bow of the key. Sessions are short but plan for annual or biennial touch-ups. A frequent mistake is asking for hairline flourishes that vanish within months. For wearing, thin rings on the opposite hand complement without rubbing the fresh ink.
25. Rabbit Hole Vortex as Cyber Spiral, Sternum Hidden Centerpiece
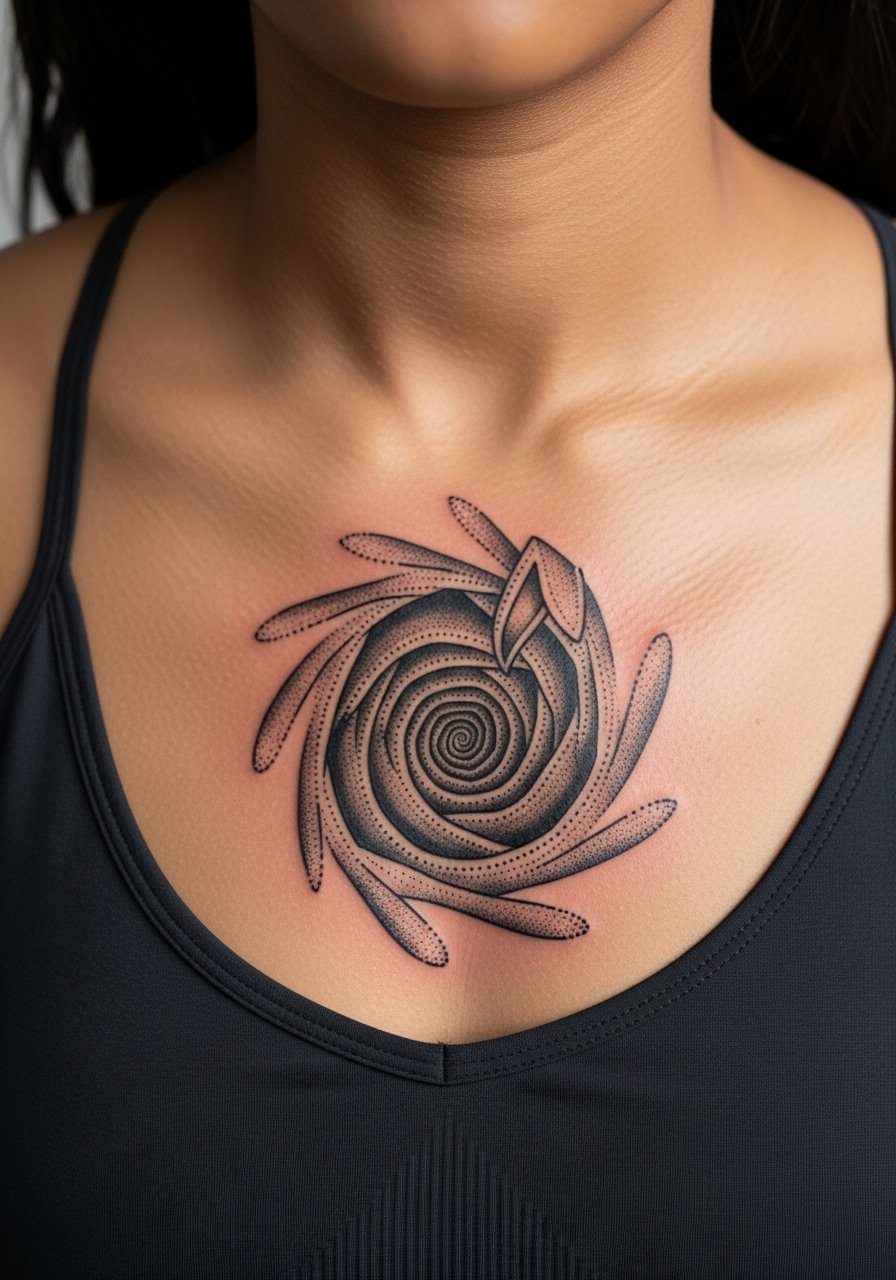
Sternum pieces look dramatic and stay largely private. Because the area can be tender choose a layout with clear negative space and avoid dense micro dotting in the center. Talk to the artist about session length and whether they prefer two shorter sittings. Pain is high for many people, but healing is fine when you follow rest guidelines. The common mistake is over-detailing the central area which becomes muddled. For sessions wear a fitted sports bra you can easily adjust.
26. Tweedle Twins as Coverup for Dated Ink, Forearm Transformation
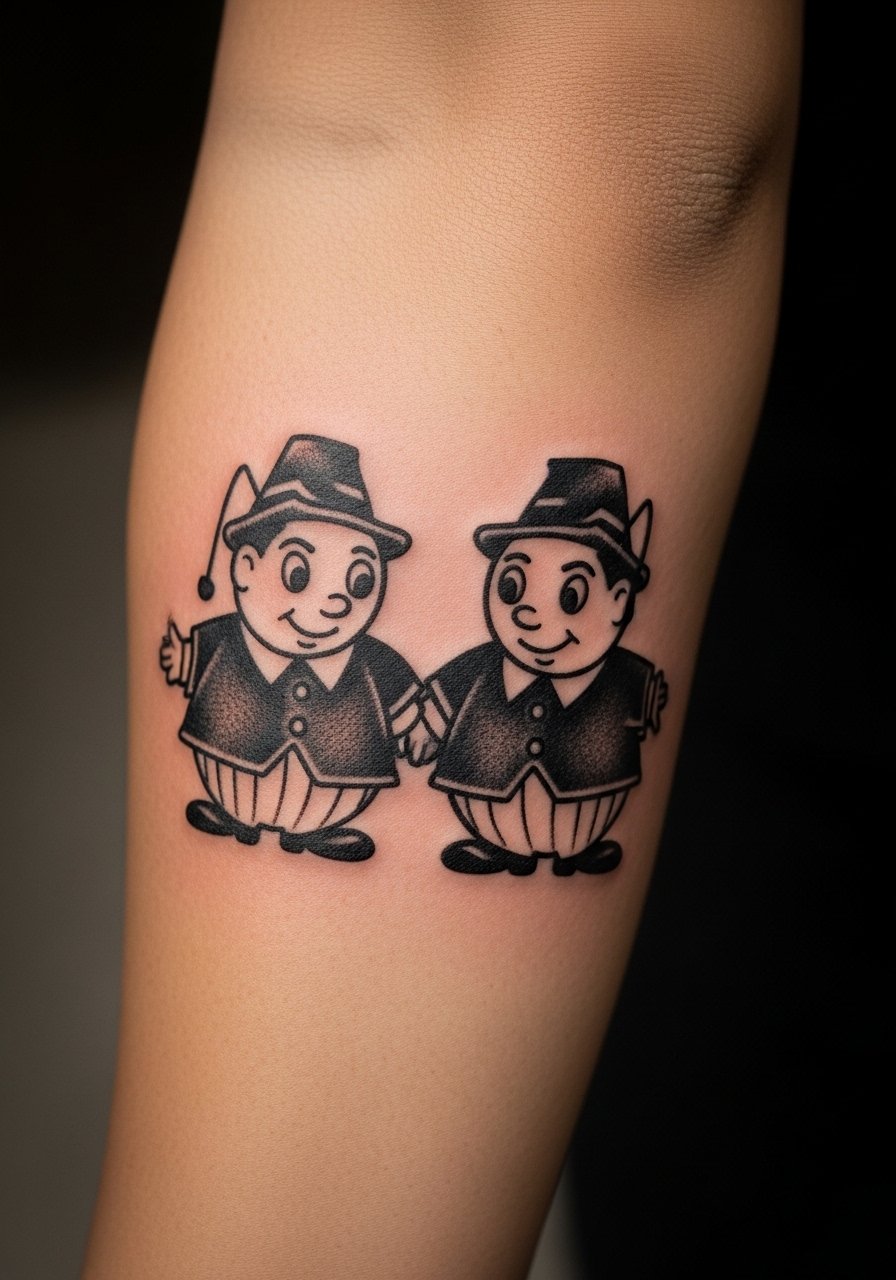
Coverups work best when the new design has heavy contrast and clear shapes. For the twins, black knives and bold silhouettes mask old faded lines effectively. Show your artist images of the old ink and ask how much of it can be safely covered per session. Expect two sessions and variable pain depending on prior scarring. Avoid requesting pale shading to hide dark lines because it rarely conceals. For the session wear a loose tank top so the arm is easy to access.
27. Micro Wonderland on the Neck, Fine Line Script
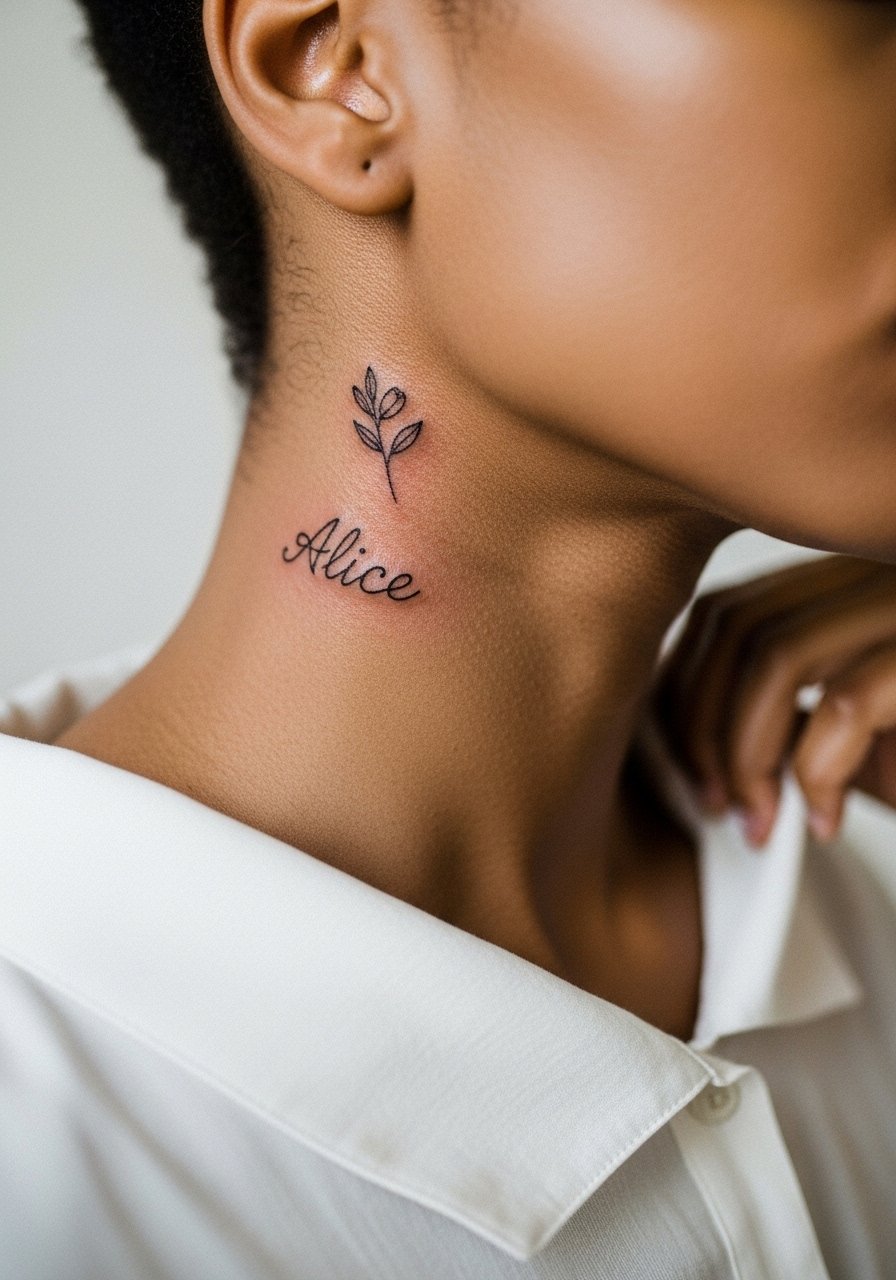
Neck placements are high-visibility and can affect professional perception in some fields. If you want a micro Alice phrase or symbol on the side neck ask for clean spacing and to keep the characters slightly larger than you imagine. Sessions are quick but the area is sensitive. A mistake is choosing ultra-tiny script that blurs into a line. For the session pin hair up and wear a wide neck shirt so the artist can access the area cleanly.
Frequently Asked Questions
Q: How long will a blackwork Cheshire Cat on my forearm typically hold up?
A: From what I have seen, bold blackwork on the forearm holds its composure longer than fine line work. Expect clear lines at two years if saturation and negative space are set up correctly. Touch-ups are common around years three to five for dense black areas that see constant sun and rubbing.
Q: Fine line keyholes on fingers versus behind the ear, which fades faster?
A: Fingers usually fade faster because of soap, water, and friction. Behind-the-ear pieces avoid daily abrasion but are tricky for small detail. Artists split into two camps on this one. One camp says fingers are a no for fine line. The other camp says correct depth and slightly larger scale settle fine behind the ear. Ask to see healed photos from the artist for the specific placement before you commit.
Q: How much does a neo-traditional punk Alice thigh piece cost?
A: Prices vary by region and artist, but a typical neo-traditional thigh piece of medium scale often falls in a range of $300-$900. That range depends on session length and color complexity. Get quotes from a few shops and ask about session day rates for smaller touches.
Q: Saniderm versus dry healing for these Wonderland pieces, what do artists recommend?
A: There are two clear camps. One group prefers protective film like Saniderm because it reduces scabbing and keeps clothing from sticking. The other group favors breathable, dry healing for small pieces to avoid trapped moisture. It often depends on the artist's workflow and the placement. Discuss the pros and cons before the session so you follow the method your artist is comfortable with.
Q: I have darker skin. Which Alice designs age better visually?
A: Strong blackwork and simplified silhouettes tend to read best on darker skin tones. High contrast and less reliance on subtle color gradients prevent colors from appearing muddy. Ask potential artists to show healed work on similar skin tones and to plan larger, cleaner shapes rather than micro-detail heavy designs.
